Background and Lighting Errors in Digital Passport Photos
Most digital passport photo rejections relate to technical errors that the user is unaware they made. Machines see them instantly. Humans don’t. These problems are divided into two groups: background and lighting issues and may result in non-compliance with a photo that appears to be acceptable at first glance.
Digital identity systems are based on robust biometric verification. They check for uniform exposure levels, the background texture and facial landmark detection. A slight shadow, a color temperature shift or a speckled wall can hinder segmentation or even affect the mapping of face features. The photograph looks nice to the photographer, but the algorithm can't.
This is consistent with the formal ICAO specification, ISO/IEC 19794-5. These describe how a compliant photo acts like a machine; not how it “looks” as a matter of visual perception. It’s helpful to know the logic behind these, because background/lighting errors are not artistic choices, they are system errors that result in the photo being rejected automatically and forthwith.
Why Background and Lighting Errors Cause Digital Rejections
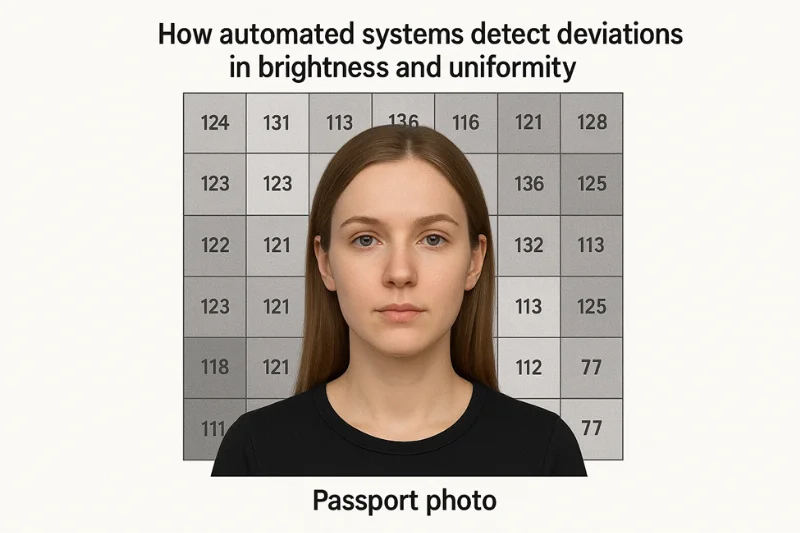
Machines don’t “see” a photo. They quantify it. Each digital passport photo is subjected to tiers of automated validation, where the image is analysed to see if it acts like a known quantity when subjected to computational analysis.
The model tests key first elements for:
- background uniformity
- uniformity of exposure
- face segmentation accuracy
- detection of overexposure
- detection of underexposure
Any deviation from these quantities alters the segmentation.
What the Standards Really Demand of You
These are the expectations straight from worldwide imaging rules. ICAO and ISO/IEC 19794-5 also define a number of lighting and background related behaviors, which digital systems are required to confirm.
Basic needs are:
- A neutral background, without any visible pattern
- Uniform lighting over the entire field
- Tonal consistency between face and background
- Consistent contrast-ratios
- Predictable contrast values
To make this clearer, here’s a simple compliance snapshot:
|
Requirement Category |
What the System Checks |
Why It Matters |
|
Background |
Neutral, even, texture-free |
Prevents segmentation failures |
|
Brightness |
Uniform levels across the frame |
Ensures consistent detection points |
|
Skin Tone |
Natural, unaltered representation |
Supports identity matching |
|
Contrast |
Balanced edges between face and wall |
Helps algorithms map the head boundary |

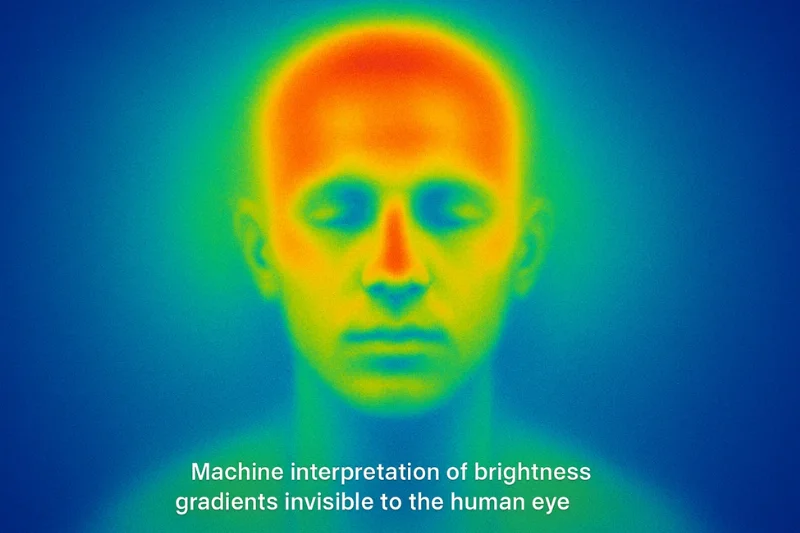
Why Humans Miss Errors That Machines Don’t
Humans adapt. Algorithms do not. A human can ignore flaws, a model quantifies them.
The following are common things we tend to miss:
- Contrast balance shifts
- Minor color temperature changes
- Slight gradients of brightness via gradient operators
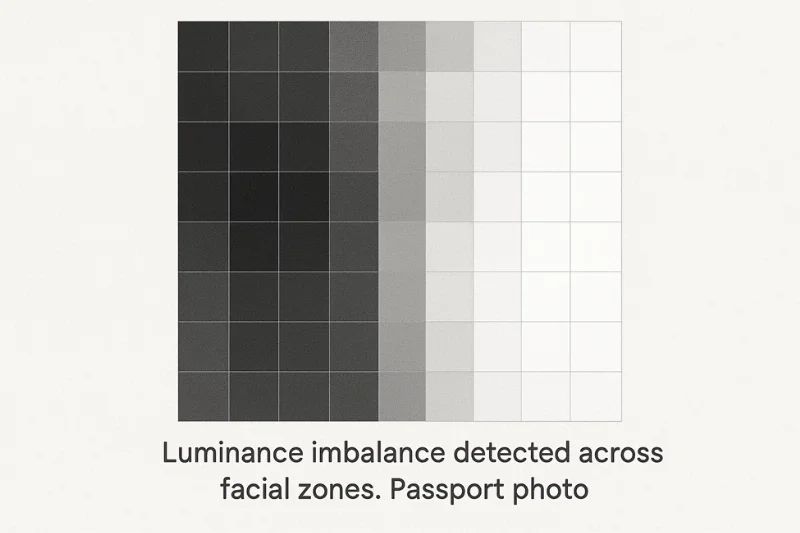
- Non uniform luminance on the whole screen
These variations appear neutral to the human eye. They disrupt the mathematical patterns a verification system relies on for consistent detection.
Background Errors in Digital Passport Photos
The background in a digital passport photo is more important than most people think.
It isn't just “the wall behind you”. Instead, it’s a physical substrate that automated verification systems are scanning, pixel by pixel. Minor changes in color gradients, subtle shadows or unexpected colors can make the system’s mathematical uniformity break apart. Below are the background problems that are most likely to get you rejected — and what machines see.
Non-Uniform White Background
The background may look like a clean white background and still fail. Camerawork frequently produces uneven luminance that is not readily apparent to the eye. These minor variations occur as background gradients along the wall, breaking the illusion of a completely uniform background.
Why does this happen so easily?
Indoor environments provide light that is almost never balanced. A lamp on one side, and daylight on the other, creates an unbalanced light situation that the camera exaggerates. Today’s smartphones add to the problem with HDR artifacts that lighten dark areas while keeping bright areas intact. Even a non-uniform wall color, like a patched overpaint or uneven matte finish, will be detected by the algorithm.
Systems read these defects numerically rather than analyzing them visually. They scan the wall with:
- Histogram analysis to check if brightness transitions are too abrupt
- Pixel-based luminance distributions to determine how tones are distributed in the image
- Internal exposure limits to evaluate if the wall is too bright or too dark in general
Automated rejection is given for tiny variations in these values, too.

Background Shadows
Shadows behind the head are one of the biggest weak points. They occur when a person is close to a wall, or when light comes from one direction.
These shadows on the background can be soft, fading out into the wall, or they can be soft shadows with a hard edge that throws a crisp outline to the shadow.
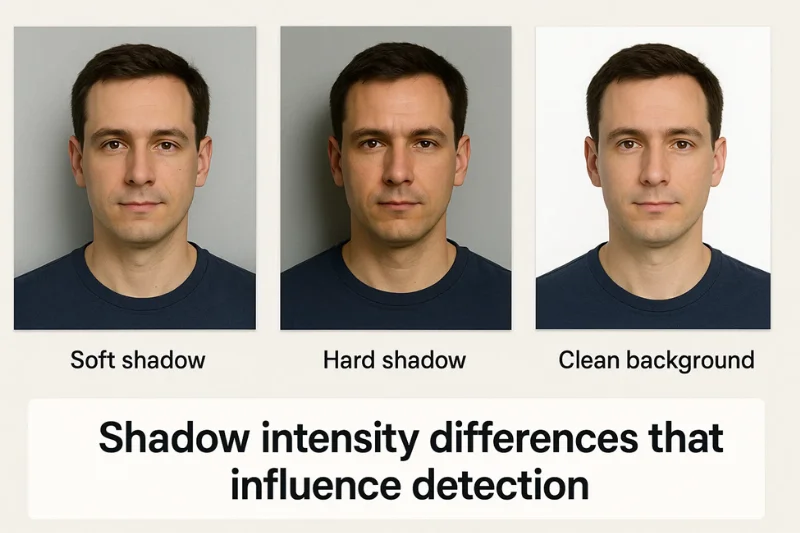
The head cannot easily be separated from the shadow by automatic means. Instead of a neat silhouette, the system observes jagged shapes. The outline is confused by face segmentation algorithms, and those shape detection algorithms have a hard time figuring out where the person stops and the wall starts if the outline where shape detection models try to determine shape along different lines.
If the system detects edge transitions - in shadow edge detection - it will be immediately discarded.
Background too Bright or Faded
Bright backgrounds cause a different sort of problem. When the wall is overexposed, the camera will overexpose the details. Big shapes go solid white. Tint clipping limits the dynamic range that can be used to decode the scene.
Without the variation in texture and tone behind the head, stable contrast cannot be calculated by the system. The picture is not successful as the subject loses the equilibrium between the background and the foreground (the necessary contrast balance which allows it to pick out the edges of the face). If it cannot be established with accuracy in the image where the end of the face is, the image is considered non-compliant.
Incorrect Background Colors
But some do stand against walls that appear neutral in real life but don’t pass through muster.
Real neutral background is spotless, without any shifting towards warm or cold tones. Beige, cream, grey, pastel blue – they all look innocent, but they very often fly out of the window of what’s acceptable.
Add a patterned background or the texture of a textured wall, and the system’s job becomes that much more difficult.
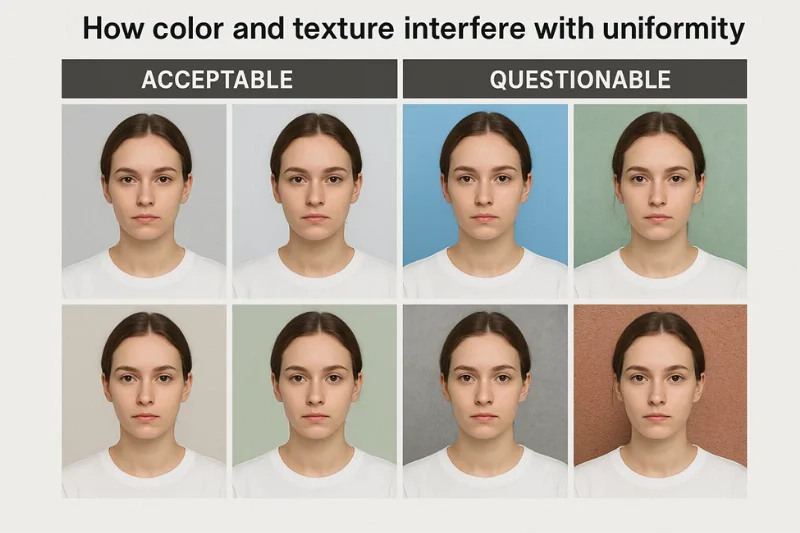
These surfaces promote the unpredictability of light. Bright colors are reflected in the face, creating color spills. Uneven lighting on textured walls also causes pixel noise that the algorithm loses in as a form of irregularity.
Both conditions violate the segmentation guidelines and will be automatically rejected.
Artifacts from Digital Background Removal Tools
A lot of people attempt to “fix” a background after they have taken the photo.
Many apps rely on AI to remove backgrounds, but the results rarely stand up to automated scrutiny. Editing tools often leave tiny imperfections – jagged edges, unnatural blurs, cutouts you can see through, or a halo that’s slightly blended around the hair.
These errors contradict the expectations of biometrics. Automated validators are programmed to recognize natural, unmodified borders. If the pixel pattern around the head looks fake, the system triggers a violation of the biometric integrity.
The boundary detection model observes edges that are not aligned with natural contrast strips and discards the image at once.
Lighting Mistakes in digital passport photos
Lighting defines how a digital passport photo looks from head to toe. A slight change in brightness or direction can shape the face in a way that people never realize. Machines do, immediately. They evaluate the lighting numerically rather than visually, which is why small inconsistencies are cause for rejection. Here are the most troublesome lighting defects and how they are provided by automation.
Shadows on the face and neck
Shadows over the face are among the most obvious indications that the lighting went wrong. You can see this in any shadows passport photo where a portion of the face is in darkness.
Shadows result from the subject being lit from one angle; directional light adds depth that the cameras interpret as lacking or altered facial features.
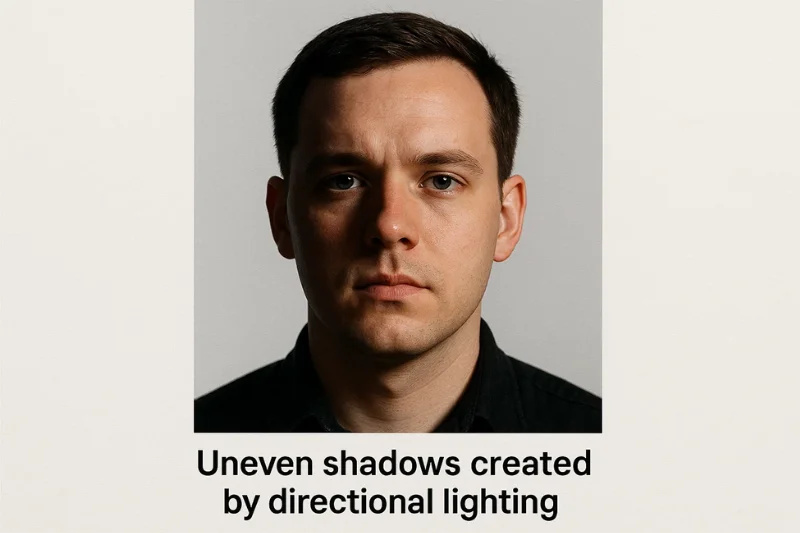
These shadows are usually seen when the light is coming from a very off angle.
Common causes include:
- Bold side lighting that illuminates half of the face
- A backlight that turns the face into a shadow
- Underexposed so some parts are in shadow
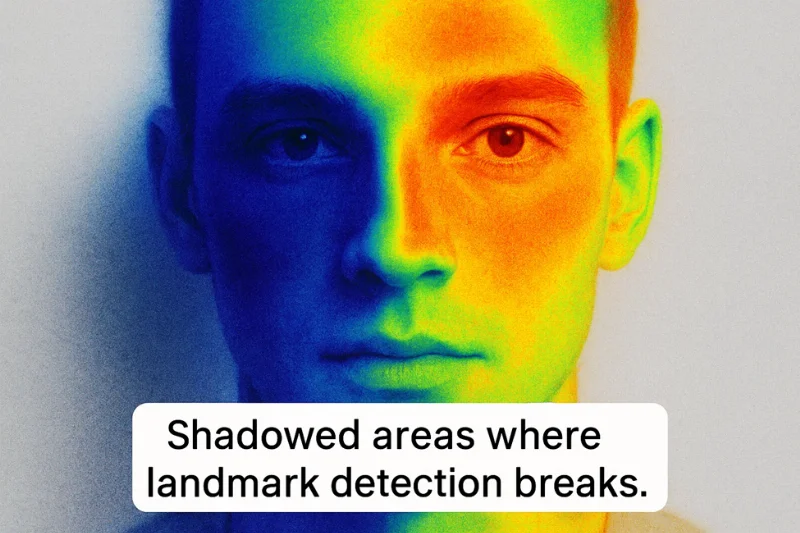
Whenever this happens, the system loses track of important details. Verification schemes based on facial landmark detection find it difficult to delineate the nose, jaw and eyes.
Algorithms performing shadow mapping interpret portions of the face as absent data which produces an immediate rejection.
Uneven Brightness or Half of Face is Bright Light
Some pictures show a face that is bisected by light, one side bright and the other dark. The skewness seems balanced but is telling us for non-fit lighting. These transitions create a wave of light and shadow over the face, which produces a strong tonal misalignment that the system immediately detects.
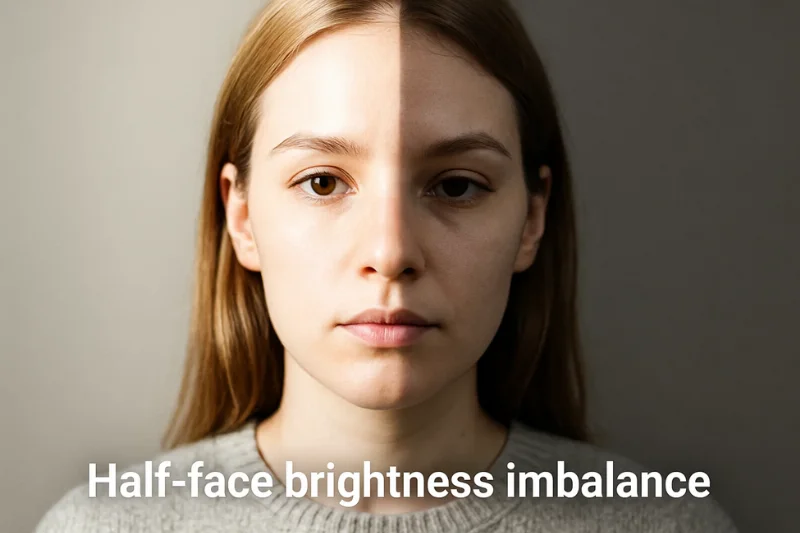
This is the case when multiple sources of light compete with each other. Typical causes include:
- Overlapping warm and cool bulbs, creating mixed source lighting
- Holding patterns in natural lighting as you get clouds blowing in front of the sun
The model tests for stability of brightness over the main facial regions. Otherwise, it does not pass the exposure uniformity test. In many cases, luminance also surpasses an internal threshold of stability, informing the system that the portrait is unstable.
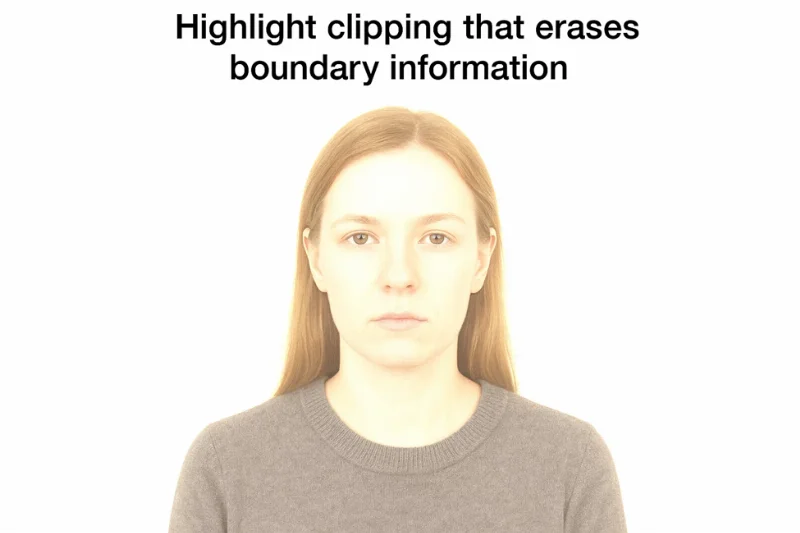
Overexposure on the Face
Overexposure appears as bright splotches over your skin. The camera registers too much light, forming washed-out areas, or a single, intense hotspot on the forehead, cheeks or nose. These regions are completely stripped of texture.
These photos are rejected by machines for a simple reason – they are missing important structure. The system is based on detection of:
- A loss of facial detail in the brightest areas
- Constraints on what the camera can record, dictated by dynamic range limits
When highlight detail is lost, the model can no longer reliably reconstruct the face.
Underexposure or Noise
The reverse issue happens when the face is too dark. Underexposure enhances shadows and image noise, resulting in a grainy photo. Darker the room, the more computational noise the camera generates.
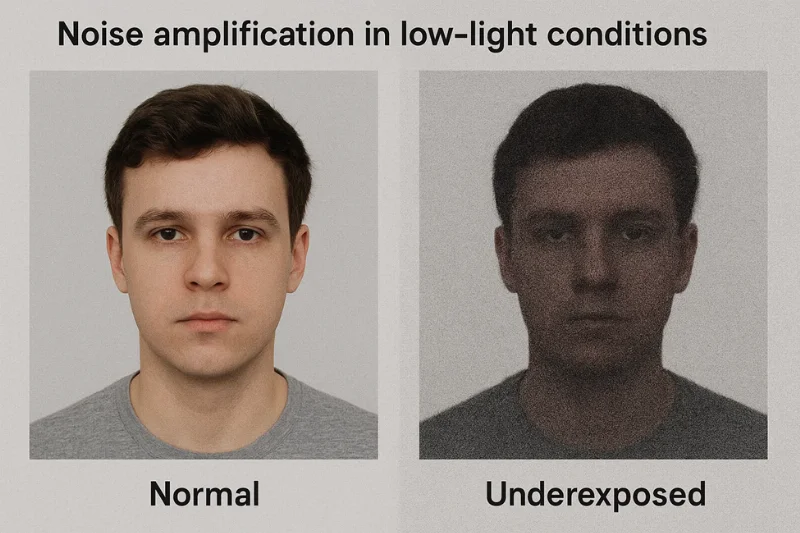
The structure of pixels is examined by automated noise detectors to identify noise.
Rejection occurs when:
- Noise is above the noise threshold of the system
- The image contains low-light artifacts altered appearance of the skin texture
Noise obscures the fineness of detail which is essential to perform trustable identity checks.
Glare on Glasses and Skin
Glare is also a type of brightness that the system immediately detects and flags.
It happens when light reflections reflect on glasses, oily skin, or a shiny forehead. Strong glare and reflections conceal essential areas of the face, including both eyes.
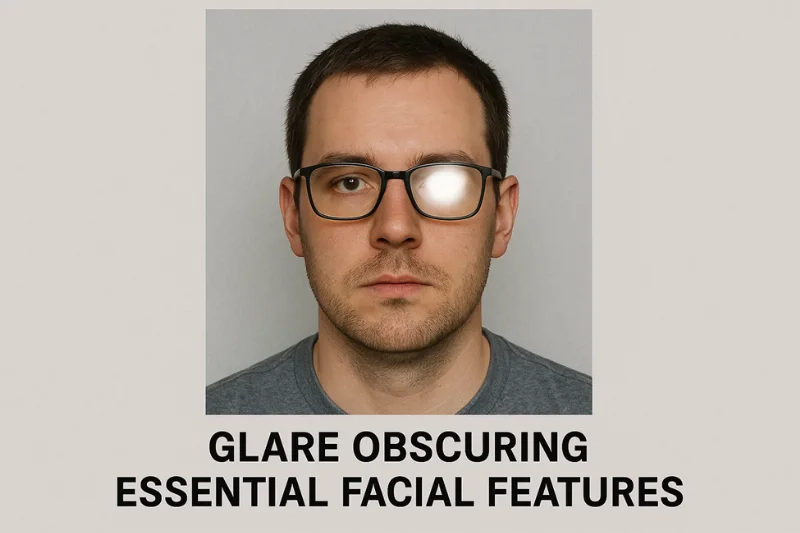
To the algorithm, glare is just a bright peak of intensity.
These spikes cause:
- Clipping of the highlights in the reflected region
- Abrupt contrast changes that alter the appearance of nearby details
Any portion of a face occluded by a reflection is considered undecipherable.
Color Temperature and White Balance Problems
Warm or cool lighting changes the entire energy of the photo / standing wave. When the light is colored yellow or blue the camera detects a color temperature shift. Simultaneously, white balance may be calculated incorrectly by the camera, leading to unnatural colors.
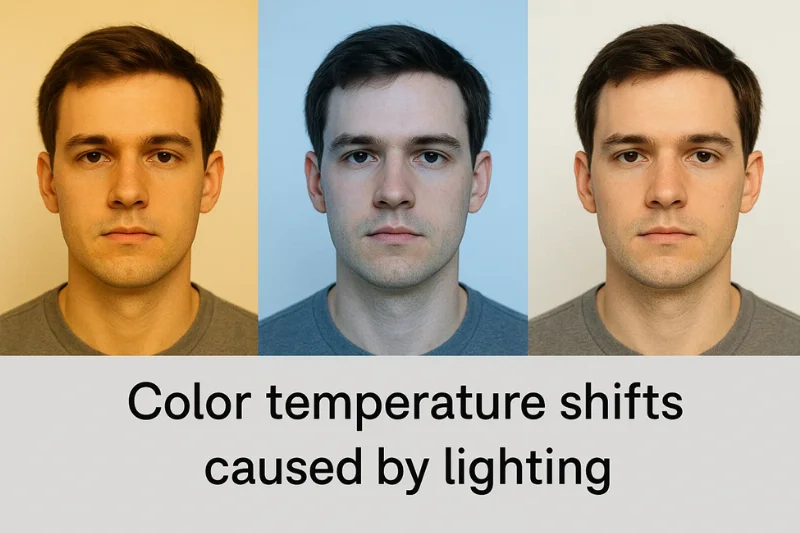
These images are rejected by machines because skin tone becomes distorted.
Models look for:
- Stable natural skin tone reproduction
- Consistency with the sRGB color profile standard, defining how colors should be displayed on digital media
If the tones go too far away from neutral, the image fails.
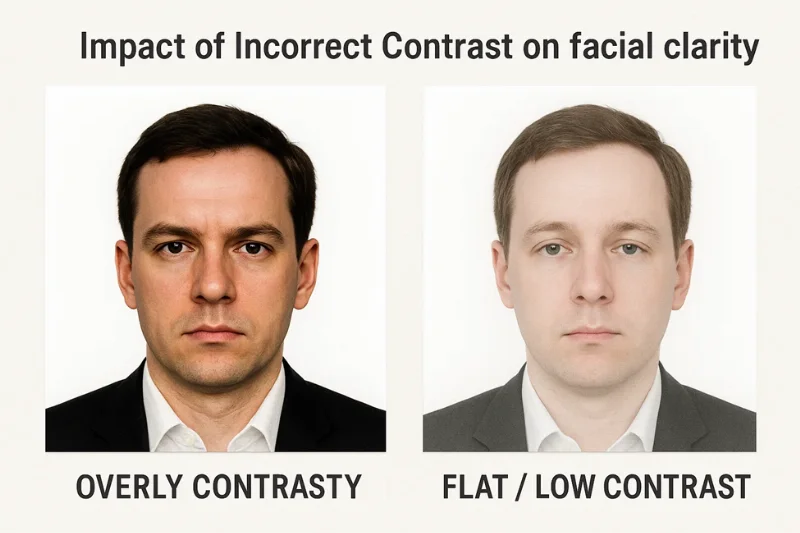
Contrast Balance Errors
Contrast controls the interplay between light and dark areas.
A high contrast makes features look harsh, a low contrast flattens the face. Both are breaking the pattern of contrast balancing the system is used to and causing tonal incongruity across the whole portrait.
Models read contrast via quantifiable data, not visual intuition.
They run:
- Histogram analysis to understand tonal distribution
- Internal contrast threshold rules that determine acceptable ranges
If the tones in the image are outside the range the system cannot confidently map the face.
How Digital Validators Detect Lighting and Background Errors
Most folks assume that there is a person first looking at a passport photo. It isn’t. The image is processed by a machine vision system, and every pixel is compared against a set of rules.
These systems do not “view” a face the way people do. They process structure, tone, and uniformity across multiple layers of segmentation algorithms that are intended to verify that the image represents a stereotypical biometric photo.

The quality control process is a sequence of focused tests. Each test is designed around a specific failure mode, and it interprets the image mathematically:
- Exposure mapping to test that the brightness is uniform across the face and background
- Shadow mapping to identify dark areas that conceal parts of the face
- A color uniformity checks to verify that the background remains neutral without any unwanted color shifts
Together, these tests exposed errors that even people miss. Any anomaly is signaled to the system that the image might not conform to the official biometric standards.
Here there are less visible failures but still a lot happens. When the system does gradient detection, it’s essentially looking to see if the brightness gradually slopes along the background — a very human eye-light-table kind of thing. The validator also scans for pixel noise, which can appear when the illumination is too low or uneven. They don’t need to be dramatic for you to start ignoring them. Even mild gradients or noise patterns violate the very stringent consistency requirements needed for biometric analysis.
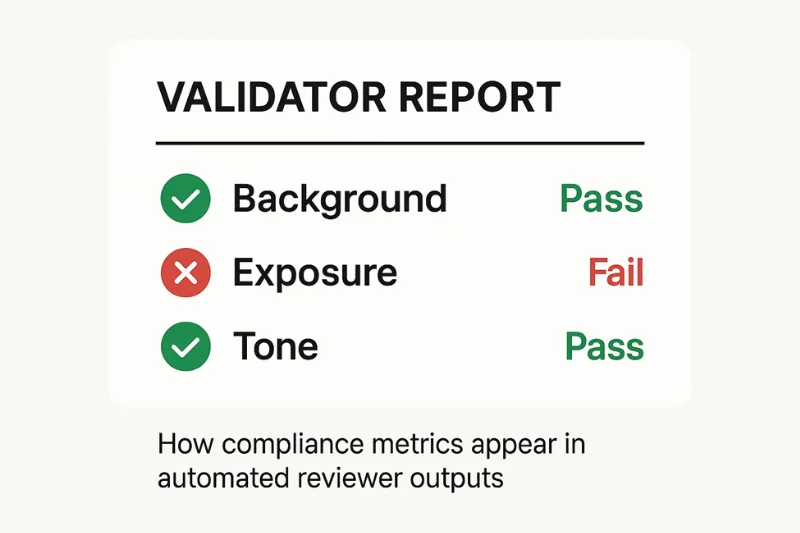
To illustrate how the system interprets these issues, here’s a quick breakdown:
|
Problem Type |
What the System Detects |
Why It Fails |
|
Uneven brightness |
Gradients from gradient detection |
Background not stable enough for segmentation |
|
Low-light noise |
Excess pixel noise |
Details lost in dark areas |
|
Harsh shadows |
Abnormal values in shadow mapping |
Facial geometry becomes unreliable |
|
Color issues |
Deviations in color uniformity check |
Background not neutral |
So even small differences can cause it to reject a submission, because biometric systems are based on predictable patterns. If those patterns change - even a little bit - the system, no longer trusts the image.
Troubleshooting Matrix for Background and Lighting Issues
A passport photo botches out when there is a conflict between what it expects and what the image provides. This matrix categorizes common problems according to a three-column error model consisting of a visual symptom, the probable technical cause, and the particular system behavior that is observed during analysis. It’s an approach to get familiar with verification failure patterns without inventing solutions - just a diagnostic perspective into how automated systems interpret background and lighting imperfections.
|
Error Type |
Underlying Cause |
Detection Logic |
|
Non-uniform background |
Gradients from uneven illumination or wall variations |
Histogram deviation and luminance pattern mismatch |
|
Background shadows |
Light direction creating visible wall shadows |
Segmentation disturbance and shadow edge detection |
|
Overexposed background |
Excessive brightness eliminating detail |
Contrast loss and boundary instability |
|
Incorrect background color |
Hue shifts or patterned texture |
Color uniformity failure and tone mismatch |
|
Digital background artifacts |
Editing tools altering edges |
Boundary disruption and artifact signaling |
|
Facial shadows |
Light falling unevenly across features |
Landmark irregularities revealed through shadow mapping |
|
Half-face brightness |
Competing or inconsistent light sources |
Exposure imbalance beyond luminance tolerance |
|
Overexposed skin |
Highlight clipping across facial regions |
Loss of structural detail in highlight zones |
|
Underexposed skin / noise |
Insufficient ambient light |
Noise threshold breach and low-light artifacts |
|
Glare on glasses or skin |
Reflective surfaces facing bright light |
Local contrast anomalies and clipped brightness |
|
Color temperature shift |
Warm/cool tinted illumination |
Skin tone deviation beyond neutral profile |
|
Contrast imbalance |
Excessive or insufficient tonal separation |
Out-of-range contrast distribution in histogram analysis |
Final check of compliance
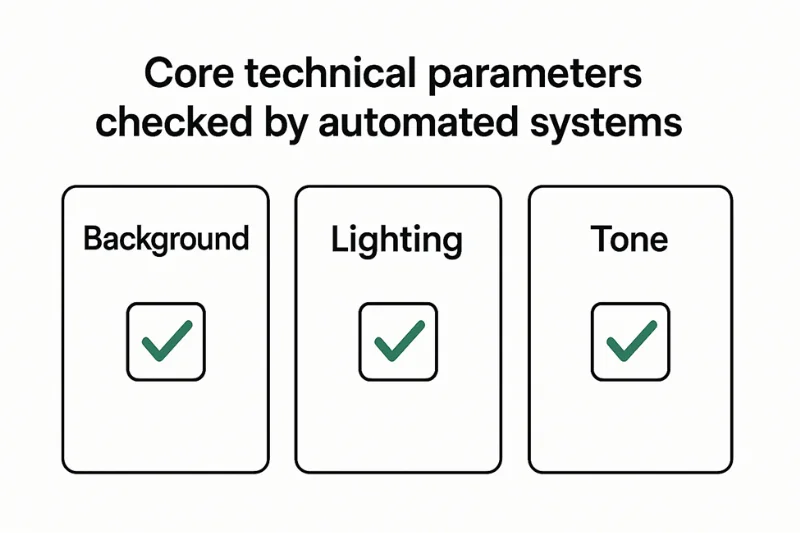
The technical checklist allows you to understand the essential factors that an automated system checks in a digital passport photo. It is only about quantifiable cues — no posing, no framing, no retakes. Each item corresponds to a property that validators check for when verifying background uniformity, exposure consistency, and tone accuracy over the entire image.
These should follow predictable patterns or else it assumes the image is not up to digital standards.
This checklist is important because each metric is linked directly to biometric validation, where accuracy and repeatability take precedence over visual appearance. Automated tools test if the image is “acting” as per strict ISO/ICAO-compliance. If any element falls out of expected tolerances - even by a fraction - the system stops to trust the image as a stable biometric sample.
Technical Compliance Checklist
|
Parameter Tested |
What the System Looks For |
Why It Matters |
|
Background uniformity |
Even tone with no gradients or shadows |
Ensures clean segmentation for biometric mapping |
|
Exposure consistency |
Stable brightness across face and background |
Prevents detail loss in highlights or dark areas |
|
Tonal accuracy |
Natural, neutral color reproduction |
Supports reliable feature extraction |
FAQ
1. Why are shadows not permitted in passport photos?
Shadows throw the lighting on the face off, and they also alter the way the wall looks behind you. When shadows appear on the face, the system is unable to read the shape consistently. They also disrupt the uniformity of the background by introducing edges that are not part of the original scenery, which confuses the algorithms. Automated tools identify such anomalies by means of a gradient detection, which reports even minor shifts.
2. Why does the background appear white to me and not to the system?
Human eyes smooth out minor tone fluctuations but cameras capture every change. Which is why a wall that looks like a plain white background can have slight background gradients. Uneven light from heating causes changes that the user can not see, but the system can. Validators detect through exposure threshold checks, which highlight concealed anomalies.
3. Can I apply it on a beige or light color wall?
A beige background is non-stop frustrating, because it’s not a true neutral background. Slight color variations can already influence how the scene is recorded by the camera. When warm light is applied to the wall, it intensifies the hue, and it is merged with the alterations of color temperature on the frame. Systems identify the subsequent distortions by analyzing one sRGB color at a time.
4. Why glare on glasses causes defocus while the background looks fine?
Glare changes the illumination of the face and conceals its structure. Even if the wall is perfectly uniform in the background, the strong glare generates spikes that prevent feature detection. The validator interprets these spikes as anomalies since the exposure threshold values are too high.
5. Is non uniform lighting a cause for rejection always?
Often yes. Uneven lighting results in brightness fluctuations not only on the face but also on the wall. The validator anticipates uniform background color and even lighting. When these alter, the system’s edge detection tool marks the variations as turbulence.
6. Why does my wall have a texture that the system doesn’t like?
A textured (or patterned) area breaks up the smooth appearance of a valid background. The embossed texture casts tiny shadows under some light which looks like noise. Even small underexposures enhance this effect. The imperfections are also detected by machine vision by noticing the anomalous pixel noise.
7. Why does the system say my background is too bright?
When light is shining on the wall, it causes overexposure resulting in washing out the details that the model needs. Even if the subject is well illuminated, the system interprets the bright plane as fluctuating background luminance. Analytic software looks for brightness spikes and runs histogram analysis, which identifies clipping.
8. Could the following be an effect of mixed light sources? What about background compliance?
Yes. Daylight and yellow indoor light are combined into mixed lighting that varies in tone within the frame. This is true for both the face and background colour. Verification tools identify the resulting instability by running color constancy algorithms on the color uniformity check results.
9. Why does soft natural light sometimes still cause rejection?
Soft light is more forgiving but not always steady. When a cloud passes or the light is uneven, the system detects tonal imbalance on the face or on the background surface. Changes such as these occur in the validator’s threshold of luminance scoring.
10. Do smartphones exaggerate background problems?
They can. The phones are aggressive in their contrast tuning, forming patterns of dynamic range compression. Background gradients may be exaggerated or the effect of shadows may be intensified. Tools detect these shifts via exposure mapping which isolates artificial tonal curves.
Conclusion
Background and lighting issues may seem trivial, but they continue to be the top reasons for rejection. Most errors in passport photo background lighting occur in places where people do not look – small tonal variations on a wall, a shadow that merges near the hairline, or a lighting imbalance on the two sides of a face. These details are measured by automated systems and very precisely. They want consistent exposure, uniformity in the portrait, and background uniformity behind the subject. When either one leaves the expected boundaries, the validator loses confidence in the image.
Every digital passport photo is subject to rigorous biometric validation during which the software analyzes tone, structure and consistency with a level of sensitivity that exceeds that of human inspection. The result isn’t visual – it’s mathematical. To be subjected to digital image compliance, your photo must exhibit a predictable response to machine analysis, that is, it should not contain hidden gradients, reflections or any form of tonal disruption. When the technical underpinning is solid, everything else in the submission process becomes much more dependable.
Authored by:
Nathaniel K. RowdenApproved by Association of Visa center