How to Take a U.S. Digital Passport Photo at Home Without an App
Table of contents:
- Taking Passport Photo at Home: U.S. Government Requirements to Keep in Mind
- Setting Up Your Home Studio
- How to Edit a Passport Photo Without an App: Crop, Resize, and Export
- Taking a Passport Photo at Home: Common Issues and Fixes
- Pre-Submission Checklist
- Final Thoughts on Taking Your Digital Passport Photo with iPhone
- Frequently Asked Questions
- Official Government Sources
The U.S. Department of State accepts self-taken digital passport photos for online passport renewal, visa applications, and the Diversity Visa Lottery entries — provided the image meets all technical and biometric specifications. This guide covers all essential steps from setting up your home photo studio, shooting the photo, and preparing the file using only built-in operating system tools or free browser-based utilities. No third-party apps are required.
Taking Passport Photo at Home: U.S. Government Requirements to Keep in Mind
The U.S. Department of State Requirements sets strict requirements for official photos, and they differ by application type. The table below shows the three most common types — online passport renewals, US visa applications, and DV Lottery entries.
Requirement | Online Passport Renewals | U.S. Visa Applications | DV Lottery Entries |
File Format | JPEG, PNG, or HEIF | JPEG only | JPEG only |
File Size | 54 KB – 10 MB | ≤ 240 KB | ≤ 240 KB |
Pixel Size | 600×600 – 1,200×1,200 px | 600×600 – 1,200×1,200 px | 600×600 – 1,200×1,200 px |
Color Space | sRGB | sRGB | sRGB |
Square Aspect Ratio | Required | Required | Required |
Filters Allowed | No | No | No |
Pixel dimensions and color space (sRGB) are identical across all three programs. The differences are in file format and file size: online passport renewal accepts JPEG, PNG, or HEIF and allows files up to 10 MB, while visa and DV Lottery submissions require JPEG only and cap the file at 240 KB. The compression ratio must not exceed 20:1 regardless of application type. Note that the official State Department photo tool outputs 600×600 px JPEG, which satisfies all three programs.
Setting Up Your Home Studio
Equipment You Need (and What to Use Instead)
Smartphone or digital camera. A modern smartphone camera is sufficient — rear cameras typically produce 12-48 MP images well above the 1,200×1,200 px ceiling. A dedicated camera gives more control over depth of field and color accuracy, but it is not necessary. Avoid the front-facing (selfie) camera: barrel distortion from wide-angle lenses will warp your face and potentially cause rejection.
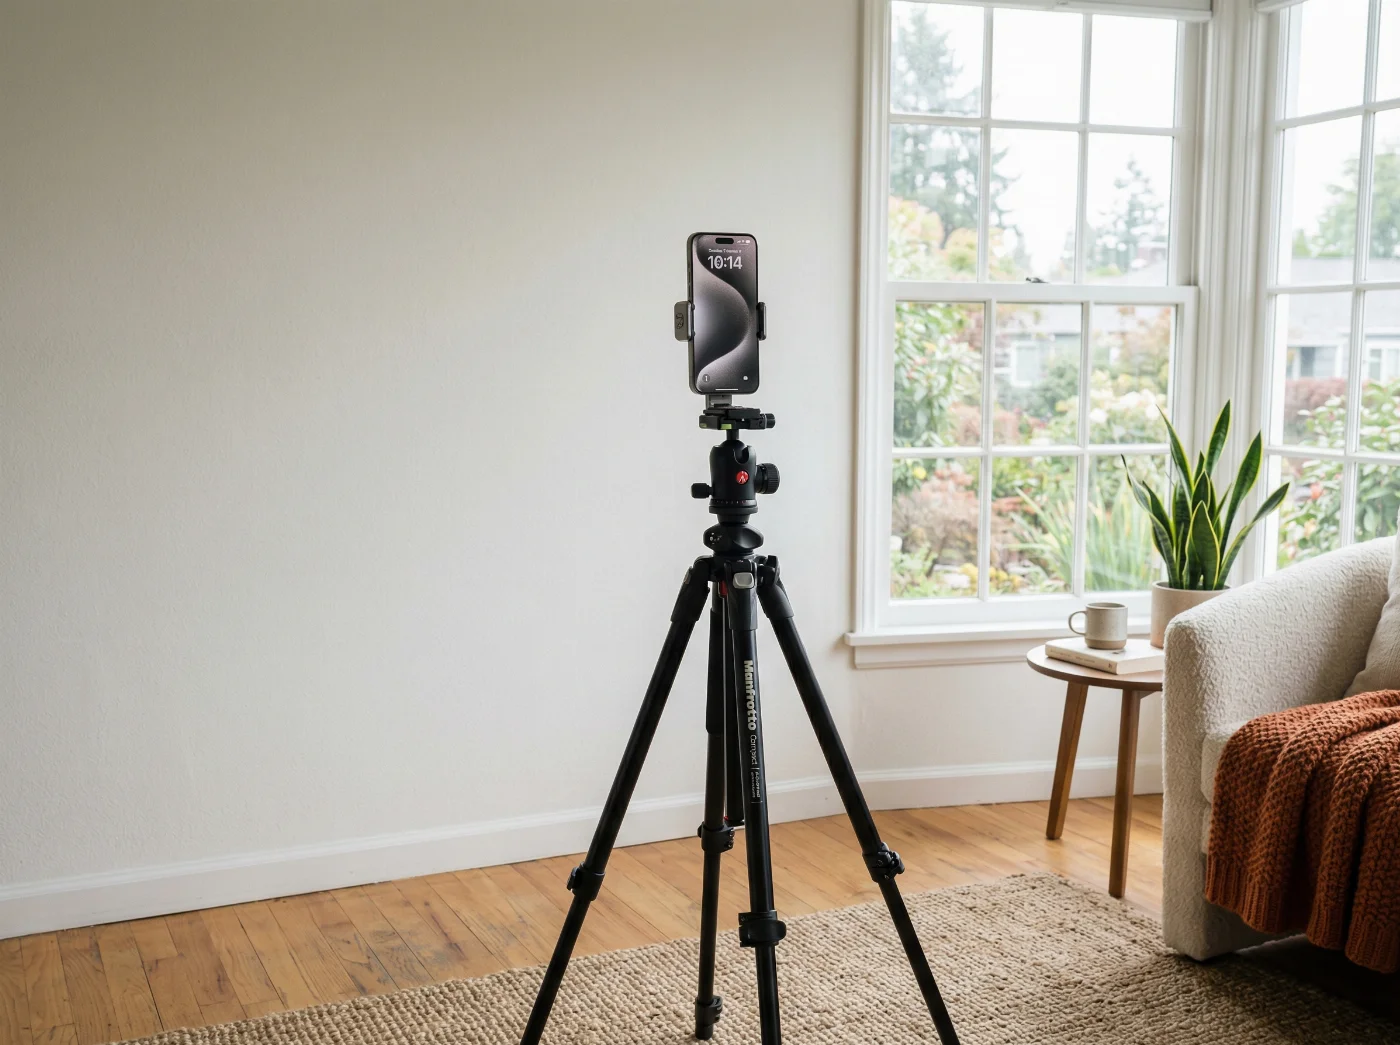
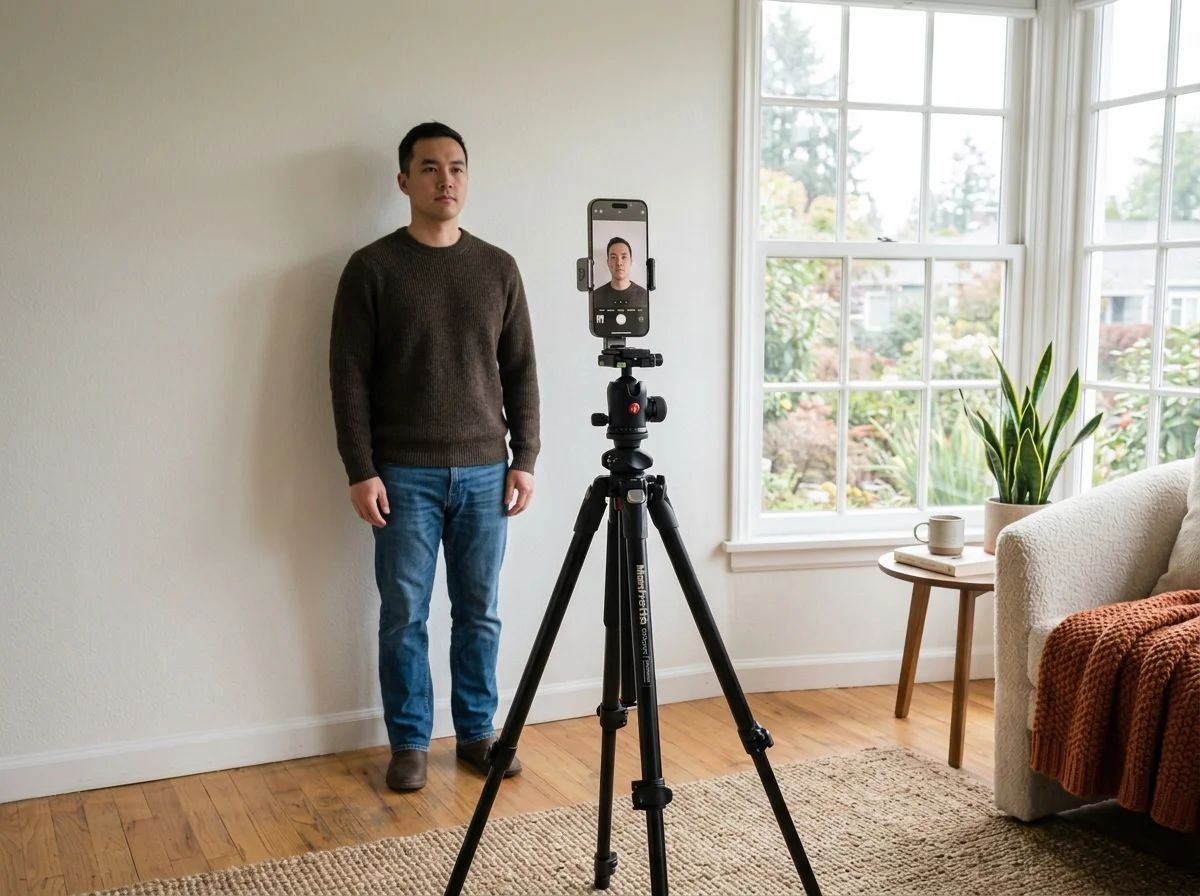
Stable surface or tripod. A standard tripod is ideal. Substitutes: a stack of books, a shelf edge, or a phone propped against a wall. The camera must be at eye level and motionless to avoid blur. Set the self-timer (2-10 seconds) to eliminate camera shake from the shutter tap.
White background. A plain white wall works as-is. If your wall has texture or color, tack or tape a white bedsheet over it. The sheet must be pulled taut — wrinkles cast shadows. Off-white and very light gray surfaces are also acceptable; the government requirement is "white or off-white."
Light source. A large window with indirect daylight is your best option. Artificial substitutes: two desk lamps with daylight-balanced bulbs (5000–6500 K).
Preparations for Taking the Shot
Managing the lighting. Preferably, stay by the window in daylight. If using artificial light sources, position your primary light source (window or lamp) at a 45° horizontal angle to your face, slightly above eye level. If using two sources, place the secondary light on the opposite side at equal or slightly lower intensity to fill shadows. Diffuse harsh sources with a white curtain, frosted glass, or a white sheet. Avoid overhead ceiling lights entirely — they flatten and shadow simultaneously. The goal is even, shadow-free illumination across the entire face, including under the chin.
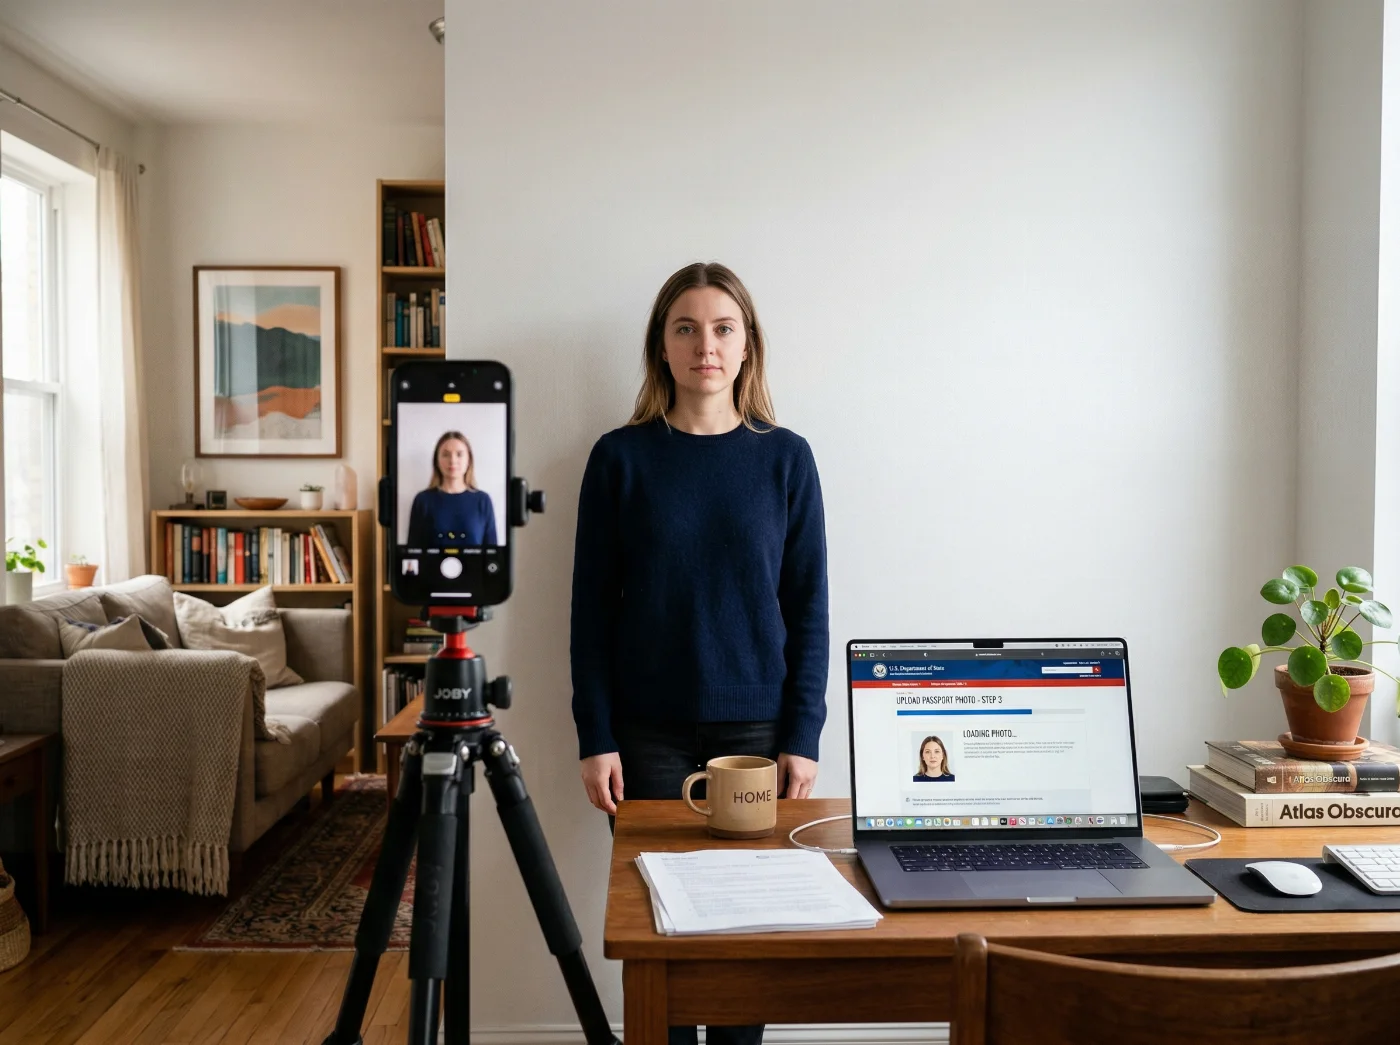
Camera setup. Make sure the camera is at your eye level — not above (which elongates the forehead and shrinks the jaw) and not below (which does the reverse). You can use a 1× or 2× zoom mode on your smartphone, but never a 0.5× wide-angle lens. On dedicated cameras, a 50-85 mm equivalent focal length gives the least distortion. Setting a timer for 3-10 seconds makes sense as it allows you to take a correct posture and avoid camera shaking.
Correct positioning. Stand or sit 4-6 feet (1.2-1.8 m) away from the background. This distance allows shadows from your body or clothing to fall out of frame. A closer distance will make a shadow show on the background; farther than 6 feet, and the background may render slightly gray or gradient-lit in the final image.
Framing the shot. Make sure your head and the tops of your shoulders are visible, and your head is centered horizontally in the frame. Leave enough headroom — your hair should not touch the top of the frame. On the final image, your head must occupy 50-69% of the shot. Avoid tilting your head and moving. Make sure there are no obstructions, neither on your face nor the background.
Facial expression. Keep a neutral expression, avoid closing your eyes, and don't smile widely (the mouth should be closed).
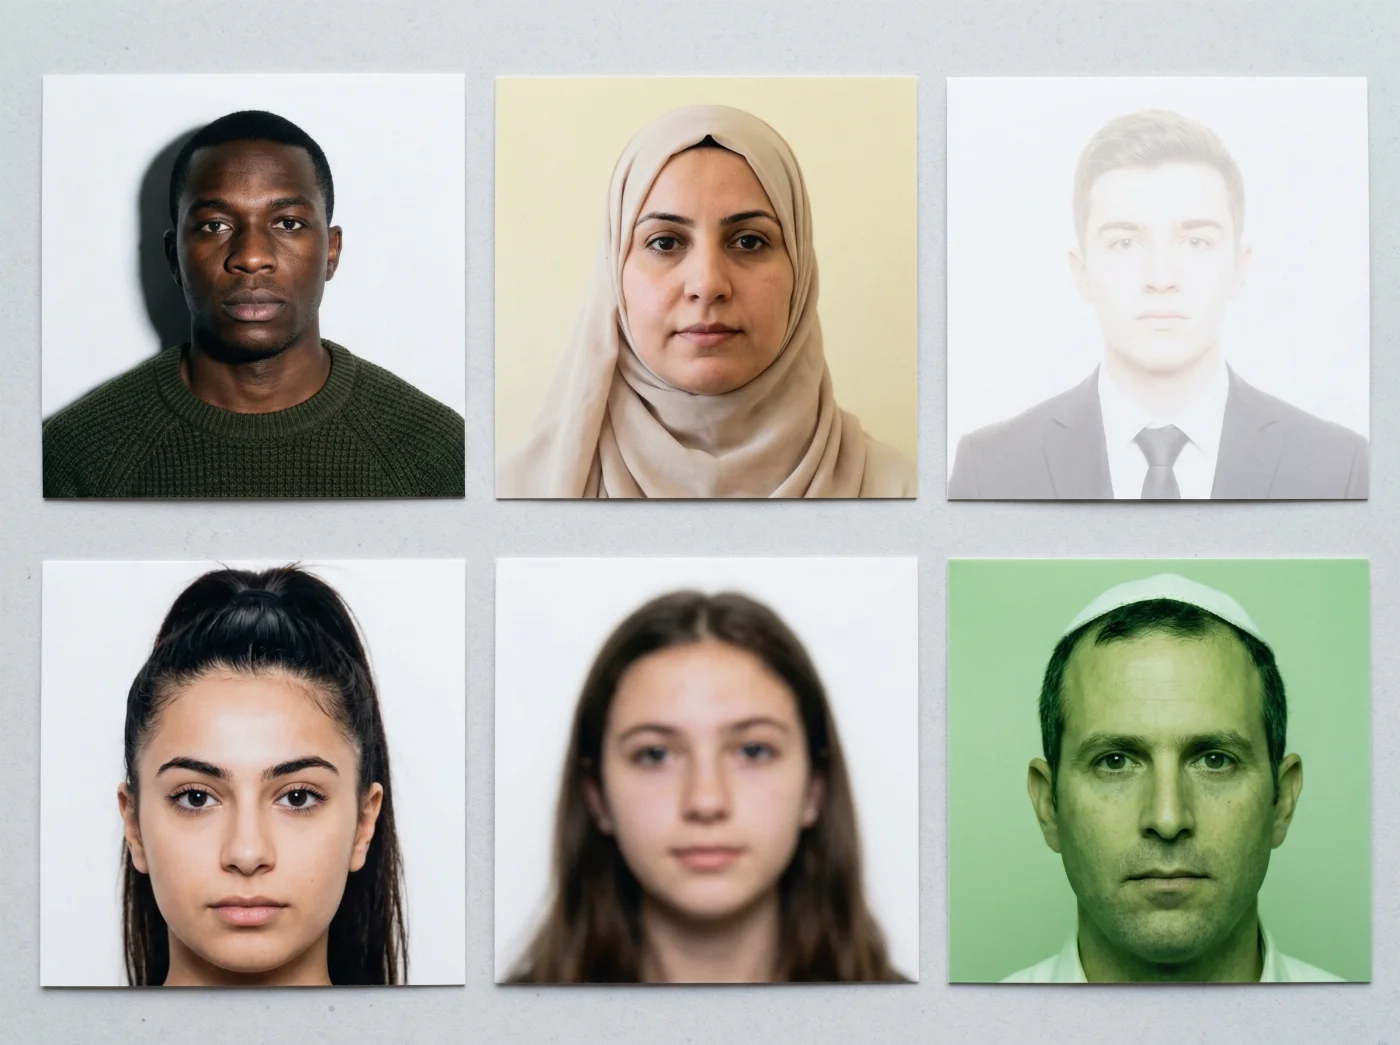
Glasses and head coverings. Glasses are not permitted. This applies to all U.S. passport and visa photos, regardless of prescription or frames. Head coverings aren't permitted except for documented religious reasons, in which case the full face from chin to hairline and ear to ear must remain visible.
Clothing: wear a solid-colored top that contrasts with the white background — avoid white, very light gray, or off-white shirts, which may blend into the background. No uniforms. Standard day-to-day clothing is correct.
Taking a Passport Photo
Stand still and take a few shots. Choose the best one that follows all the requirements above. For an easier editing process, download the best image to your laptop.
How to Edit a Passport Photo Without an App: Crop, Resize, and Export
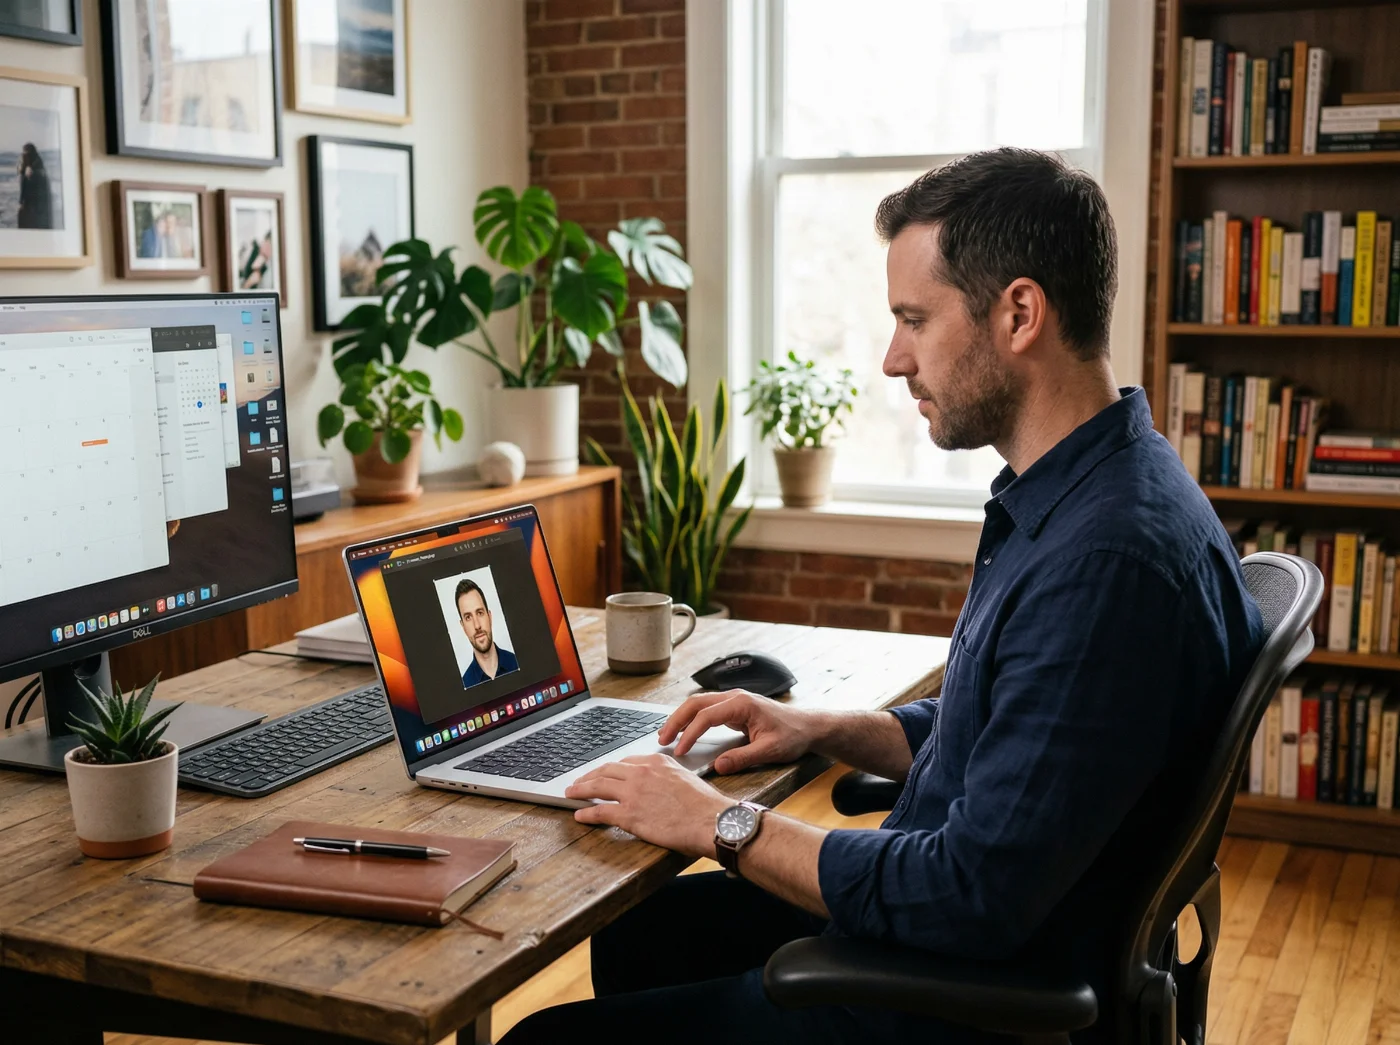
Mac: Preview
Preview handles both cropping and export without any additional software.
To crop to 1:1 and export as JPEG:
Open the photo in Preview.
Tools > Adjust Size — note the original pixel dimensions.
Tools > Rectangular Selection — hold Shift while dragging to constrain to a perfect square. Select the area centered on your face with head and shoulders visible.
Tools > Crop (or ⌘K) to apply.
Tools > Adjust Size — enter 600 in the Width field, ensure "Scale proportionally" is checked. Height should auto-fill to 600.
File > Export — choose JPEG, set Quality to High (90%+). Save.
What it cannot do: color profile conversion. If your camera shoots in Display P3 (common on recent iPhones and Macs), the exported JPEG may still carry a P3 profile. To force sRGB, open the exported file in Preview, go to File > Export, and under the color profile dropdown, select sRGB IEC61966-2.1.
Windows: Photos App or Paint
Photos app: Open the image > click the Edit icon (pen) > Crop > click the aspect ratio selector and choose Square. Drag the crop box to the center of your face, then click Done. Export via Save a copy as JPEG.
Paint: Use the Select tool, hold Shift to draw a square selection. Copy, paste into a new file (the canvas resizes to the selection), then use Image > Resize — enter 600 in Pixels width, uncheck "Maintain aspect ratio," enter 600 in height. Save as JPEG.
Neither Windows app performs color profile conversion. If you are submitting to the visa or DV system and your photo was taken on a wide-gamut device, verify the color profile using a free tool like the IrfanView Info dialog or an online EXIF reader before submission.
After export, right-click the file and check its size in your OS file inspector (Get Info on Mac, Properties on Windows). For passport online renewal, the file must be between 54 KB and 10 MB. For visa and DV applications, it must be 240 KB or less. If it exceeds 240 KB, re-export at a lower JPEG quality level (85 is a reasonable starting point) or use Squoosh to compress it.
Free Travel.State.Gov's Photo Tool (Official)
The State Department offers a browser-based photo tool that accepts an image from your computer, crops it to a square, resizes it to exactly 600×600 px, and outputs a JPEG you can download. It does not require a login, download, or payment.
What it does: square crop, resize to 600×600 px, convert to JPEG.
What it cannot do: exposure correction, background adjustment, or head-size validation. Use it only if your photo is already properly lit, framed, and centered.
When to use it: when your photo is already good, and you only need format compliance.
Taking a Passport Photo at Home: Common Issues and Fixes
Taking your U.S. digital passport photo at home is a straightforward process, and there is not much that can go wrong. However, a minor mistake can lead to a rejection. Avoid it by referring to these expert tips.
1. Shadows on Background
A dark shadow appears on the background behind or around you.
Move farther from the background — 3-6 feet works best.
Add a second light source directed at the background, not the face.
Ensure both side lights are balanced so no single source casts a dominant shadow.
2. Yellow or Gray Background
The background appears off-color rather than white.
Check white balance on the camera — set to "Daylight" or "Auto" with the correct light source.
Use daylight-balanced bulbs (5000-6500 K). Incandescent bulbs cast yellow light; fluorescent bulbs cause green tones in the photo
If only slightly off-white, try adjusting white balance in post using Preview's (Mac) Adjust Color tool or Pixlr. Do not use automatic "fix" tools — they may alter skin tones.
As a last resort, use Pixlr's color picker to check if the background is within an acceptable range before submission.
3. Overexposure or Underexposure
Face is washed out (overexposed) or too dark to see detail (underexposed).
If overexposed: reduce light intensity, close the curtain partially, or move lamps farther back. On a smartphone, tap the face on screen to set the exposure metering point, then slide the sun icon down.
If underexposed: add a reflector (white foam board opposite the main light), move lamps closer, or use a larger window. On a smartphone, tap the face and slide the sun icon up.
Do not use HDR mode: it applies tone mapping and may alter the background to non-white.
4. Head Too Small or Too Large
The head occupies less than 50% or more than 69% of the image height.
If too small: move the camera closer or zoom in (2× on smartphones). Alternatively, re-crop the image tighter.
If too large: move the camera farther back. Do not crop so tight that the chin, crown, or shoulders are cut off.
5. Blur
The image is soft or visibly blurred.
Mount the camera on a stable surface or tripod. Do not handhold.
Use the self-timer to allow the phone/camera to settle before the shutter fires.
Ensure the face, not the background, is in the focal plane — on smartphones, tap the face on screen before the timer runs out.
Ensure there is adequate light — low light forces a slow shutter speed or high ISO, both of which cause blur or noise.
6. Color Distortion (Greenish, Bluish, or Unnatural Skin Tones)
Skin tones appear unnatural, or the image has a color cast.
Check white balance. A mixed light environment (daylight from the window + incandescent lamp) produces inconsistent color. Use a single light source type.
On iPhone, check that the image color profile is sRGB, not Display P3. Convert via Preview > File > Export > select sRGB profile.
Avoid shooting near colored walls — reflected color bounces onto skin.
Do not use automatic "enhance" or AI-based color correction tools — they may push the image outside acceptable parameters.
Pre-Submission Checklist
Use this 3-step checklist to evaluate the final quality of your digital image. If you ticked all the boxes, you’re ready to submit your photo!
1. Background & Lighting
Background is white or off-white, plain, no patterns or shadows
The subject is 3-5 feet (0.5-1 m) in front of the background
Face is evenly lit — no shadows under the chin, nose, or in eye sockets
No shadow cast by the subject onto the background
No harsh overhead lighting
2. Framing & Positioning
Head centered horizontally
Both shoulders visible
Head straight — no tilt, no turn, both ears at the same height
Face occupies 50–69% of image height (chin to crown)
Eyes open, looking directly at the camera
Neutral expression, mouth closed
No glasses, no head covering (unless religious exemption)
No white or near-white clothing
3. File & Format
File is a perfect square (1:1 aspect ratio)
Pixel dimensions 600×600 – 1,200×1,200 px
Color space: sRGB
No filters, retouching, or background replacement applied
Passport online renewal: JPEG, PNG, or HEIF; 54 KB – 10 MB
Visa or DV Lottery application: JPEG only; ≤ 240 KB
Final Thoughts on Taking Your Digital Passport Photo with iPhone
A compliant U.S. passport photo can be produced at home with a smartphone, a white background, and natural or artificial light, using only free tools already available on your computer or in the browser. The critical variables are consistent lighting without shadows, correct head framing, and a final file that matches the format and size requirements for your specific application type. Address those three areas, and the photo will pass.
Frequently Asked Questions
Can I Use a Smartphone to Take My Own Passport Photo?
Yes. The State Department does not require professional equipment. A modern rear-facing smartphone camera produces more than enough resolution. You must follow all biometric and technical requirements— correct background, lighting, framing, file format, and size — no matter what equipment you use. Avoid the front-facing wide-angle camera.
Does My Photo Need to be Exactly 2×2 Inches?
The 2×2 inch (51×51 mm) specification applies to printed photos submitted physically. Digital submissions require a square image with pixel dimensions between 600×600 and 1,200×1,200 px. The physical size is irrelevant for digital uploads.
What File Format Should I Use When Taking a Passport Photo With iPhone?
For online passport renewal, JPEG, PNG, or HEIF are all accepted. For visa applications and DV Lottery entries, only photos saved as a JPEG are accepted. We recommend saving your image as a JPEG; it’s the most universal and reliable format.
What is the Maximum File Size for a Digital Passport Photo?
Depends on the document type you’re submitting it with. For online passport renewal: 54 KB minimum, 10 MB maximum. For U.S. visa applications and DV Lottery entries: 240 KB maximum. Always double-check all requirements before submission.
Can I Edit the Photo to Fix the Background or Adjust Lighting?
Basic adjustments — exposure correction, white balance — are technically acceptable if they do not alter the subject's appearance. Cropping and resizing are required and explicitly permitted. The most reliable way to match your iPhone photo to the official requirements is by using an online passport photo maker like PhotoGov. It automatically adjusts your image to the U.S. Department of State specification, providing a submission-ready, technically compliant digital photo in under 30 seconds.
Do I Need to Convert My iPhone HEIC Photo to JPEG?
Only if you are submitting a visa application or DV Lottery entry — both require a JPEG. For online passport renewal, HEIF (HEIC) is accepted. To ensure JPEG is captured directly, go to Settings > Camera > Formats > Most Compatible on your iPhone before shooting. Alternatively, convert the HEIC file using Preview on Mac (File > Export > JPEG) or any free online converter.
Official Government Sources
Digital Photo Requirements: The U.S. Department of State
Visa Photo Requirements: The U.S. Department of State
Was this helpful?
45 found this helpful
Authored by:
Nathaniel K. Rowden (Compliance consultant)Top expert
Verified by the Photogov compliance team
ICAO 9309-compliant
Based on official government sources
Helpful votes: 45
Was this helpful?
45 found this helpful
We value your Privacy
We use cookies to enhance your browsing experience, serve personalized ads or content. By clicking “Accept All”, you consent to our use of cookies.