How to Take a Passport Photo With an iPhone at Home: 2026 Guide
Table of contents:
- What iPhone Model is the Best for Taking Passport-Size Photos?
- Front or Back Camera?
- Passport Photo Requirements To Follow at Home
- Taking Your Own Passport Photo With an iPhone: a Step-by-Step Guide
- What is the Difference Between a Digital Passport Photo and a Printable One?
- How to Take a Child’s Passport Photo With an iPhone
- Common Mistakes to Avoid With iPhone Passport Photos
- Frequently Asked Questions
Today, you don't need a professional camera or a commercial studio to get an acceptable passport photo. It can be easily captured with your iPhone at home, and adapted to official passport or visa requirements with a reliable passport photo maker like PhotoGov.
The key is to start with a technically solid shot: a simple home setup and a few basics are enough to capture a good original image. After that, you can turn it into a compliant ID photo in under 30 seconds with an online tool. Let's see how to do it from the comfort of your home or office (and no, you don't need the latest iPhone model).
What iPhone Model is the Best for Taking Passport-Size Photos?
When it comes to passport‑size photos, you don’t actually need the newest or most expensive iPhone model to get an image that passes strict biometric checks. I use my iPhone 13 Pro to take all my visa and ID pictures, and it works just fine. However, traveling frequently and applying for different visas, I've learned that a lot depends on the quality of the original image, not the model itself. We will discuss it in detail in this post.
Pretty much all devices from the iPhone 11 and later offer fast, accurate autofocus, good performance in indoor lighting, and enough detail and sharpness to capture a clear picture without visible noise or pixelation. So don't worry if you don't have the most recent model!
Higher‑end models like the iPhone 15 or 16 series do provide a little extra dynamic range and detail. But for a small printed or digital passport photo, it's insignificant. Once the photograph has been converted to a passport-size picture with an online passport photo maker, it is virtually indistinguishable from a studio shot.
Saying that, the iPhone 17 may be a good pick if you prefer using the front camera, as many users and reviewers report noticeably sharper and cleaner selfies compared to older models.
Front or Back Camera?
You can absolutely take a compliant passport photo with the front camera on an iPhone, as long as you treat the whole process like a mini-photoshoot, not as snapping a casual selfie.
The rear camera still wins for absolute sharpness and natural facial proportions, which are essential for biometric identification. The best way to capture an image with the back camera is to place the iPhone on a tripod or ask someone to take a picture of you. Maintaining a proper distance from the camera lens helps avoid typical close‑up selfie distortion that can ruin the shot by altering your face's proportions.
Passport Photo Requirements To Follow at Home
The official ID photo requirements are similar worldwide. They are determined by local authorities, such as the US Department of State, or His Majesty's Passport Office in the UK. The authority behind the biometric standards that countries base their guidelines on is the International Civil Aviation Organization (ICAO). It lists all the official requirements in Document 9303.
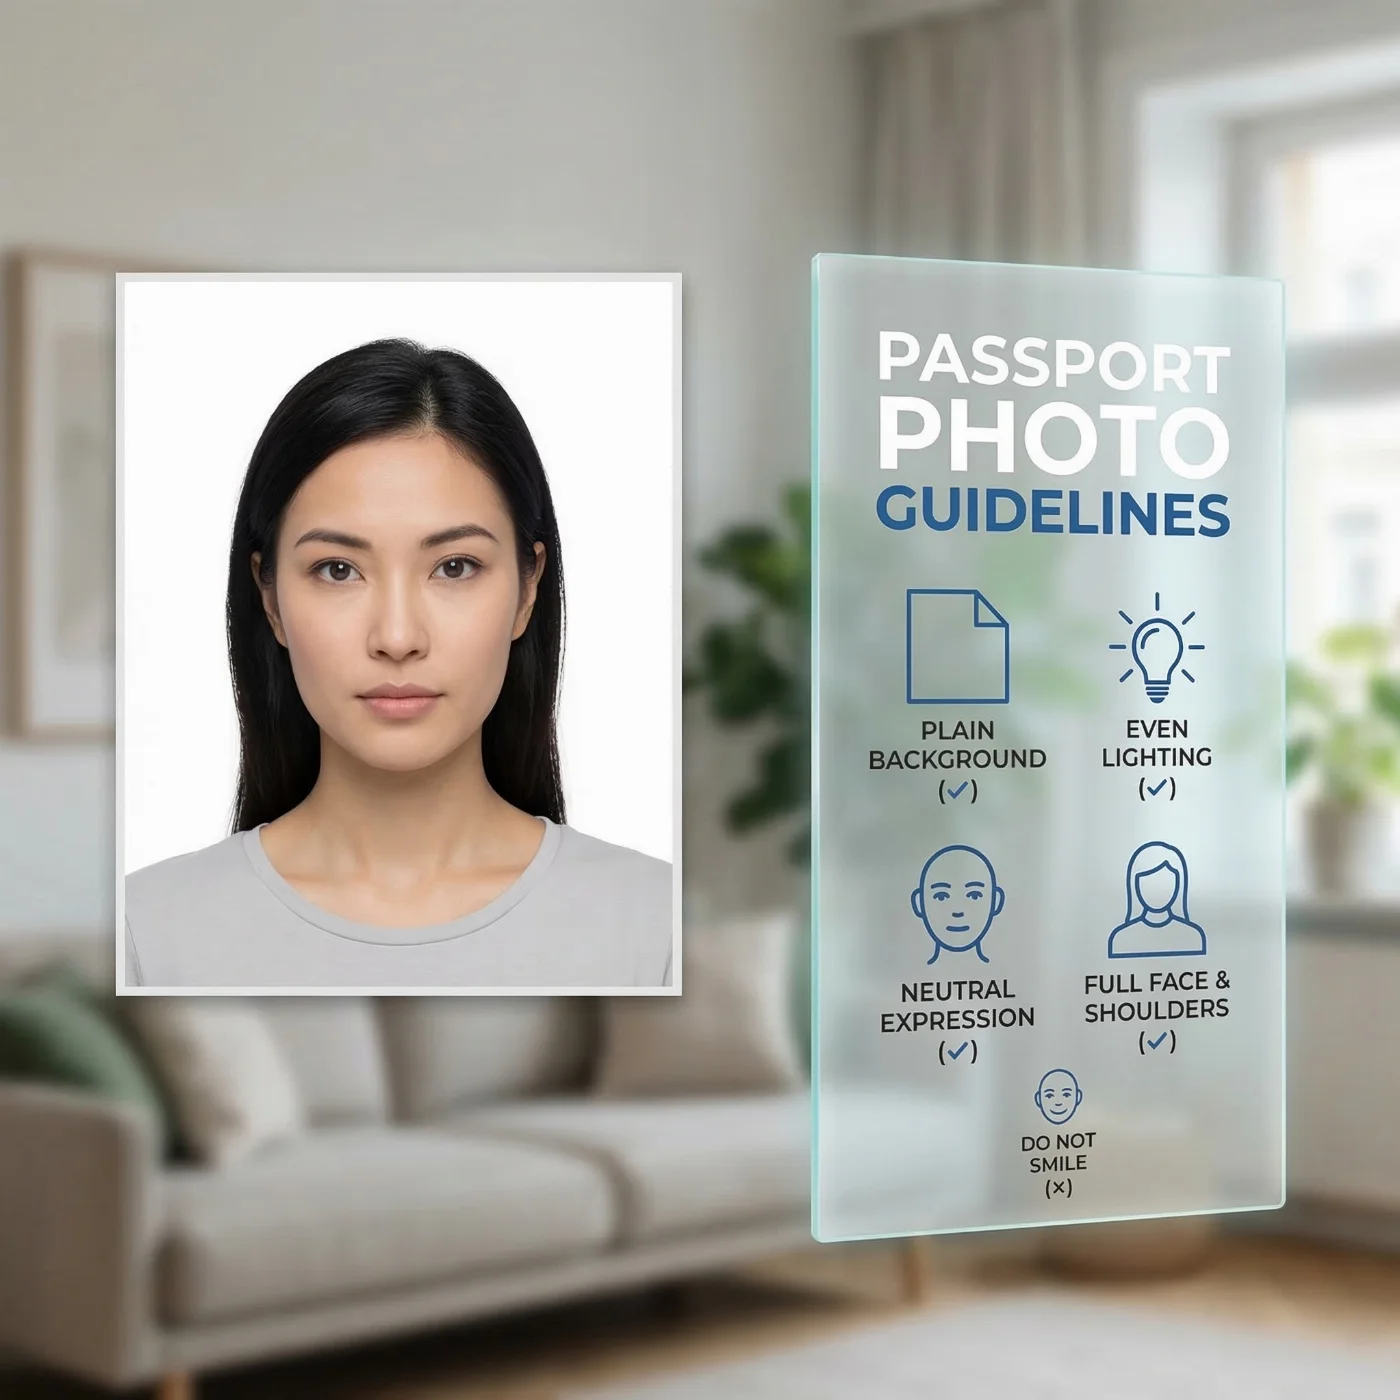
All passport photographs must adhere to these government standards. Below is a list of key international requirements:
- A photo must be sharp and in color
- A background must be plain, light, and uniform (usually white or off‑white)
- An applicant's face must be presented in full, front view, looking straight at the camera
- An applicant must maintain neutral expression: mouth closed, eyes open, no exaggerated expressions (smiling, frowning)
- A picture must be evenly lit, with no harsh shadows or bright reflections
- A photograph must be recent, typically taken within the last 6 months
- Facial features, or colors, can't be digitally altered and must be presented naturally
Passport photography sizes and proportions are different for different types of documents — and there is usually an "inside" country standard for ID photos. For example, in the US, a 2 x 2-inch format is frequently used for official pictures. A UK passport photo and Schengen visa photo size is 35 x 45 mm. But you need a 43×55 mm photo for a Dubai visa. The difference in sizes, framing, and head proportion requirements can be very confusing: always double-check with the official resources or on our website before submitting your documents.
Taking Your Own Passport Photo With an iPhone: a Step-by-Step Guide
Now that we've learned the basics, let’s begin the photo-making process. All you need is your iPhone and a simple setup.
Step 1: Set up Your iPhone
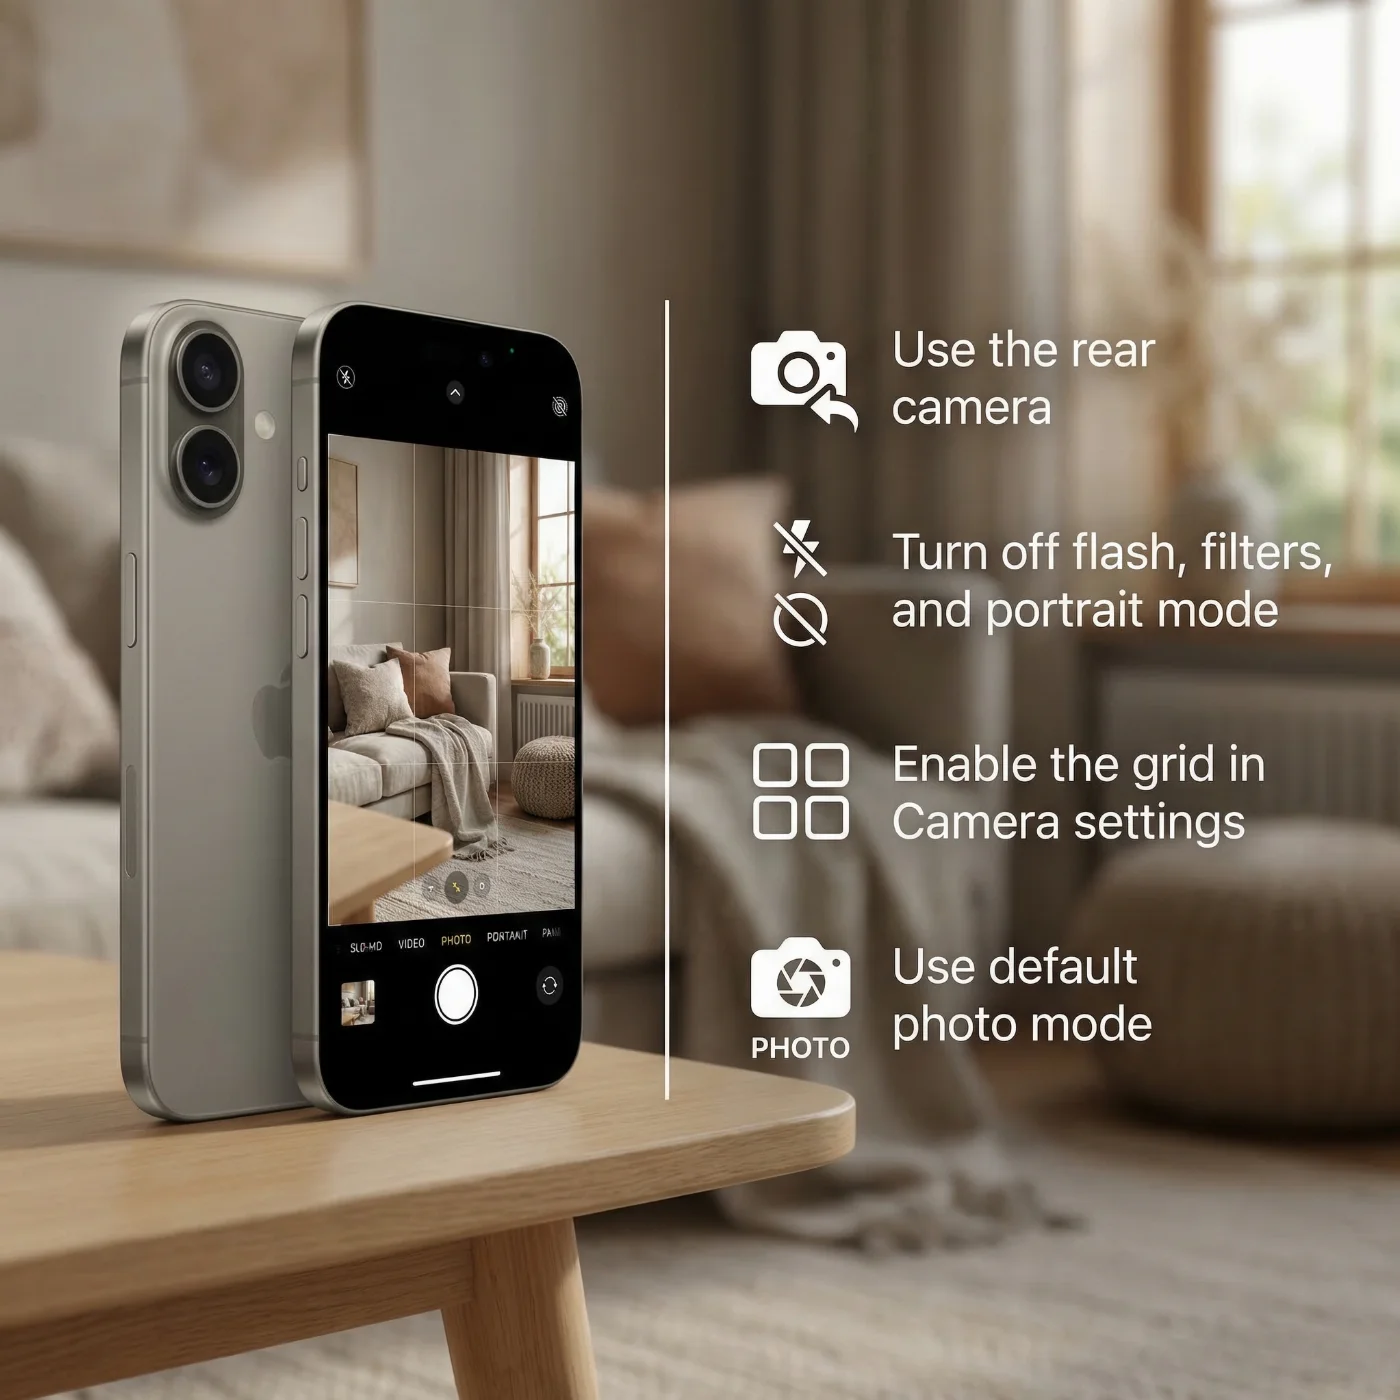
- Use the rear camera.It offers higher resolution and has better optics than the front (selfie) camera, resulting in sharper, more detailed images.
- Turn off flash, filters, and portrait mode.Flash can cast shadows or create strong glare on your face — a frequent reason for ID photo rejection. Portrait mode blurs the background, and filters may alter your facial features and the colors, which are not allowed in passport photos.
- Enable the grid in Camera settings. The grid will help you keep your head centered and the shot straight: a correctly proportioned image is essential for biometric identification.
- Use default photo mode. Avoid Live Photos or video modes. A standard still photo at full resolution is best.
Step 2: Create a Proper Background and Lighting Setup
Most passport photos get rejected because of a bad background or lighting — not because they were taken with an iPhone. Here are a few tips to create a simple home setup.
Backgroud
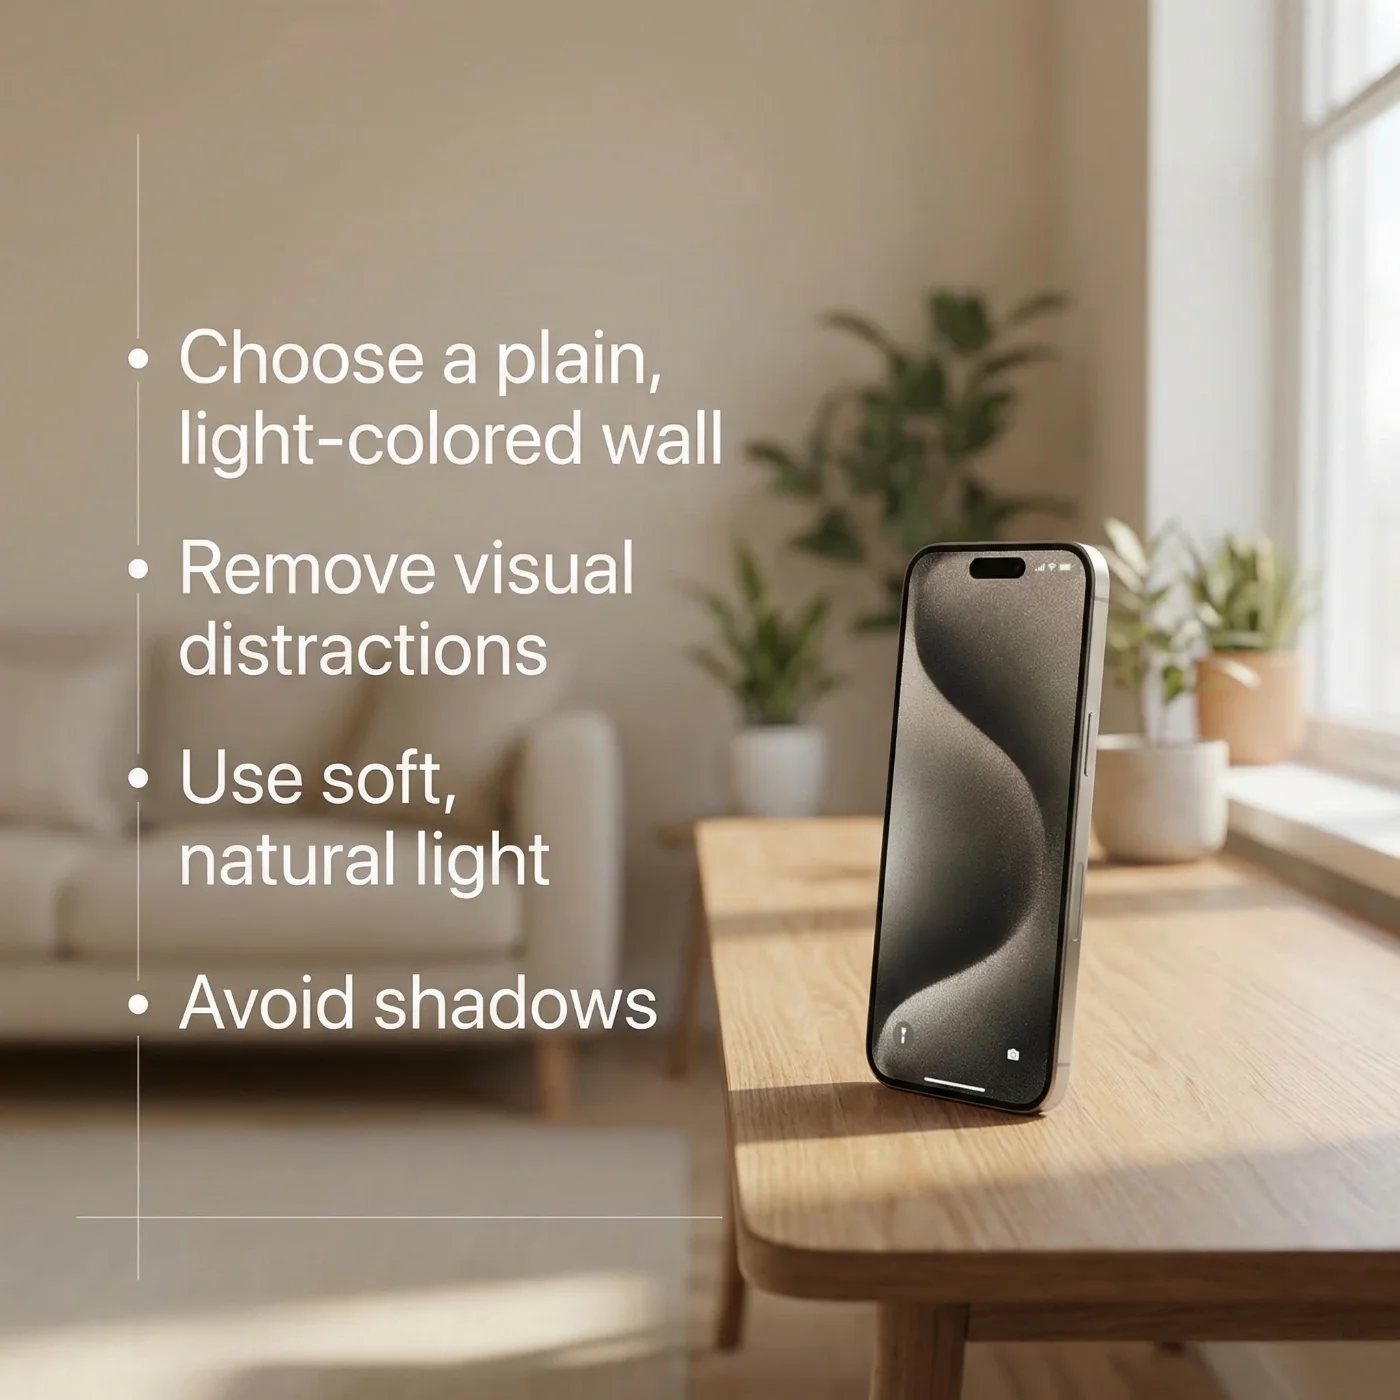
- Choose a plain, light‑colored wall.White or very light gray works best. Avoid patterned walls, tiles, curtains, or any objects behind you.
- Remove visual distractions. No frames, light switches, shelves, plants, or text in the background. For a better result, the backdrop must be clean and plain.
Lighting
- Use soft, natural light.Natural daylight from a window in front of you or slightly to the side is ideal. Avoid having a bright window behind you, as it will result in an overexposed image. Similarly, don't position yourself in a dark area, as it may result in an underexposed image.
- Avoid shadows and harsh light. Strong ceiling lamps or a single bright light on one side can create deep shadows on the face and background, which are not allowed on official ID photos.
- Soften the light if needed. If the light is too strong, diffuse it with a sheer curtain or white fabric, so shadows under your nose and chin become softer.
A rule of thumb: if you can see clear, dark shadows around your nose, eye sockets, or behind your head, the light setup needs adjustment before you take the photo.
Step 3: Position Yourself Correctly in the Frame
Biometric systems will correctly identify your face if it is centered in the frame, square to it, and within a specific size range.
Camera and Distance
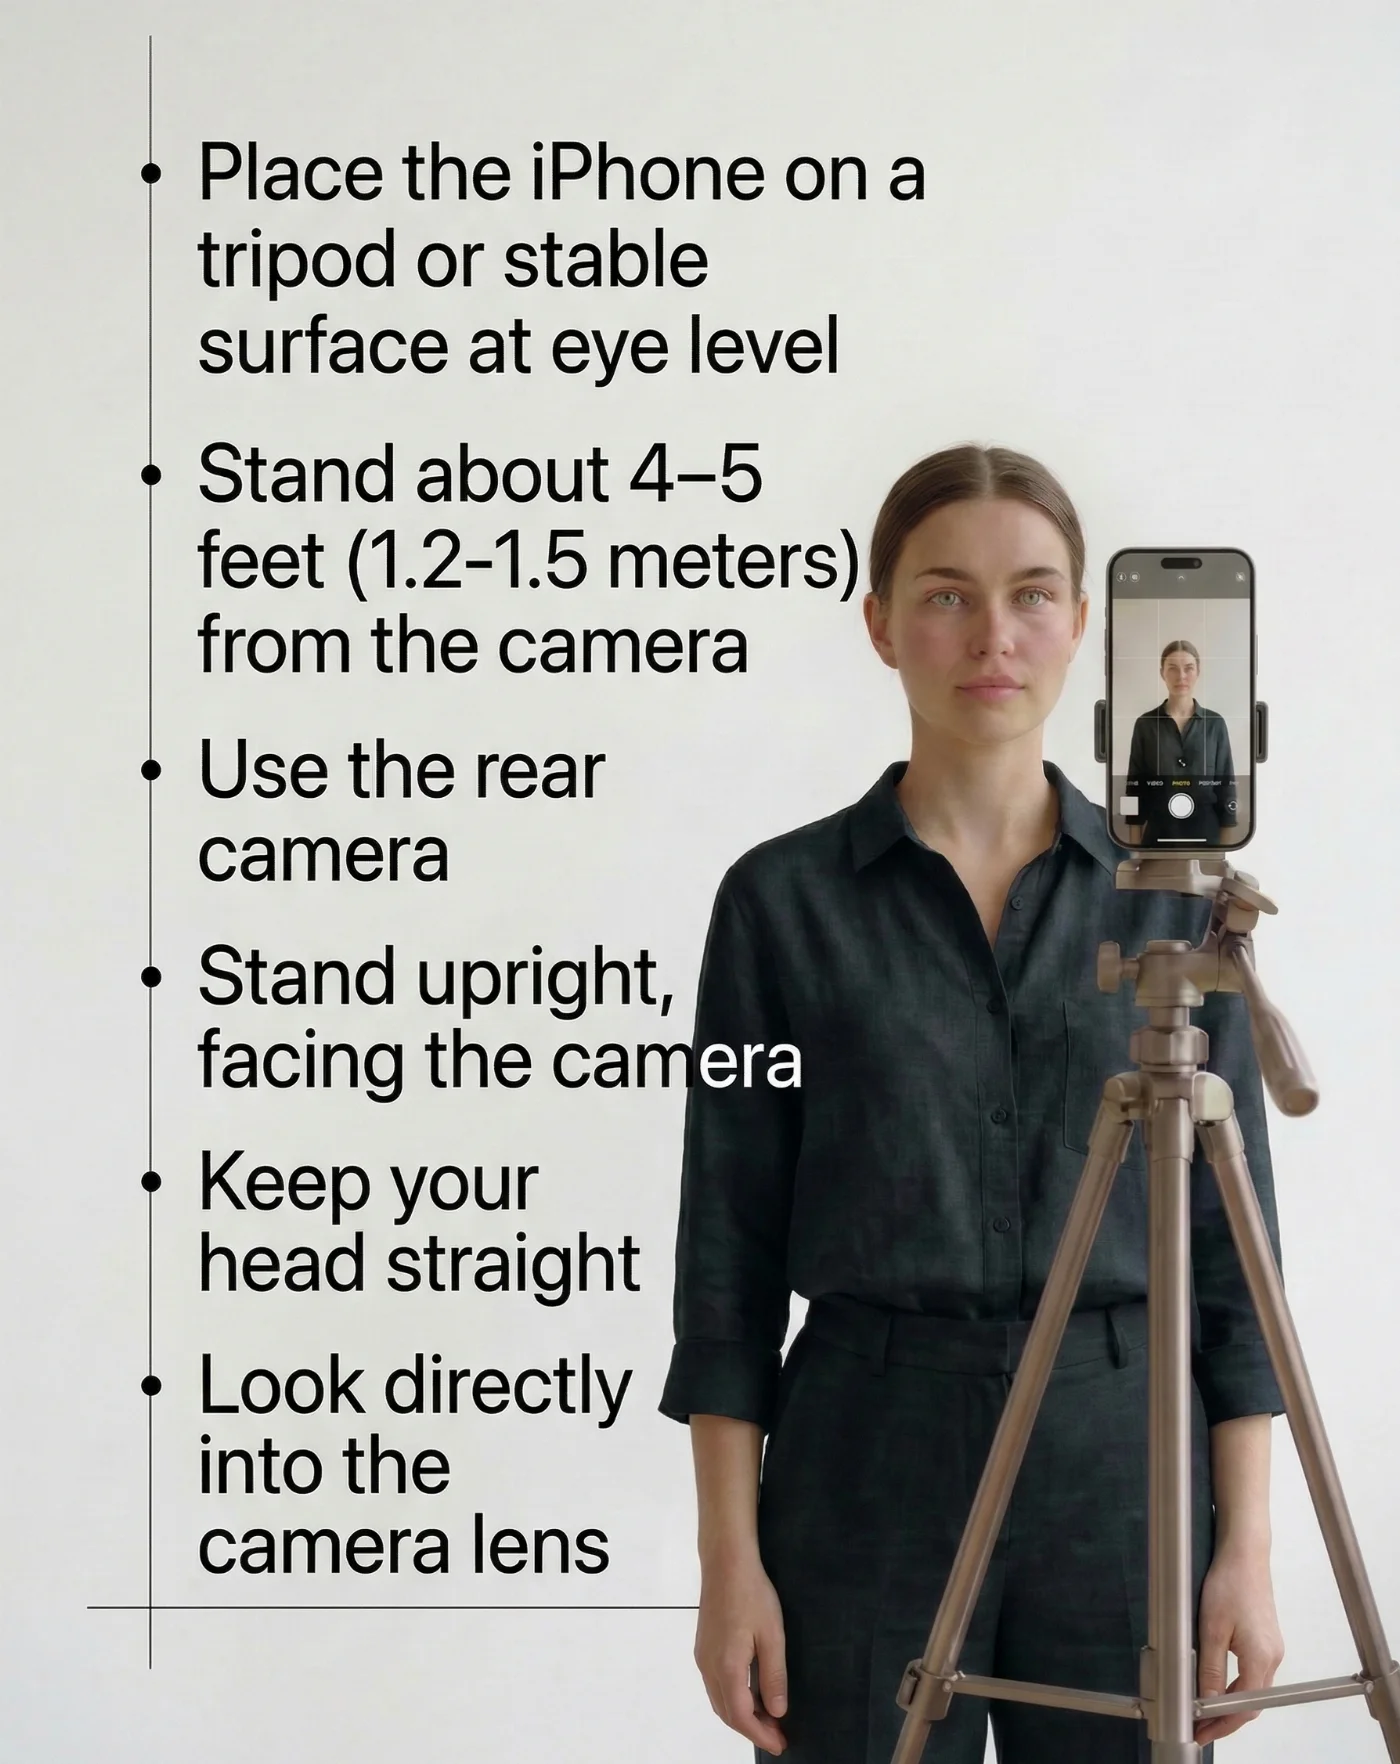
- Place the iPhone on a tripod or stable surface at eye level. Avoid holding the phone at arm’s length — this can result in unintentional tilt, distorted proportions, or blur.
- Stand about 4–5 feet (1.2–1.5 meters) from the camera. This distance helps avoid distortion and gives enough room for the upper shoulders and head in the frame.
- Use the rear camera and, if possible, ask your family member or friend to take the photo for you. If you are alone, use the timer, setting it for 3 or 10 seconds.
Your Position
- Stand upright, with shoulders relaxed, facing the camera.
- Keep your head straight: no tilt to the left or right, no raised or lowered chin.
- Look directly into the camera lens, not at your reflection on the screen.
In the preview, your head and upper shoulders should be visible, with some space above your head and on each side. You will adjust the exact crop later.
Step 4: Prepare Your Looks
 Clothing
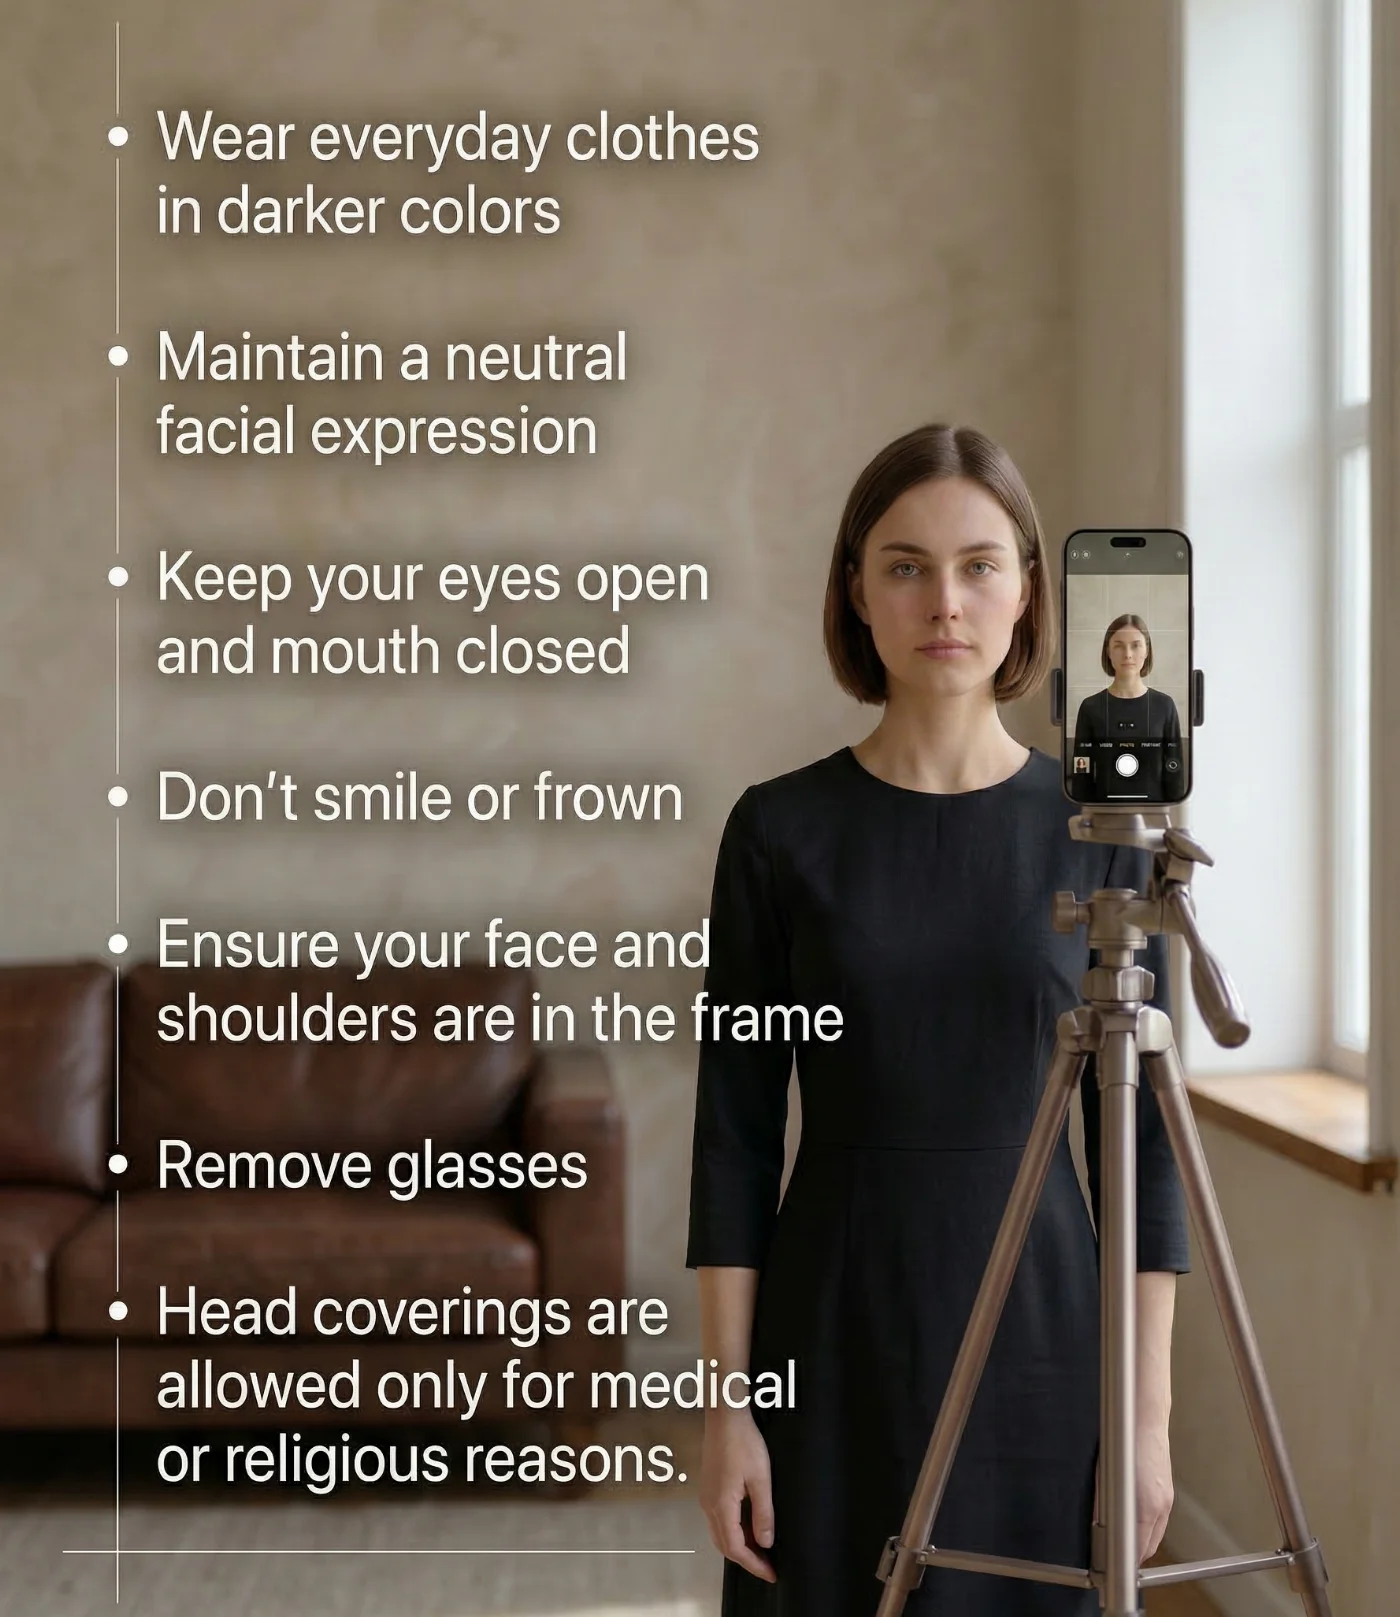
- Wear simple, everyday clothes in solid, darker colors that contrast with the light background. Avoid pure white tops, bold logos, busy patterns, or off‑shoulder styles that can blend into the background or look informal.
- Do not wear uniforms or camouflage, and skip anything that looks like official attire. Head coverings are only allowed for religious or medical reasons if they are worn regularly and do not obscure your face.
Face and Expression
- Keep a neutral facial expression.Mouth closed, eyes fully open. A subtle, natural smile (what they call "a Mona Lisa" smile) is often acceptable, but avoid any exaggerated expressions.
- Don't smile, frown, or laugh. Exaggerated expressions aren't permitted in passport, visa, and ID photos.
- Ensure your face is fully visible. No hair covering your eyes, eyebrows, or parts of your cheeks.
- Avoid any retouching. Beauty filters and smoothing effects alter your features and will most likely cause automatic systems to flag your photo as digitally enhanced, which isn't allowed.
- Remove glasses. Many authorities either require or strongly prefer photos without glasses to avoid glare and reflections. Sunglasses or any tinted lenses are not permitted in passport photos.
If you must wear glasses. Only prescription glasses are allowed, and they must not have tinted lenses or thick frames that obscure your eyes. Use frames without thick rims, make sure lenses are clear and free from reflections, and keep eyes fully visible. If you need to wear glasses for medical reasons, you will need to provide a signed doctor's statement. - You may only wear head coverings if they are required for religious purposes or medical reasons and allowed by your country’s rules. Your full face must still be visible.
Aim for a polished but realistic look that matches how you normally appear during identity checks or border control.
Step 5: Capture the Photo With iPhone
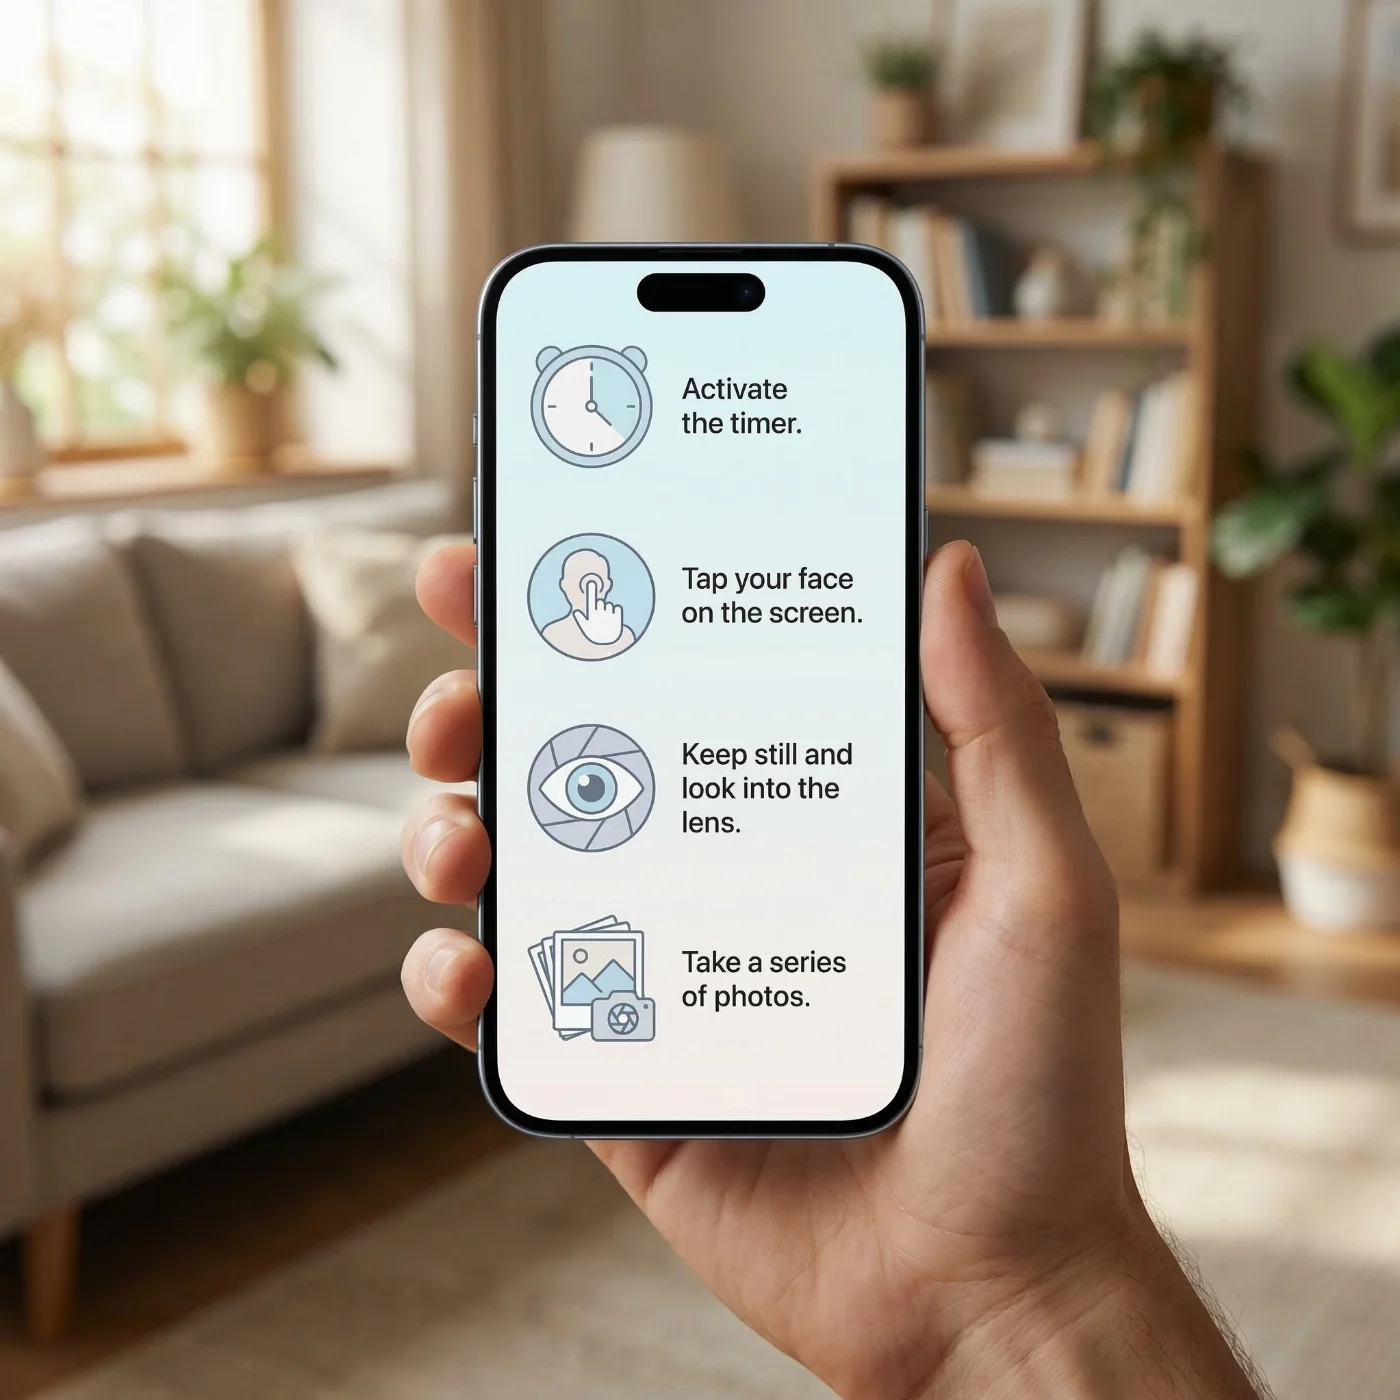
- Activate the timer (3–10 seconds). This eliminates camera shake and gives you time to take a suitable pose.
- Tap on your face on the screen.This sets the focus and exposure correctly, making your features sharp and properly lit.
- Keep still and look into the lens. Avoid blinking during the countdown. If you blink, simply repeat the shot.
- Take a series of photos. Capture at least 5–10 images with the same neutral expression. This gives you options to choose the best one later.
Do not use digital zoom. If your head looks too small, move the phone slightly closer rather than zooming in, which can reduce quality.
Step 6: Use a Passport Photo Maker to Apply Official Requirements
A raw iPhone photo is only the starting point for making an official ID photograph. A good passport photo maker will:
- Automatically crop the photo to the correct dimensions for your chosen country and document type
- Position your head and eyes within the required measurement range
- Help ensure the background and margins around your face match official guidelines
- Export the image in the correct resolution and file format for printing or a digital copy for online submission
This reduces the risk of small technical mistakes that lead to rejections.
How the Passport Photo App Fits Into the Process
PhotoGov is designed to create official photos that meet international ID regulations. The system uses built-in templates for 900 ID photos in over 150 countries. Just follow the steps below to convert your iPhone selfie into an application-ready photograph.
- Take a series of photos on your iPhone following the guidelines above.
- Choose the clearest, sharpest, and well-positioned image from your camera roll.
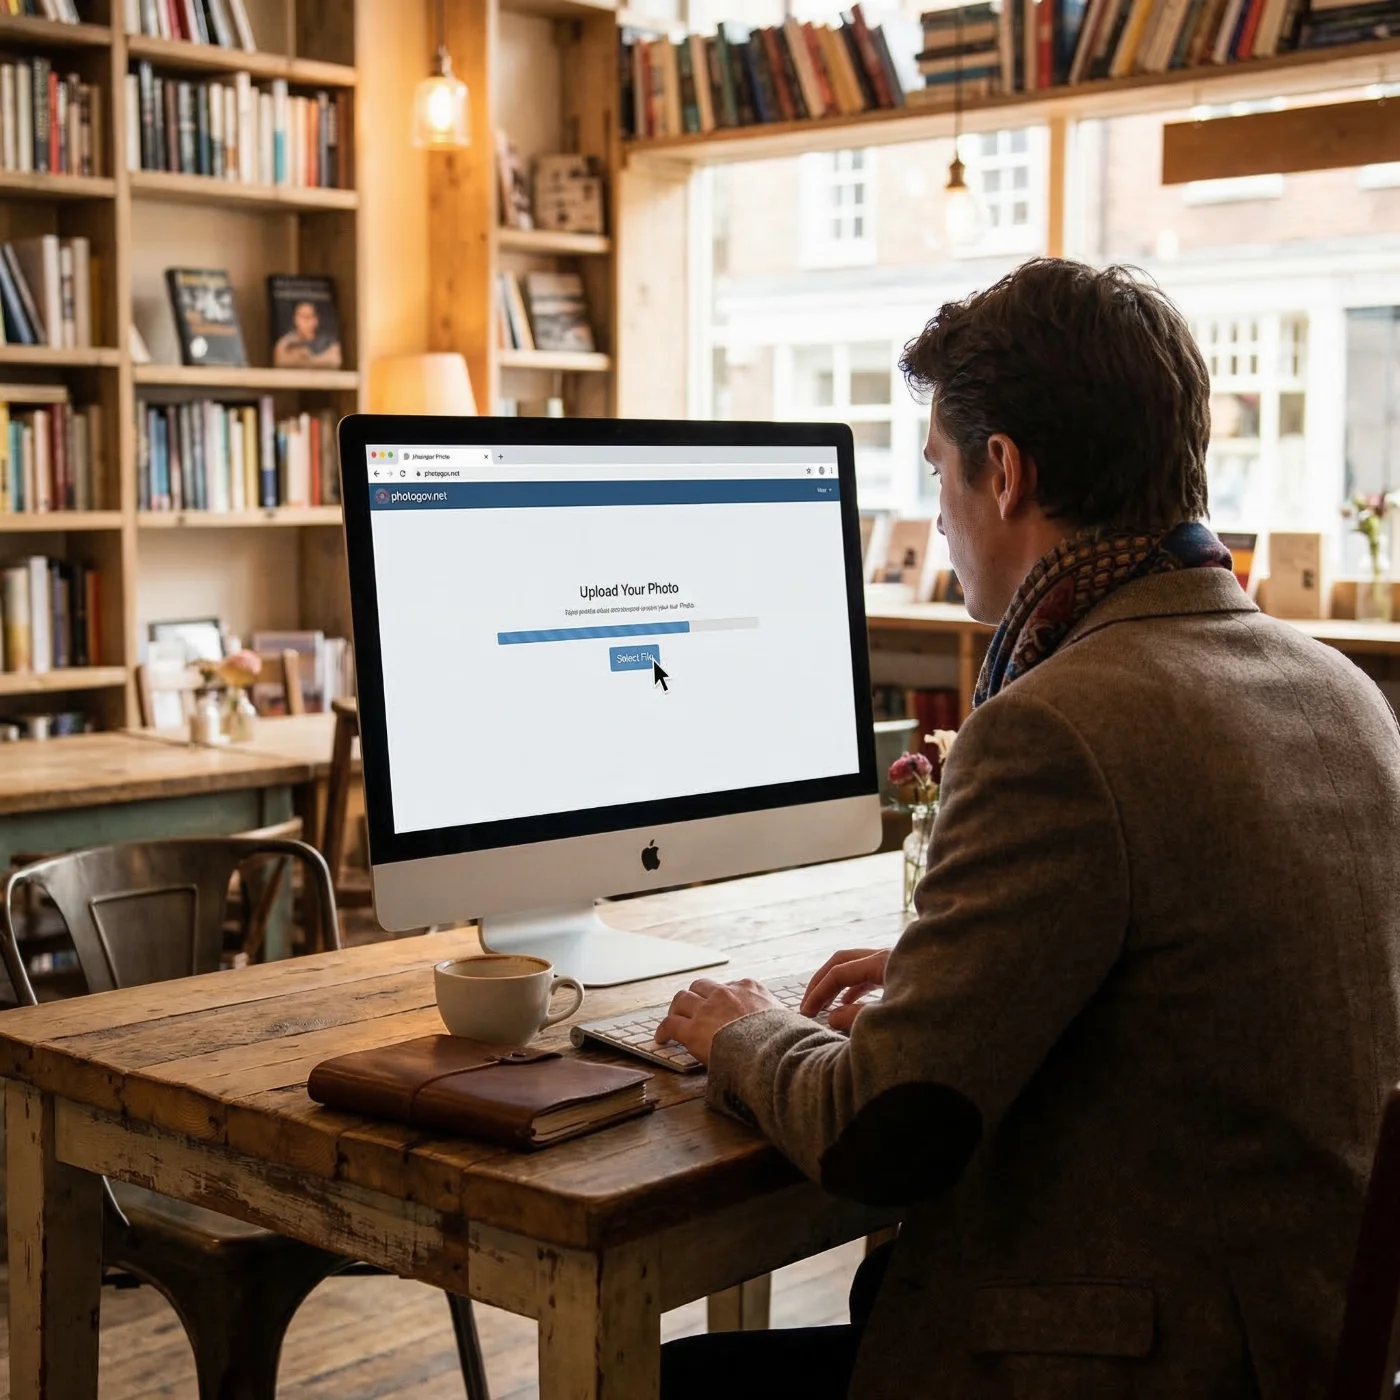
- Upload your digital photo to PhotoGov directly from your iPhone.
- Select your country and document type (for example, “U.S. passport”, “Schengen visa”, etc.).
- Let the tool automatically align, crop, and match the photo to the official standards.
- Choose an add‑on option of formal clothing adjustment to change your casual outfit into a neutral, professional look that meets official passport photo requirements.
- If your application is of high priority, select Human Verification for an additional, manual photo check by the PhotoGov's senior compliance specialist.
- Download an application-ready picture in a printable PDF format, or a digital copy for online submissions.
Instead of manually checking proportions, focus on getting a clean shot, while the passport photo maker handles the technical standards.
Step 7: Print Your iPhone Passport Photo
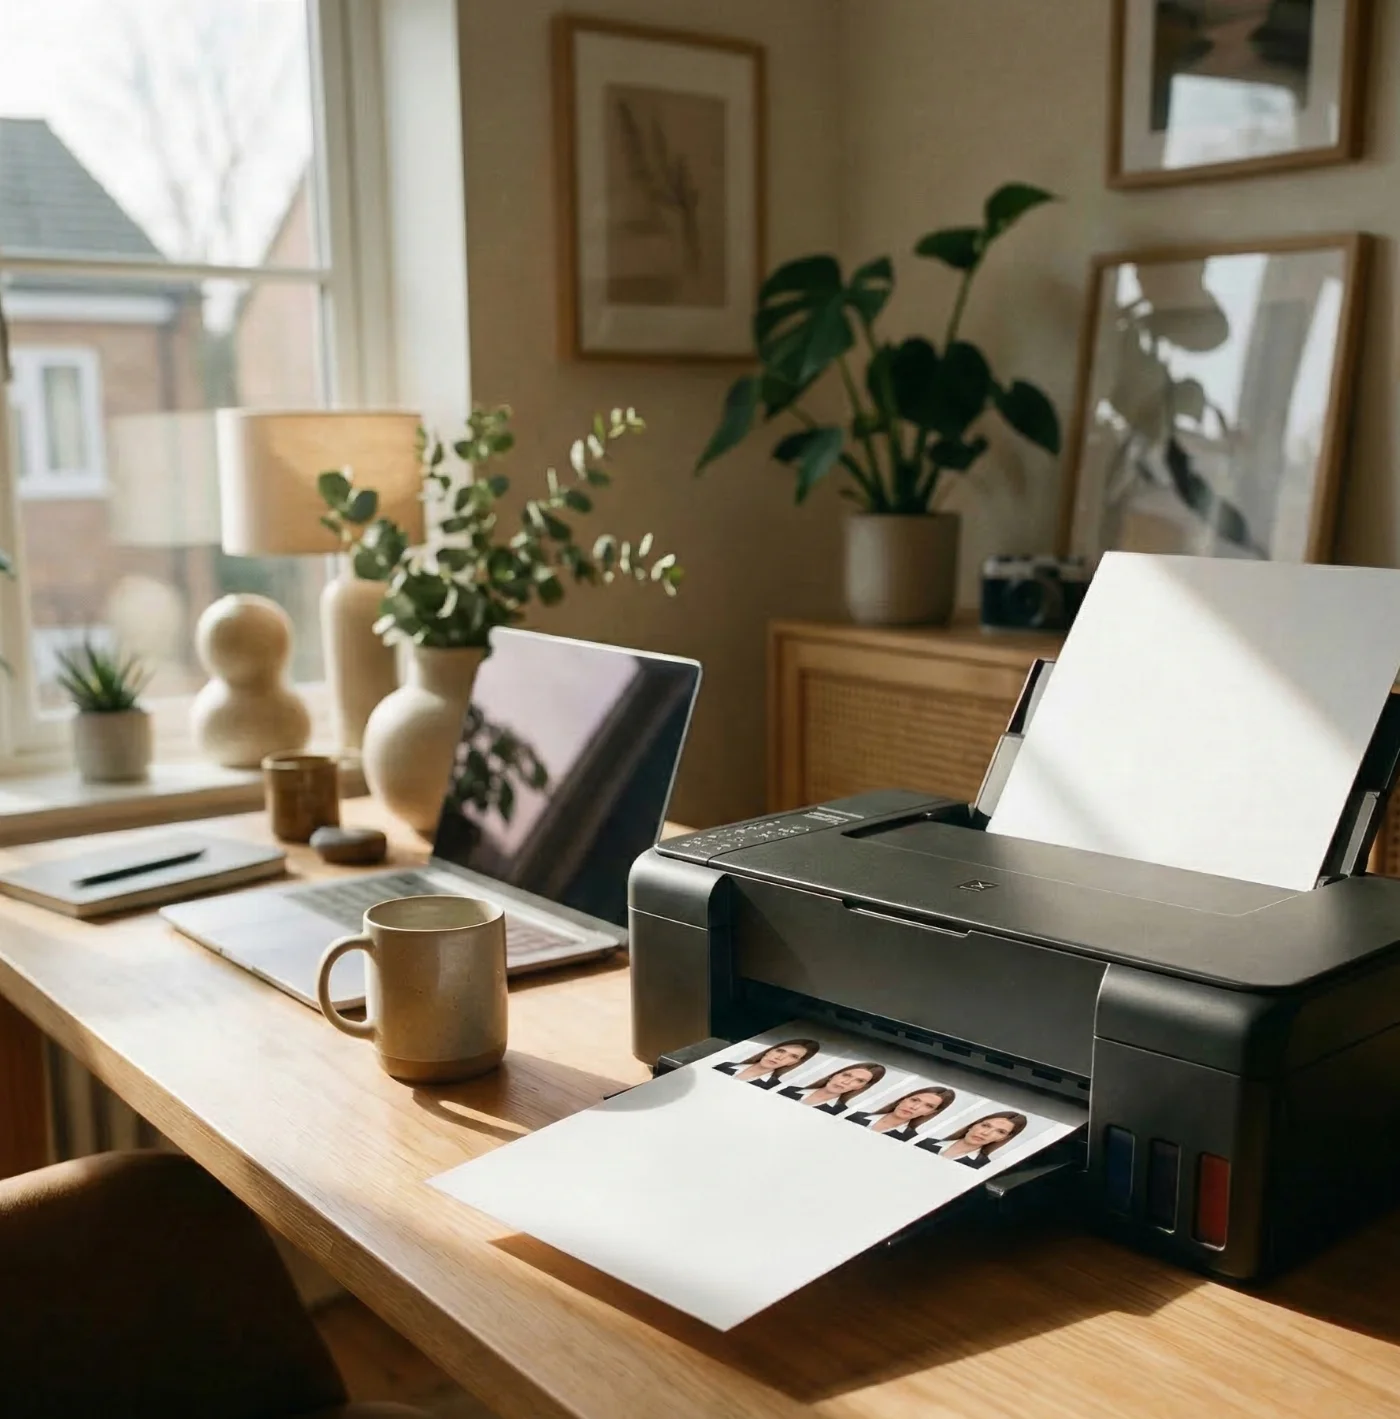
If your passport application requires a printed high-resolution photo, the print quality must also meet specific standards. You can print the image at home — but only if you own a professional photo printer and have photographic paper of the required quality, or visit a print shop or order prints online.
Printing Options
- Home printer. If you own a professional photo printer, use high‑quality photo paper (matte or glossy, depending on the requirements). Make sure printing is set to actual size (100% scale), not “fit to page”.
- Local photo lab or pharmacy. Transfer the file to a USB drive or send it from your iPhone, and ask the shop to print it at the exact passport size defined by the issuing authority.
- Online printing services. Check the nearest services where you can order prints, which will later be shipped to your home or office.
- Do not cut into your face when trimming the photo
- Keep the prints clean and flat, avoiding bends, scratches, or fingerprints
- Do not laminate or alter the physical photo in any way
Well‑prepared digital files from your iPhone, combined with correct printing, usually look indistinguishable from studio‑made passport photos.
What is the Difference Between a Digital Passport Photo and a Printable One?
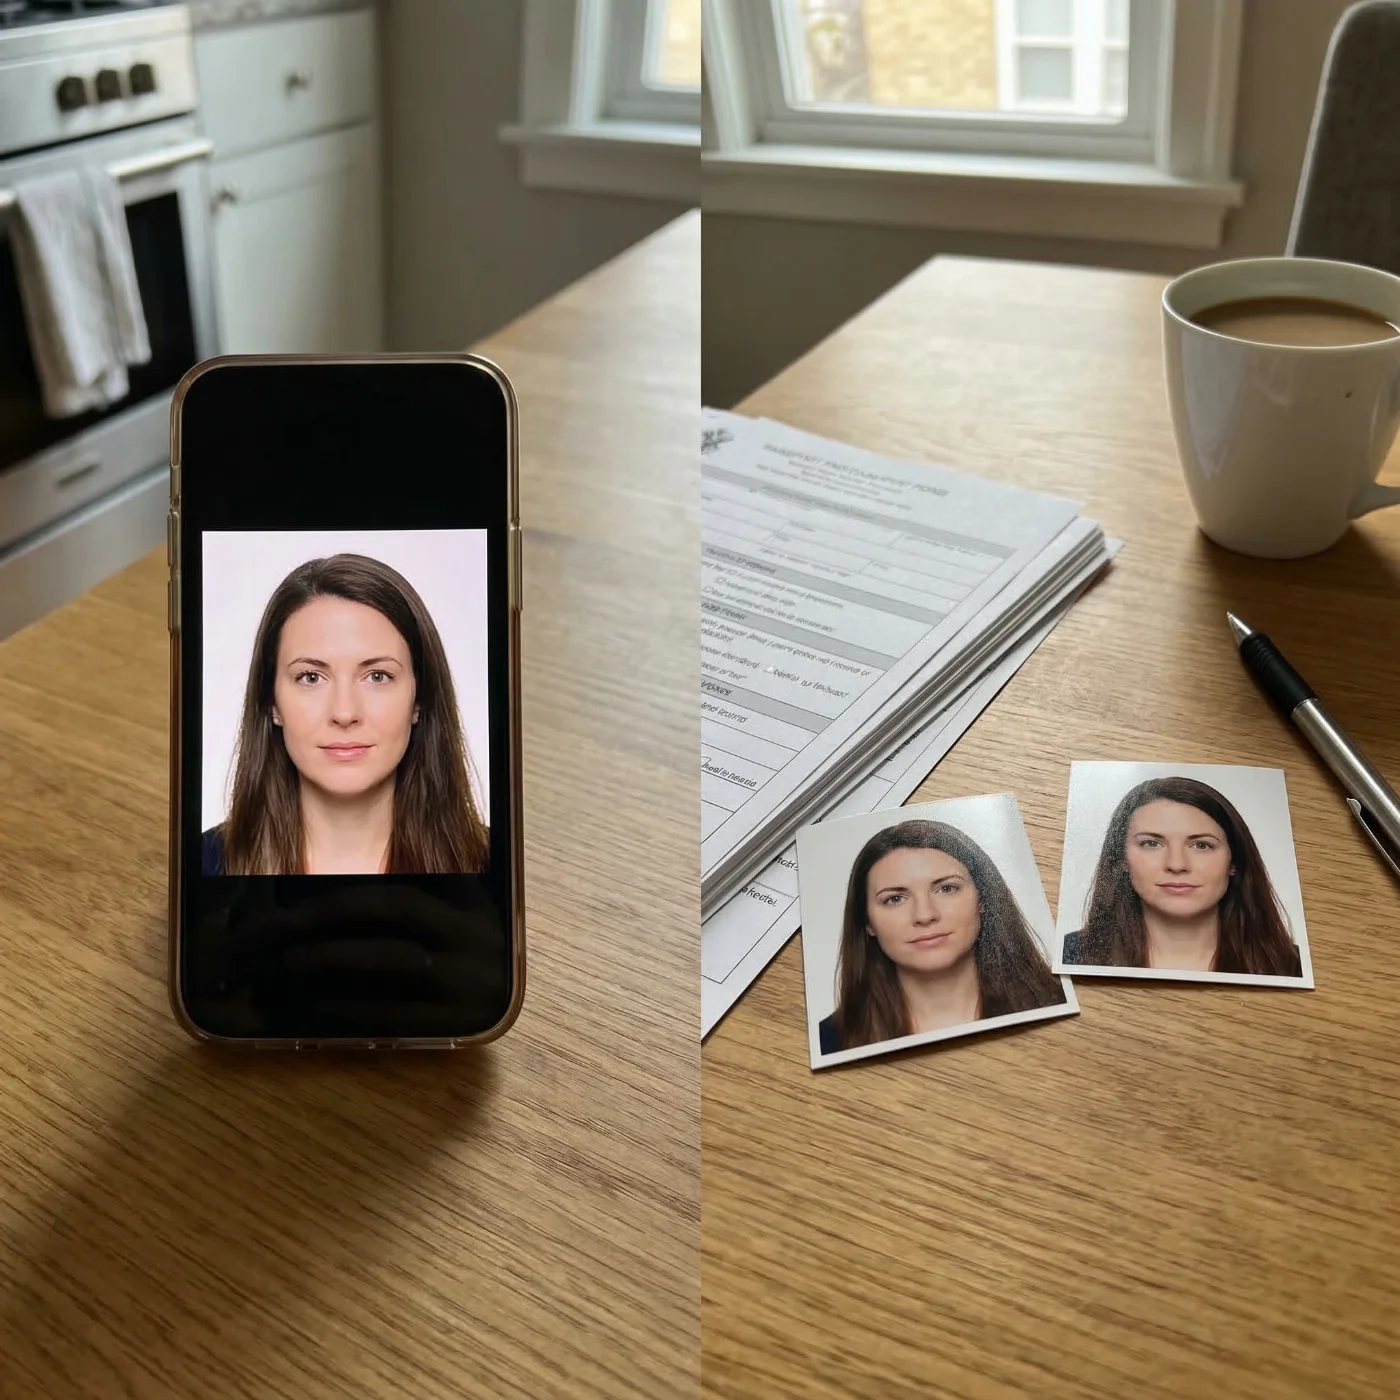
A digital passport photo is an image file that is required for online applications. Authorities publish exact specs for pixel dimensions, aspect ratio, and maximum file size (for example, a 600×600 px JPEG under 240 kB for a U.S. online passport, or a 900×1200 px JPEG for a UK digital passport photo. You must upload the digital photo directly to an online form.
A printable passport photo is a physical photo printed on high-quality photo paper at a specific size (for example, 2×2 inches for U.S. passports or 50×70 mm for Canadian passports). The printout is attached to a paper application or handed in at an embassy, consulate, or tourism agency office.
Both a digital and a printed photo must strictly adhere to international biometric standards: a plain light background, even lighting, neutral facial expression, head and shoulders centered within the shot, the head taking up about 50–80% of the image (depending on the document type).
How to Take a Child’s Passport Photo With an iPhone
Child passport photos follow the same biometric rules as adults: clear, front-facing image, plain white background, even lighting without shadows. The only leniency is for newborns—some countries accept partially closed eyes if facial features are fully visible.
Babies Who Cannot Sit Yet
Lay the baby on a white sheet over a firm surface. Hold the iPhone directly above, rear camera pointing straight down. Use soft window light; enable the 3–10 second timer so both hands steady the phone. Remove hats and headbands.
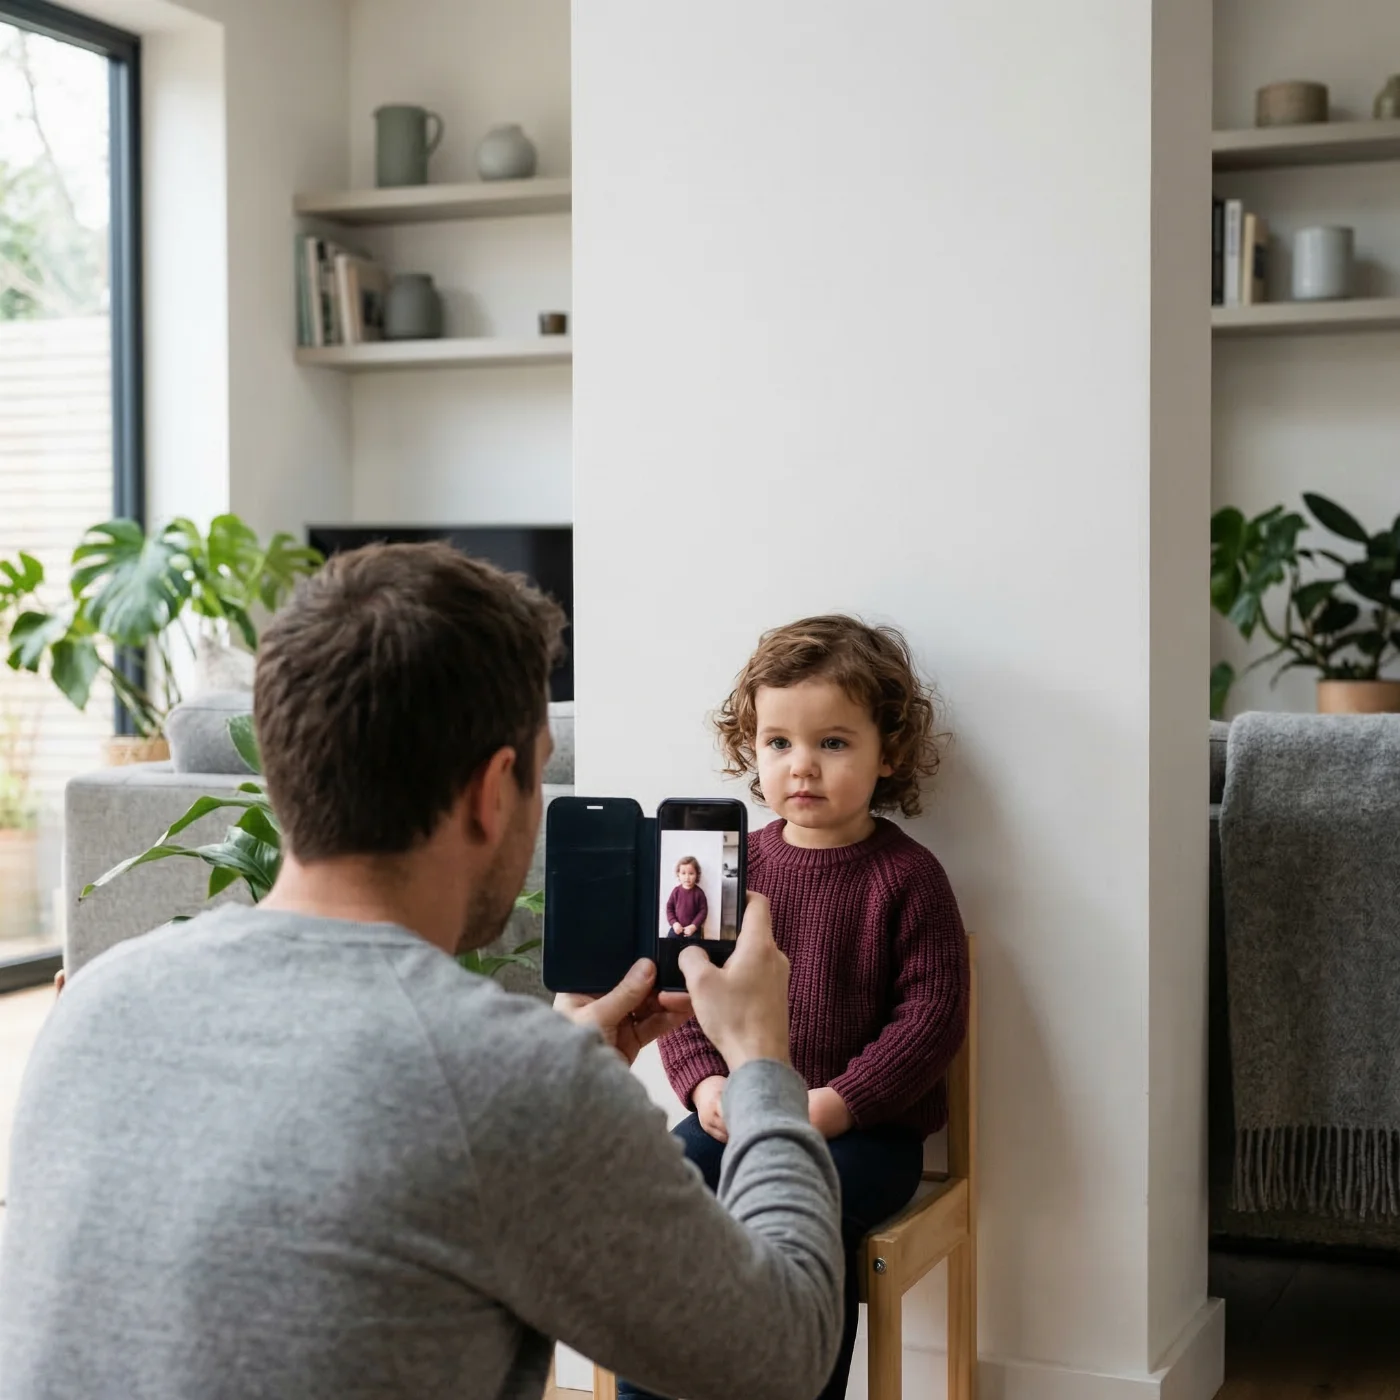
Sitting Babies and Toddlers
Position the iPhone at eye level on a tripod, 1–1.5 meters away. Use the rear camera only. For support, use a car seat lined with white cloth (babies) or a chair against a white wall (toddlers). A helper stands behind the phone, attracting attention with a toy held near—but outside—the frame.
iPhone Settings When Taking Passport Photos of Children
Tap the child's face on screen to lock focus before each shot. Avoid Portrait mode, filters, Live Photos, and flash. Keep sessions short; shoot when the child is rested.
Processing
Upload to PhotoGov for automatic cropping and compliance verification.
Common Mistakes to Avoid With iPhone Passport Photos
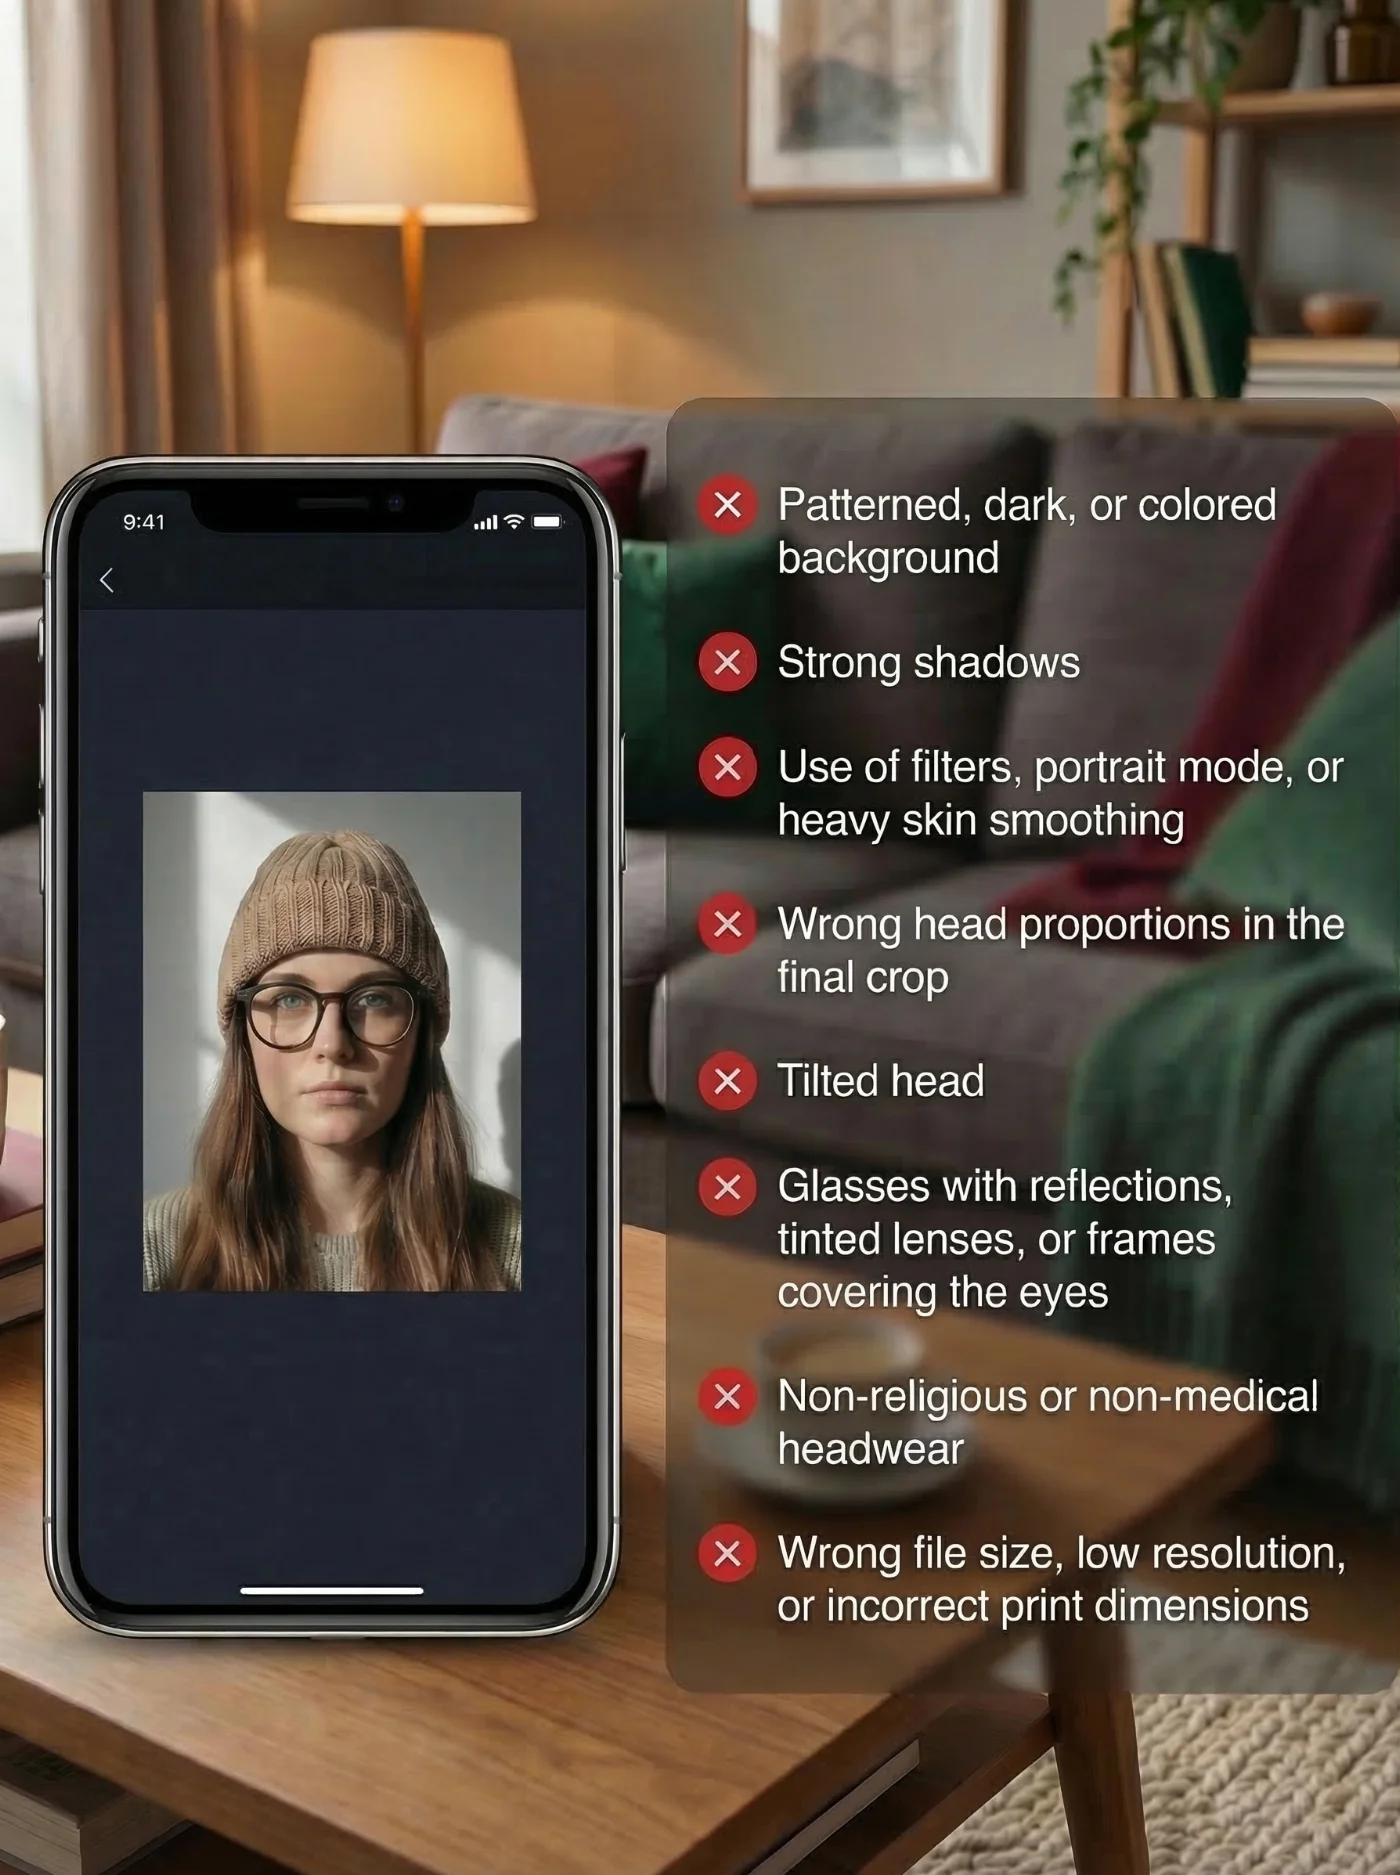
To finish, here are frequent pitfalls that cause home‑made passport photos to be rejected:
- Patterned, dark, or colored background instead of plain light
- Strong shadows on the face or behind the head
- Use of filters, portrait mode, or heavy skin smoothing
- Wrong head proportions in the final crop
- Tilted head or face turned away from the camera
- Glasses with reflections, tinted lenses, or frames covering the eyes
- Non-religious or non-medical headwear
- Wrong file size, low resolution, or incorrect print dimensions
If you avoid these issues, your iPhone‑based passport photo stands an excellent chance of being accepted on the first try.
Frequently Asked Questions
Can I Really Use an iPhone Photo for a Passport?
Yes. Modern iPhones produce more than enough quality for passport photos as long as you follow official rules on background, lighting, composition, and sizing. In most cases, authorities care about biometric compliance, not the specific camera you use.
However, some countries still require professionally made photographs for certain documents — for example, if you're applying for a Canadian passport or citizenship, you can only provide professionally shot images, signed by a photographer or a studio.
Do I Need a Special App to Take a Passport Photo With My iPhone?
You can capture the image with the built‑in Camera app, but using a dedicated passport photo maker or a passport photo app like PhotoGov simplifies cropping, sizing, and biometric checks. This reduces the risk of technical rejection even when the original shot is good (but improperly sized).
Are Selfies Acceptable for Passport Photos?
Selfie‑style photos are usually not recommended because arm’s‑length shots often introduce distortion, tilt, and uneven framing. It is better to use the rear camera with a tripod, stand, or helper so the lens is at eye level and the image is straight.
Can I Use Portrait Mode or Filters on My iPhone?
No. Portrait mode adds background blur, and filters or beauty effects alter the way your face looks. Passport photos must show a natural, unmodified appearance with a sharp, non‑blurred background.
How Close Should I Stand to the iPhone?
A distance of about 4–5 feet (1.2–1.5 meters) works well for most iPhones. This keeps facial proportions natural and leaves enough room in the frame for correct cropping around your head and shoulders.
How Do I Make Sure the Photo Meets U.S. Size Requirements?
The U.S. standard is a 2 x 2 inch photo with the head height and eye line within specific millimeter ranges. You can either set this up manually in an editor or let a passport photo maker, such as PhotoGov, automatically crop and scale the image to U.S. specifications. Please note that our service does not digitally alter facial features; it only crops and resizes images for US ID photos.
Can I Reuse an Older iPhone Photo From My Gallery?
Only if it was taken within the allowed time frame (typically the last 6 months), reflects your current appearance, including hairstyle, facial hair, and is shot according to the rules listed on this page. If in doubt, take a fresh photo instead of reusing an older one.
Do I Still Need to Go to a Photo Booth or Pharmacy if I Use PhotoGov?
Not necessarily. If your authority accepts digital uploads, you can submit the processed file directly. If printed photos are required, you can print the PhotoGov output at home on photo paper or send it to a local lab or pharmacy for professional printing.
What if My iPhone Passport Photo Gets Rejected?
If your photo is rejected, check the reason given: common issues include background, shadows, or incorrect size. You can reshoot with adjusted lighting and positioning, then process the new image again through a passport photo maker to confirm that it meets the specified standards.
Was this helpful?
25 found this helpful
Authored by:
Nathaniel K. Rowden (Compliance consultant)Approved author
Verified by Photogov experts
ICAO 9309 compliant
Based on official government sources
Helpful votes: 25
Was this helpful?
25 found this helpful