U.S. Online Passport Renewal: Digital Photo Upload Guide
Table of contents:
- How the Online Passport Renewal Photo Upload Works
- Your Online Passport Photo Upload Step-by-Step
- The Big Checklist: All Requirements Your Passport Renewal Photo Must Follow
- Travel.State.Gov Automatic Validator's Photo Check Sequence
- Common Rejection Causes and How to Resolve Them
- Troubleshooting MyTravelGov Error Messages
- Final Thoughts on the Online Passport Renewal
- Frequently Asked Questions
The U.S. Online Passport Renewal System (OPRS) requires applicants to submit a digital photo that meets a specific set of technical and biometric standards. Unlike printed photos with paper applications, digital uploads are processed entirely by an automated validation pipeline — no human reviewer is involved until the file passes every format, biometric, and quality check.
This guide covers all technical requirements for passport renewals via the Travel.State.Gov. It specifically explains how the automated validator evaluates each criterion and provides a precise reference for preparing a compliant file before upload. All specifications reflect current 2026 U.S. Department of State standards.
How the Online Passport Renewal Photo Upload Works
Travel.State.Gov serves as the applicant interface for the Online Passport Renewal System. It is not a simple file storage portal — uploaded photos are immediately processed against a multilayered set of federal compliance standards covering file structure, color accuracy, biometric geometry, and image quality. The system determines whether the submitted image meets the requirements for a legally valid U.S. identity document before the application advances.
Your Online Passport Photo Upload Step-by-Step
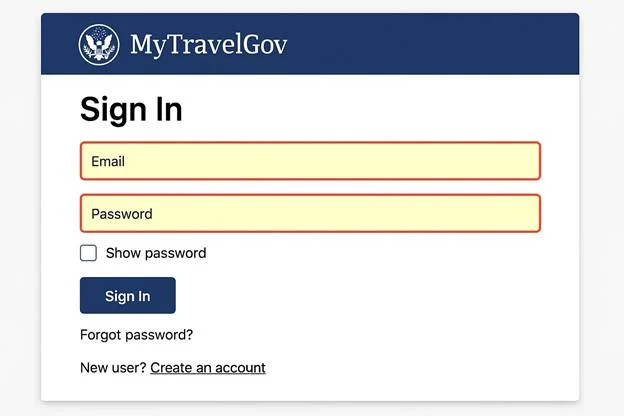
Log in to Travel.State.Gov using the email address associated with your federal services account
Complete the identity verification and personal information steps
Navigate to the Digital Photo step in the renewal workflow
Select and upload your image file
Review the compliance preview and confirm submission.
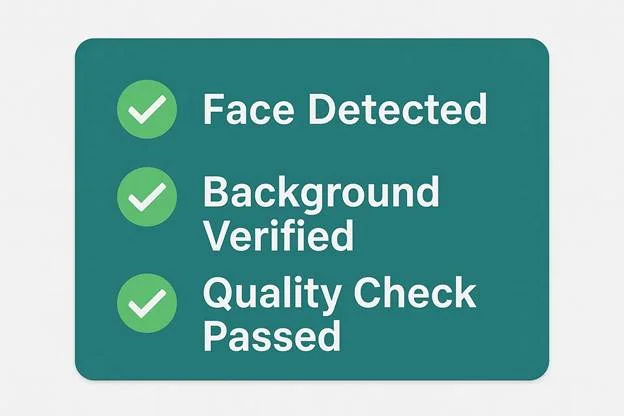
Your File is Accepted: Confirm and Submit the Image

When your photo passes all validations, it shows a preview with an on-screen confirmation request. Make sure you're 100% positive that the photo is relevant before clicking "Confirm."
At confirmation:
You perform the finished image preview
The system confirms that your identity is verified
Your photo is included in your official digital application packet.
The Big Checklist: All Requirements Your Passport Renewal Photo Must Follow
1. Accepted File Formats
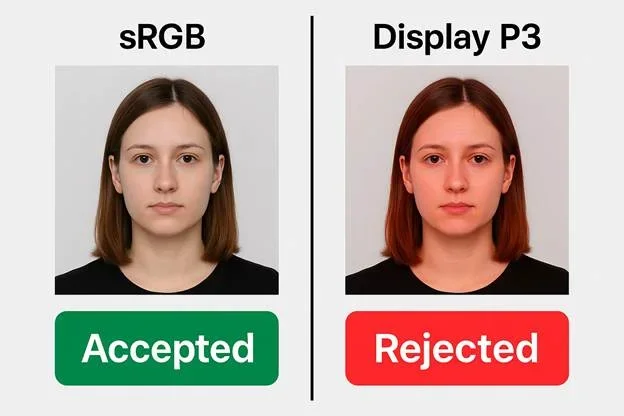
The Travel.State.Gov online renewal portal accepts JPEG, PNG, HEIC, and HEIF file formats. All submitted files must use the sRGB color profile regardless of format. Files encoded in Display P3, AdobeRGB, or any other wide-gamut color space are rejected: federal validation systems are built solely around the sRGB standard. Color values from non-sRGB profiles are not safely mappable and produce errors in background segmentation and skin tone analysis.
Requirement | Accepted | Rejected |
File format | JPEG, PNG, HEIC, HEIF | WEBP, TIFF, BMP, GIF |
Color profile | sRGB | Display P3, AdobeRGB, wide-gamut profiles |
Aspect ratio | 1:1 (square) | Any non-square ratio |
EXIF metadata | Intact, unstripped | Missing or corrupted metadata |
Note on the file format. Though JPEG, PNG, HEIC, and HEIF formats are accepted for online passport renewals, we recommend uploading your photo as a JPEG as it is the most common and the most reliable format. Make sure it is saved in the sRGB color profile, has a 1:1 aspect ratio, and contains EXIF metadata.
2. Pixel Dimensions and File Size
Parameter | Requirement |
Minimum dimensions | 600×600 px |
Maximum dimensions | 1200×1200 px |
Aspect ratio | 1:1 (equal width and height) |
Minimum file size | 54 KB |
Maximum file size | 10 MB |
Pixel dimensions are the first attribute the validator checks. Files outside the accepted range are rejected immediately, before any biometric or quality analysis takes place.
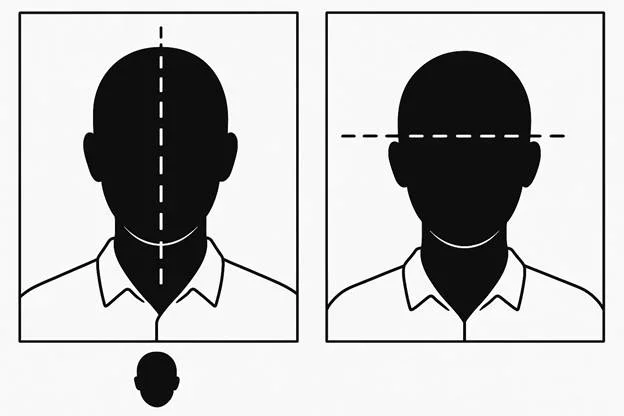
3. Head and Biometric Positioning
Head height must occupy 50–69% of total image height, measured from chin to crown
Eyes must be open, fully visible, and positioned within the standard U.S. biometric landmark zone
Face must be centered horizontally and vertically within the frame
Expression must be neutral with mouth closed
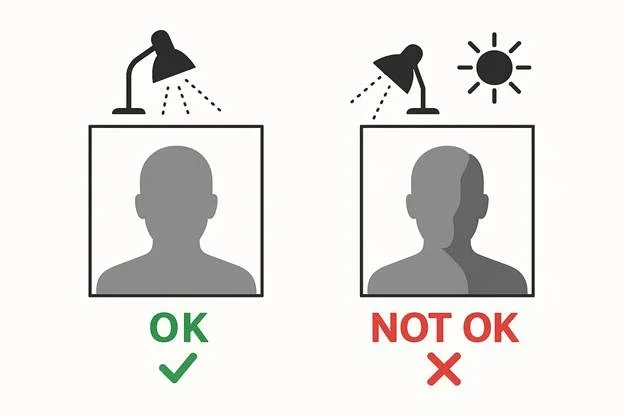
4. Background and Lighting
Background must be solid white (#FFFFFF) with no gradients, shadows, patterns, or texture
Lighting must be uniform across the entire face and background
No shadows on the face or behind the head
No hotspots, glare, or directional lighting that creates brightness variation
5. Prohibited Elements
Glasses of any kind
Hair covering the eyes or eyebrows
Filters, AI enhancements, skin-smoothing software, or portrait mode processing
Digital background replacement or retouching of facial features.
Travel.State.Gov Automatic Validator's Photo Check Sequence
The U.S. Department of State's automatic validation system evaluates uploaded images in a fixed sequence. A failure at any stage halts further processing and returns a rejection message. Let's explore them in detail.
1. File Structure and Metadata Integrity

Before any image content is analyzed, the system inspects the file's structural properties. Checks include:
File format and MIME type identification
JPEG, PNG, HEIC, or HEIF structural validity
sRGB ICC profile presence and compatibility
EXIF metadata completeness — missing or corrupted metadata triggers rejection
EXIF orientation flag — the system checks whether the orientation is encoded correctly; files that rely on orientation flags without pixel-level encoding may be rotated incorrectly by the validator
Absence of multi-layer, multi-frame, or motion metadata containers (common in Live Photo captures)
Important note. Unaltered, unedited original images from smartphones and digital cameras keep this information intact. However, if you're trying to use a screenshot, or a photo saved from a messenger app, or a social media feed — most likely, this essential data would be stripped. Always use the original photo (opposed to screenshots or images saved from apps or websites) for your passport renewal.
2. Pixel Dimensions and Aspect Ratio
The validator confirms that width and height are equal and fall within the 600x600–1200x1200 px range. Non-square files are treated as cropping errors and rejected before face detection begins.
3. Facial Landmark Mapping
The system locates a defined set of biometric reference points: eye corners, nose bridge, chin point, eyebrow arches, mouth edges, and jawline contours. Each landmark must fall within accepted distance and angle tolerances relative to the others. Mapping fails when:
The image is out of focus or pixelated
The head is tilted or not facing the camera directly
Hair, glare, or other obstructions occlude the eyes or eyebrows
The mouth is open, or the expression deviates from the neutral template
The head occupies less than 50% or more than 69% of the image height
It is important to keep this in mind when shooting the photo for your passport renewal. If you're choosing a DIY process, make sure all requirements listed in this article are fully met.
4. Background Segmentation
The automatic validator isolates the foreground subject from the background by detecting the expected uniform white field. Segmentation fails when:
The background contains any yellow, gray, or beige toning
Shadows fall on the wall behind the subject
The background has visible texture, creases, or patterns
Uneven illumination creates brightness gradients in the background area
The system checks for #FFFFFF at the pixel level, not approximate whiteness as perceived by a human viewer. Even, uniform background in the photo file that you submit with your passport renewal application is essential for it to be accepted.
5. Lighting and Exposure Analysis
The lighting on the passport photo has to be natural, even, and diffused. The automatic validator analyses it by "scanning" pixel brightness across the full image. It will flag the image as inappropriate in the following cases:
Significant brightness differential between the left and right sides of the face
Shadows beneath the chin or beside the nose
Overexposed areas where highlight detail is clipped
Underexposed areas where shadow noise obscures facial features
6. Color Profile and Compression Quality
The final checks confirm sRGB compliance and image quality:
Color profile embedded in the file must be sRGB
No color cast from artificial lighting or incorrect white balance
The image is not over- or underexposed
Compression artifacts do not degrade facial detail to the point where landmark extraction fails.
Common Rejection Causes and How to Resolve Them
Non-square aspect ratio. The validator rejects any file where the width and height are not equal.
Fix: Re-export the image with a 1:1 crop before resubmission.
Non-white or non-uniform background. Any tint, shadow, gradient, or texture in the background fails the segmentation check.
Fix: Reshoot against a flat white surface under diffuse, uniform lighting. Minor background tinting can be corrected in software only within the limits of permissible editing (softening uneven white areas toward #FFFFFF is permitted; painting over or digitally replacing the background is not).
Incorrect color profile. Files in Display P3 or AdobeRGB fail color validation regardless of how the image looks visually.
Fix: Re-export the file with the sRGB color profile explicitly selected. This applies to HEIC files converted from Apple devices, which default to Display P3.
EXIF orientation error. The image appears correctly oriented on the device but arrives rotated at the validator. This occurs when the file relies on an EXIF orientation flag rather than pixel-level orientation.
Fix: Use an export tool that bakes orientation into the pixel grid before submission.
Facial landmark detection failure. The validator cannot locate one or more required biometric points. Common causes: blur or pixelation, head tilt, hair over the eyes or eyebrows, glasses, open mouth, or incorrect head-to-frame ratio.
Fix: Reshoot with the camera held level, subject facing directly forward, hair pulled back, no eyewear, and neutral expression.
Overexposure or underexposure. Detail loss from extreme exposure cannot be recovered in post-processing without introducing artifacts.
Fix: Reshoot in controlled lighting with even illumination across both sides of the face.
Excessive compression or low resolution. Files saved at very low JPEG quality settings lose edge detail and introduce blocking artifacts that disrupt biometric mapping.
Fix: Export at 85-92% JPEG quality. Upscaling a low-resolution original introduces pixelation and should not be used as a substitute for a properly captured image.
Live Photo or motion metadata. HEIC files captured as Live Photos contain multiple frames and motion data in the container. This metadata can cause the upload system to classify the file as a multi-frame or animated container.
Fix: Disable Live Photos before capturing passport photos, or use a converter that strips motion metadata and exports a single static frame.
Troubleshooting MyTravelGov Error Messages
Error Message | Likely Cause | Resolution |
"File Must Be JPEG" | File format not recognized or color profile mismatch | Re-export as JPEG or PNG in sRGB from the original source |
"Photo Does Not Meet Requirements" | Pixel dimensions, color profile, or background segmentation failure | Verify dimensions (600–1200 px square), sRGB profile, and background uniformity |
"Face Not Detected" | Landmark mapping failure due to blur, occlusion, tilt, or incorrect head ratio | Reshoot with sharp focus, direct camera angle, no obstructions, head at 50–69% of frame height |
"Rotate Your Photo" | EXIF orientation flag misread by validator | Re-export with orientation baked into pixel data |
"Upload Failed" | File structure, metadata, or color profile incompatibility preventing processing | Re-export from original camera source; avoid screenshots, re-saves, or format conversions without sRGB output |
Final Thoughts on the Online Passport Renewal
The Travel.State.Gov upload validator applies U.S. Department of State specifications in a fixed automated sequence — file structure and format first, then dimensions and aspect ratio, then biometric landmark mapping, background segmentation, lighting analysis, and color profile validation. A photo that satisfies every requirement in this sequence will pass without manual review. The most common failure points are color profile (sRGB required regardless of file format), background uniformity (#FFFFFF, no shadows or gradients), head-to-frame ratio (50–69% of image height), and EXIF orientation in HEIC files. Addressing these before upload eliminates the majority of rejection causes.
Frequently Asked Questions
What File Formats Does Travel.State.Gov Accept for Passport Renewal?
The online passport renewal portal accepts JPEG, PNG, HEIC, and HEIF. All formats must use the sRGB color profile. Note that HEIC and HEIF are accepted exclusively by the online renewal portal — paper passport applications, U.S. visa submissions, and DV Lottery entries require JPEG only.
Why is sRGB Color Standard Required for My Passport Renewal?
U.S. federal imaging systems are calibrated to the sRGB color standard. Files encoded in other color spaces (Display P3, AdobeRGB) produce unpredictable color values when read by sRGB-based validators, causing failures in background uniformity detection and skin tone analysis.
What Pixel Dimensions are Required for My Passport Renewal Photo?
The image must be square with equal width and height between 600 px and 1200 px per side. Pixel dimensions are the first attribute the validator checks; files outside this range are rejected immediately.
What is the File Size Limit for My Passport Renewal Photo?
The accepted file size range is 54 KB to 10 MB. Files below the minimum lack sufficient detail for biometric extraction; files above the maximum are rejected at upload.
Why are Non-Square Digital Passport Photos Rejected?
A non-square crop misaligns the face relative to the biometric template the validator uses for landmark mapping. The system identifies unequal dimensions as a format error and rejects the file before facial analysis begins.
Why is My HEIC Photo Being Rejected Despite HEIC Being an Accepted Format?
HEIC files from Apple devices default to the Display P3 color profile. Even though HEIC is an accepted format, a Display P3 color profile will cause rejection at the color validation stage. Convert the file to sRGB before submission. Additionally, HEIC files captured as Live Photos contain motion metadata that can cause the upload system to treat the file as a multi-frame container. Disable Live Photos before capture or strip motion metadata during conversion.
Can I Edit My Photo Before Uploading?
Cropping to the correct 1:1 ratio and adjusting white balance or mild exposure corrections are permissible. Skin smoothing, AI retouching, face reshaping, digital background replacement, filters, and portrait mode enhancements are prohibited. These modifications alter facial geometry and texture in ways that disrupt biometric processing.
Does DPI Matter for Digital Uploads?
No. DPI is a print metadata value and is not evaluated by the online upload validator. The system assesses pixel dimensions, aspect ratio, file format, color profile, and image content.
Was this helpful?
64 found this helpful
Authored by:
Nathaniel K. Rowden (Compliance consultant)Top expert
Verified by the Photogov compliance team
ICAO 9309-compliant
Based on official government sources
Helpful votes: 64
Was this helpful?
64 found this helpful
We value your Privacy
We use cookies to enhance your browsing experience, serve personalized ads or content. By clicking “Accept All”, you consent to our use of cookies.