U.S. Digital Passport Photo Rejected? 2026 Fix Checklist
This 2026 Guide covers the full set of reasons a digital passport photo can be rejected, explains how the automated review system evaluates each requirement, and provides a precise fix checklist to use before resubmission. All specifications reflect 2026 U.S. Department of State standards.
Why U.S. Digital Passport Photos Get Rejected
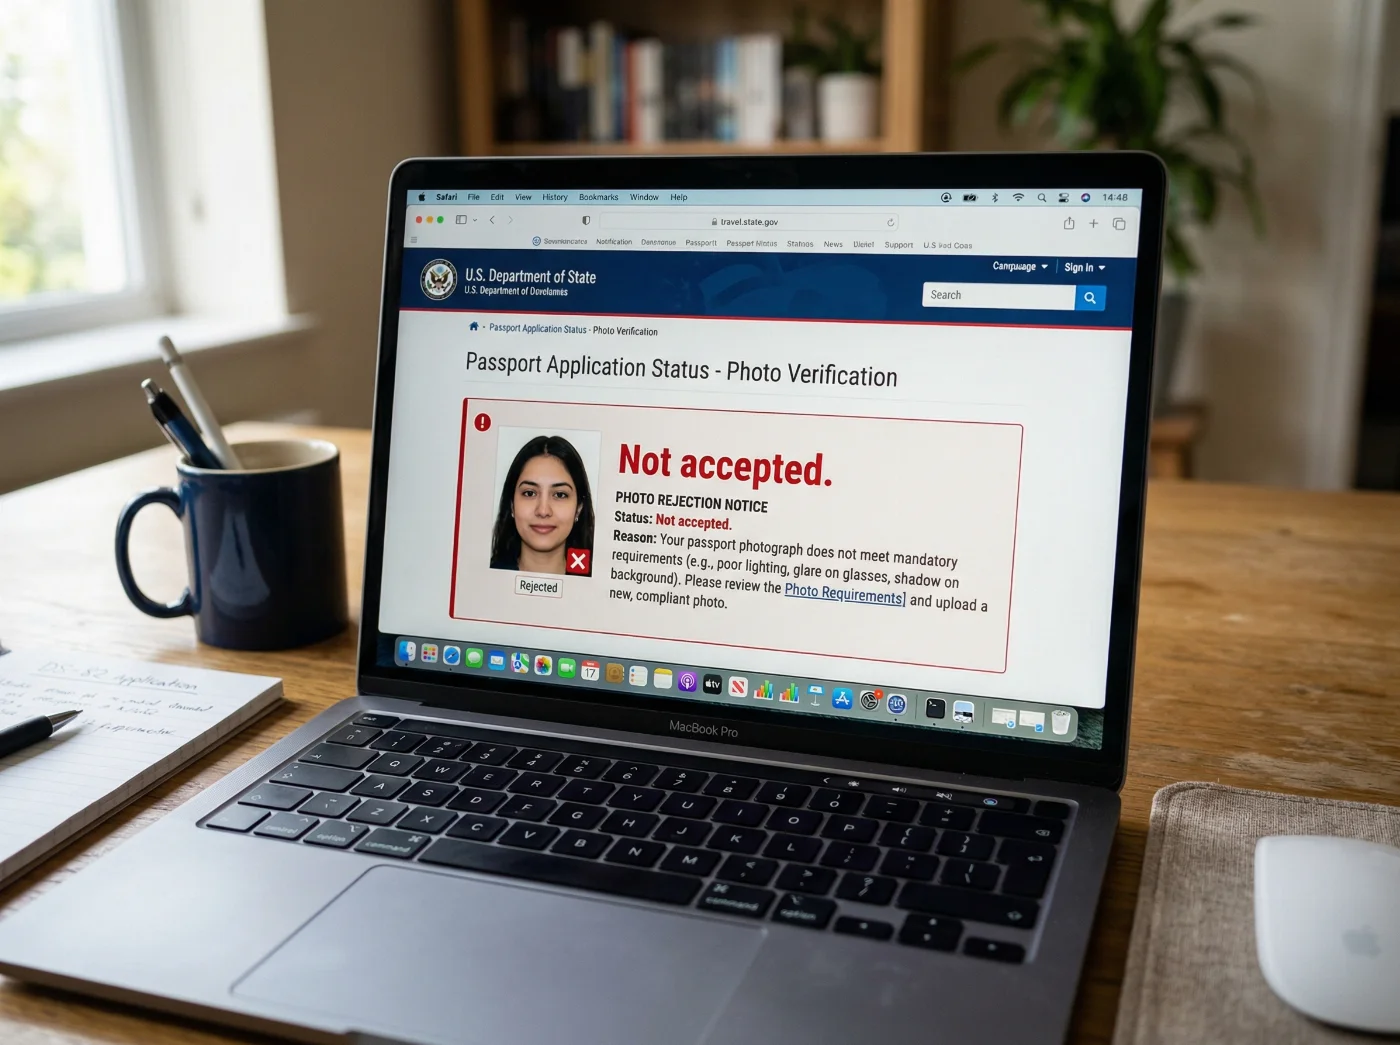
U.S. digital passport photo rejections follow a predictable pattern. The Department of State's online renewal portal runs every uploaded image through a layered automated validation pipeline before a human reviewer is involved.
The photo approval pipeline enforces strict technical requirements — pixel dimensions, file format, color profile, exposure levels, background uniformity, and biometric alignment — and it rejects any file that falls short of any single criterion. Subtle issues that would pass a casual human inspection, such as an off-white wall, a minor color temperature shift, or a head positioned slightly outside the required size range, trigger immediate failures. To avoid rejections, use expert advice in this article to create a digital passport photo that is accepted on the first try.
How the U.S. Digital Screening Process Works
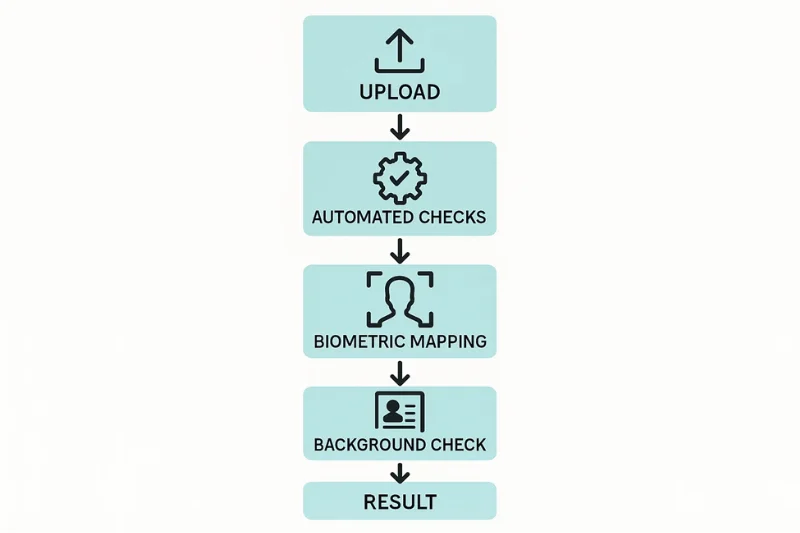
Validation begins the instant you upload a file. The automated system scans image properties before any biometric analysis takes place. Only files that pass automated checks are forwarded — in a limited number of cases — to a human reviewer.
Automated review checks:
File dimensions and aspect ratio
File type (JPEG required)
Color profile (sRGB required)
File size limits
Metadata integrity
Image orientation
Exposure and brightness levels
Human review applies when:
The automated system cannot confidently classify the image
Biometric feature detection is inconclusive
Lighting or background quality is marginal.
What the System Checks
The U.S. system evaluates uploaded files in a fixed sequence. Failures at any stage halt further processing.
Check Type | What It Looks For | Common Failure Points |
Size | 600×600 px – 1200×1200 px, square | Incorrect pixel dimensions or non-square crop |
File Specs | JPEG + sRGB | Wrong color profile, HEIC exports for visas/DV Lottery entries |
Face Landmarks | Head ratio, eye level | Head too large or too small |
Background | Pure white, no shadows | Off-white, uneven texture |
Compression | No artifacts or pixel noise | Over-compressed image |
Why Automated Review Has Become Stricter
As more people renew passports online, the system leans much more on automated checks instead of human judgment. That shift has real consequences: the tolerance for “almost OK” photos is much smaller, background and lighting flaws now trigger instant rejection, off‑center or poorly cropped images are blocked, even small departures from the required sRGB color space get flagged, and processing artifacts from smartphone cameras are picked up reliably. Automation speeds things up, but it also removes the flexibility a human reviewer might once have used to approve a borderline photo.
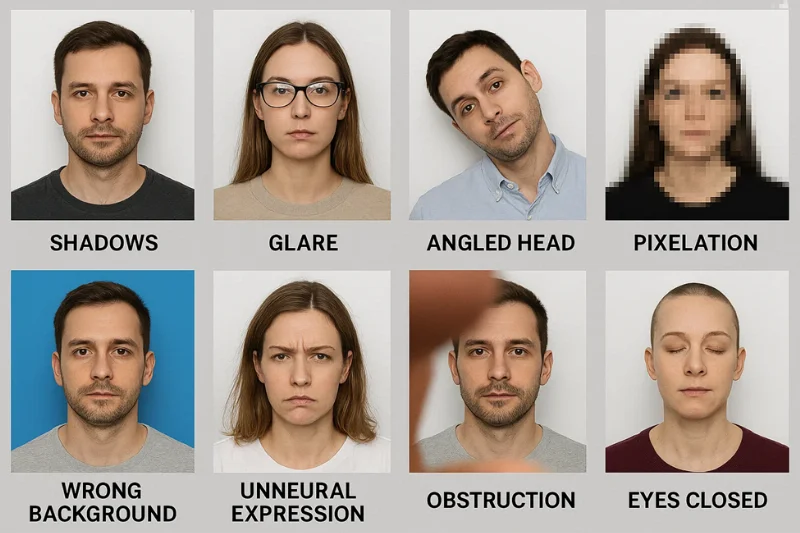
Top 14 Reasons U.S. Digital Passport Photos Get Rejected
Each entry below identifies the error, explains why the system flags it, cites the specific rule it violates, and describes the type of correction required.
1. Incorrect Dimensions or Non-Square Aspect Ratio
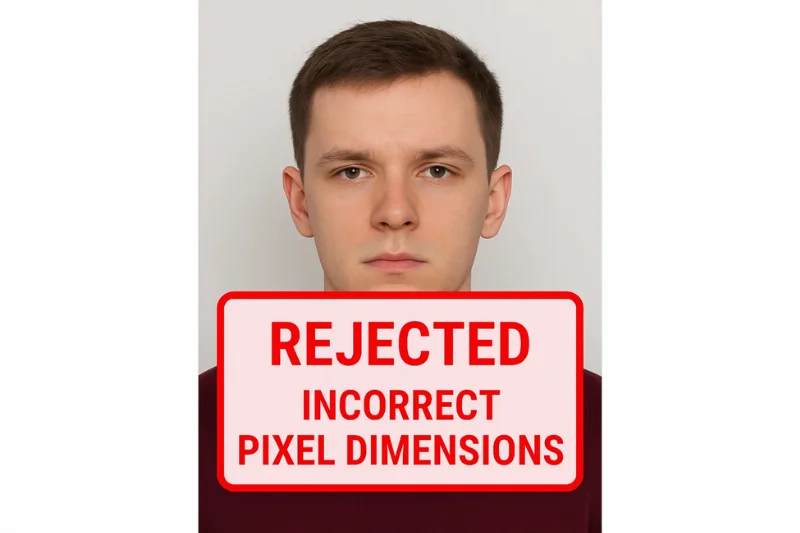
The system requires a square image between 600×600 px and 1200×1200 px. Any file outside this range, or with unequal width and height, is rejected at the first validation step before biometric analysis begins. The validator checks pixel dimensions first; a non-square shape misaligns the face within the biometric template and is treated as a cropping error.
Rule violated: U.S. Department of State 1:1 aspect ratio requirement, minimum 600×600 px resolution.
Fix: Re-crop and re-export to match the required square dimensions.
2. File Too Large or Too Small
The file must be 240 KB or smaller for visa and DV Lottery entries and 54KB-10 MB for passport renewal, while retaining sufficient quality for biometric feature extraction. Files above the limit fail during JPEG validation. Files below a practical quality threshold — typically the result of aggressive compression — lose detail at critical landmarks such as eyebrow edges and skin texture, causing biometric mapping to fail.
Rule violated: Department of State file size rule (≤ 240 KB for visas and DV Lottery submissions or 54KB-10 MB for passport renewals).
Fix: Re-export at a balanced compression setting that meets both the size ceiling and minimum quality threshold.
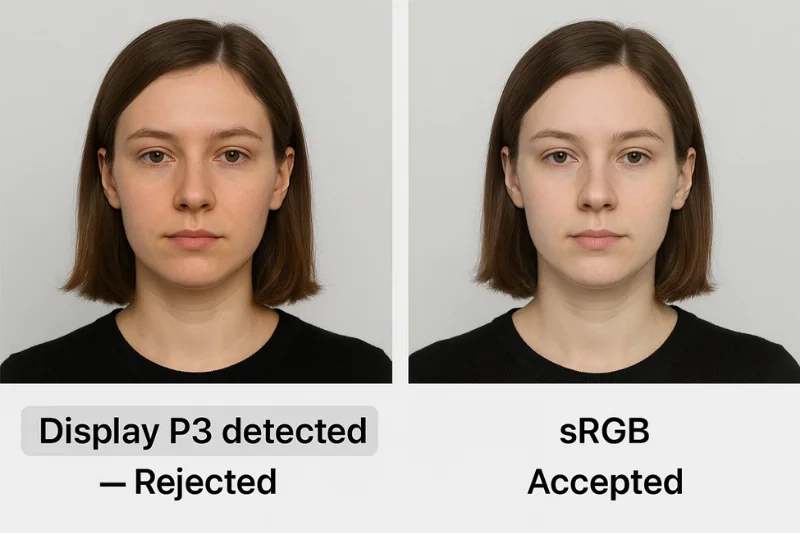
3. Wrong File Format or Color Profile
The system accepts JPEG, PNG, HEIC, and HEIF files for passport renewals and JPEG for visas and DV Lottery entries, exported in the sRGB color profile. AdobeRGB and Display P3 files are rejected automatically because the validator cannot process non-standard formats or color spaces. This error commonly occurs when images are exported directly from a smartphone or editing application that defaults to a wide-gamut profile.
Rule violated: Federal requirement for JPEG + sRGB.
Fix: Re-export from the original source with the correct format and color space settings.
4. Blurry or Pixelated Image
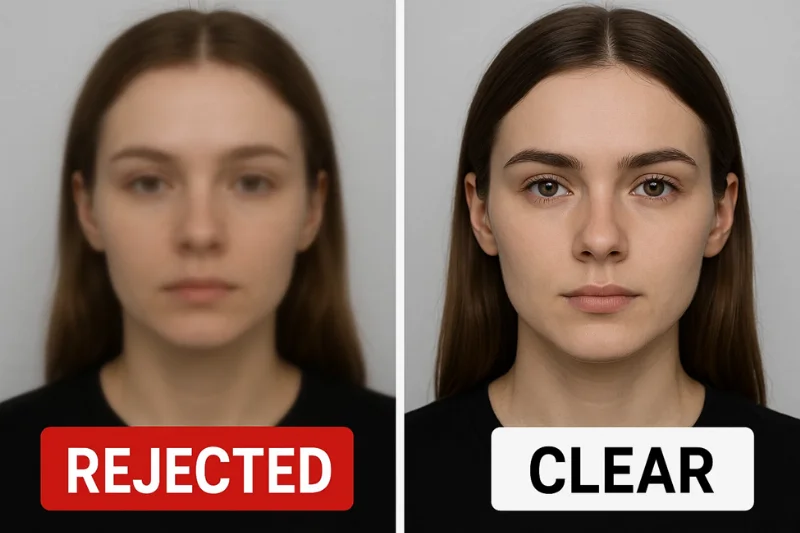
Any image that is out of focus, grainy, or has been over-smoothed is rejected because the system cannot extract reliable biometric data from degraded detail. Soft focus, camera motion, or heavy digital retouching all degrade the precision of facial landmark detection. When the system cannot identify clear feature positions, the image is treated as unprocessable.
Rule violated: U.S. requirement that photos provide sufficient quality for accurate biometric reading.
Fix: Reshoot with a stable camera position, sharp focus, and adequate lighting.
5. Shadows on Face or Background
Shadows — whether on the face or behind the head — cause immediate rejection because they interfere with biometric mapping and create apparent non-uniformity in the background. Dark areas on skin or in the background are flagged as non-compliant; during background segmentation, shadows are interpreted as noise that disrupts the expected uniform white field.
Rule violated: U.S. requirement for a plain, uniformly lit white background with no gradients.
Fix: Adjust the lighting setup or reshoot in a well-lit environment that eliminates all shadows.
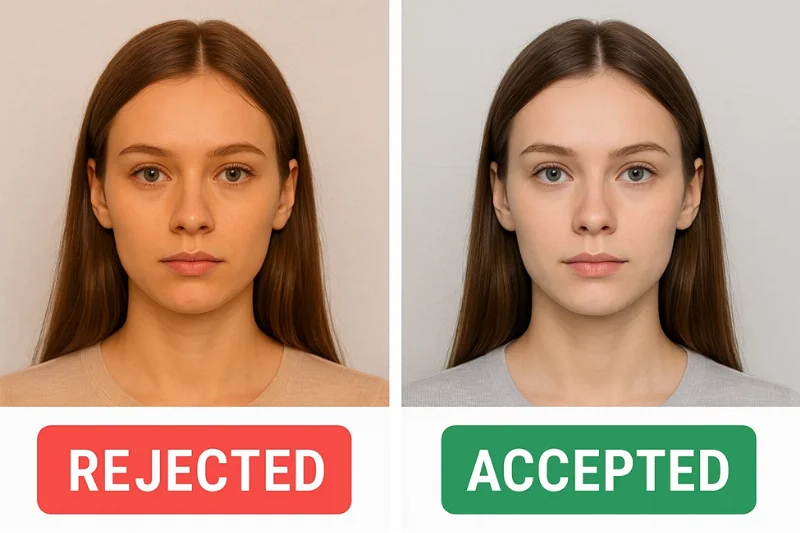
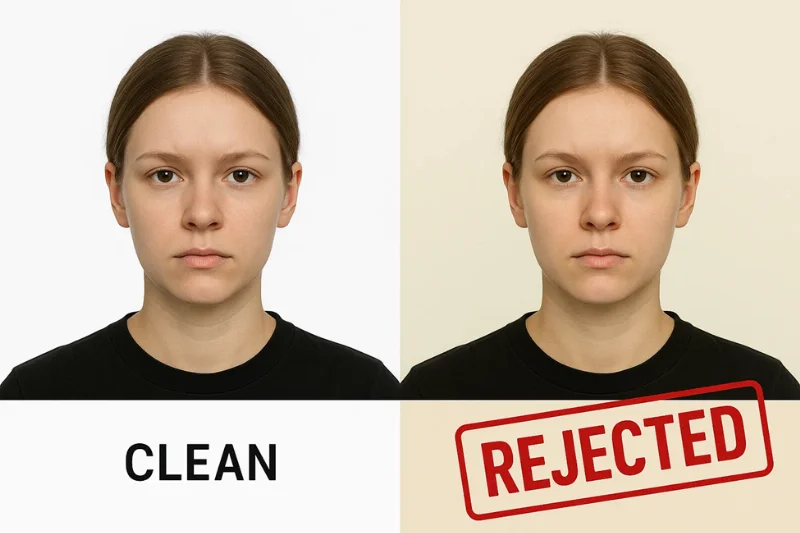
6. Non-White Background
The system requires a solid white background at #FFFFFF with no texture, tint, or gradient. Even minor yellow, beige, or gray tones are sufficient to cause rejection, as they disrupt the uniformity check used during automated segmentation. The validator performs edge detection at the background borders and flags any non-white shading, texture, crease, or color variation.
Rule violated: U.S. requirement for a plain white background.
Fix: Remove background inconsistencies or reshoot against a flat white backdrop under uniform lighting.
7. Non-Neutral Facial Expression
Smiling or opening the mouth shifts facial geometry in ways that disrupt biometric symmetry and landmark consistency. These deformations are reliably detected as deviations from the expected biometric template — specifically in mouth position and jaw alignment. All expressions other than a fully neutral, closed-mouth face are rejected.
Rule violated: U.S. regulation requiring neutral expression with the mouth closed.
Fix: Reshoot with a completely relaxed face and eyes open.
8. Incorrect Head Size
The head must occupy 50–69% of the total image height. A head outside this range cannot be matched to the U.S. biometric template. The validator flags faces that are too close to the camera, too far away, or surrounded by excessive empty space above the head.
Rule violated: U.S. federal guideline requiring head height between 50% and 69% of image height.
Fix: Re-crop or reshoot so the head fills the correct proportion of the frame.
9. Glasses or Facial Obstructions
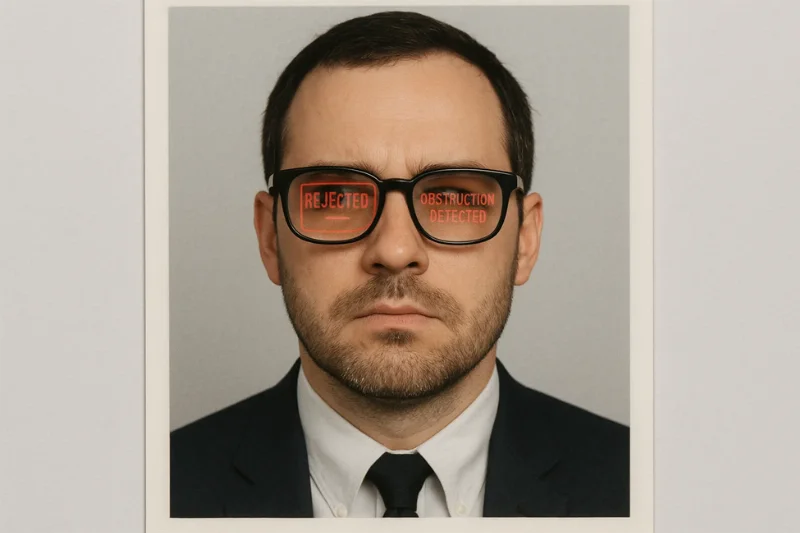
Glasses have been prohibited in U.S. passport photos since 2016. Glare on lenses, reflections, shadows from frames, or any partial obscuring of the eye area degrades biometric landmark detection. The validator raises a flag when it detects reflective surfaces, occlusion in the eye region, or any obstruction that reduces the visibility of key landmarks.
Rule violated: Prohibition on glasses and facial obstructions.
Fix: Remove all eyewear and reshoot.
10. Over- or Underexposure
Overexposed and underexposed images fail because stable facial details cannot be retrieved from either extreme. Overexposure washes out feature boundaries; underexposure introduces noise that corrupts the biometric template. Brightness normalization is applied as a preprocessing step, but it cannot reconstruct lost detail or suppress noise beyond a narrow range.
Rule violated: Federal requirement for uniform, balanced lighting across the entire face.
Fix: Adjust the lighting setup or reshoot in controlled conditions.
11. Digital Alterations
Filters, smoothing tools, and AI-generated enhancements produce visual patterns that the system detects as evidence of processing. These modifications alter skin texture, suppress natural detail, and disrupt biometric consistency.
Rule violated: U.S. prohibition on digital retouching of passport photos.
Fix: Submit an unaltered photo taken without filters or editing software.
12. Hair Obscuring Eyes or Eyebrows
Hair covering one or both eyes, or obscuring the eyebrows, prevents the system from reading critical facial landmarks. Even partial occlusion above key feature regions is sufficient to disrupt landmark mapping and produce a rejection.
Rule violated: U.S. requirement that the full face be visible, including both eyes, both eyebrows, and both nostrils.
Fix: Pull hair fully away from the face and reshoot.
13. Head Tilt or Off-Axis Pose
The head must be level, centered, and facing the camera directly. Any tilt or rotation causes the system to misinterpret facial geometry, because pose detection maps the face against an expected frontal orientation. Even a minor rotation disrupts the biometric alignment model.
Rule violated: U.S. policy requiring a frontal, upright head position.
Fix: Reshoot with the chin level and the head perfectly straight.
14. Incorrect Color Balance
Photos with orange, blue, green, or any other color cast are rejected because the tint distorts skin tone data and introduces errors into automated analysis. Smartphone cameras routinely produce these shifts under artificial lighting. The validator flags images with abnormal color temperature or chromatic imbalance.
Rule violated: U.S. requirement for natural color rendering consistent with biometric norms.
Fix: Correct white balance in the export settings or reshoot under clean, neutral-spectrum lighting.
2026 U.S. Digital Passport Photo Rules to Follow to Not Get Rejected
Requirement | U.S. Standard (2026) | Purpose |
Pixel Size | 600×600 px to 1200×1200 px, square | Ensures sufficient resolution for facial analysis |
Aspect Ratio | 1:1 | Keeps facial landmarks in the correct position |
File Size | Up to 240 KB for visas and DV Lottery; 54 KB-10 MB for passport renewal | Prevents data loss and upload failures |
File Format | JPEG for visas and DV Lottery; JPEG, PNG, or HEIF for passport renewal | Stable processing across federal systems |
Color Profile | sRGB | Standardized color rendering for identity checks |
Background | Pure white (#FFFFFF) | Clean contrast for automated segmentation |
Head Height | 50–69% of image height | Aligns the face with biometric templates |
Eye Height | Eyes centered within the U.S. mapping zone | Maintains correct landmark geometry |
Expression | Neutral, mouth closed | Supports consistent biometric matching |
Prohibited | Glasses, filters, shadows | Causes landmark detection failures |
Key notes on the 2026 rules:
Pixel dimensions are the first thing the validator checks — incorrect sizing is one of the fastest and most common rejection triggers. A slightly larger file (e.g., 900×900 px) generally produces sharper output and improves landmark detection reliability; the 600×600 px figure is the minimum, not the recommended target. DPI is irrelevant for digital submissions and has no bearing on upload validation.
The head height requirement (50–69% of image height) is measured from the chin to the top of the head. A head that is too large or too small prevents the system from accurately locating biometric landmarks — chin, nose bridge, and eyes — and the image is automatically rejected.
The prohibited elements below each create occlusions or artificial alterations that prevent authentic facial geometry from being read, resulting in immediate rejection regardless of other image quality:
Glasses of any kind, including clear or thin frames
Strong or directional shadows on the face or background
Hair covering the eyebrows or eyes
Beauty filters or skin-smoothing software
AI-generated enhancements
Overexposed or color-tinted images.
The 2026 U.S. Digital Photo Fix Checklist
Work through each step to identify the cause of rejection and prepare a corrected file before resubmission.
Step 1: Verify Pixel Dimensions (600x600 to 1200x1200 px)
Confirm that the image is square and within the accepted resolution range. Check:
Width and height are equal
Resolution is between 600×600 px and 1200×1200 px
Step 2: Verify the 1:1 Crop and Head Ratio
Confirm:
The image is a perfect square
The head occupies 50–69% of the total image height
The face is horizontally and vertically centered
Space above the head and below the chin is balanced
Step 3: Inspect Background Uniformity
Check:
White is consistent across the entire frame (#FFFFFF)
No yellow, gray, or beige tones anywhere in the background
No objects, shadows, or patterns behind the subject
Step 4: Verify Lighting and Shadow Absence
Confirm:
Both sides of the face are evenly lit
No dark gradients or shadows in the background
No glare, hotspots, or harsh directional lighting on the face
Step 5: Check for Blur and Noise
Examine:
Eyebrows, eyelashes, and jawline are clearly defined
No motion blur from camera shake
No high-frequency noise from low-light shooting
Step 6: Confirm No Glasses and Neutral Expression
Verify:
All eyewear has been removed, including clear or thin frames
Lips are relaxed and closed with no teeth showing
Eyes and eyebrows are fully visible and unobstructed
Step 7: Validate File Format and Color Profile
Confirm:
File extension is .JPG or .JPEG for visas and DV Lottery submissions
File extension is JPG, JPEG, PNG, or HEIF for passport renewal
Color profile is sRGB — not Display P3 or AdobeRGB
Skin tones appear natural under neutral lighting conditions
Step 8: Re-export Correctly
Confirm:
Final file size is 240 KB or less for visas and DV Lottery entries; 54 KB-10 MB for passport renewal
No excessive compression artifacts visible
No embedded profiles, transparency layers, or non-JPEG containers
Step 9: Run a Pre-Submission Compliance Check
Run the photo through a compliance validator before uploading to catch issues that are easy to miss manually. A good checker verifies:
Crop alignment and head size ratio
Background uniformity and shadow detection
File specifications: JPEG, sRGB, resolution, aspect ratio
Biometric alignment against the U.S. template.
When to Reshoot Instead of Editing
Certain defects cannot be corrected in post-processing. Attempting to fix them digitally introduces additional artifacts or constitutes impermissible manipulation under U.S. federal standards. In the following cases, a full reshoot is the only compliant solution.
Extreme shadows. Strong shadows on the face or background cause biometric occlusion. Digitally removing or lightening them alters the image in a way that constitutes prohibited manipulation. Reshoot if there is a strong shadow under the chin, dark areas behind the head, or harsh directional light creating gradients across the background.
Severe overexposure or underexposure. Permanent detail loss from extreme exposure cannot be recovered without introducing artifacts. Reshoot when bright areas are washed out, facial features are lost to overexposure, or the image is grainy from underexposure.
Glasses glare. Glasses are prohibited in U.S. passport photos, and lens glare cannot be removed in a way that appears authentic. Digitally editing the eye region constitutes image manipulation that violates federal standards. Reshoot if any light reflects from the lens surface or the eyes are even partially obscured.
Head not facing the camera directly. A head that is not perfectly straight-on is biometrically unusable. Digitally rotating or straightening the image breaks facial geometry and disrupts landmark alignment. Reshoot when the chin is significantly raised or lowered, the head tilts to either side, or the face is not looking directly at the camera.
Hair covering eyes or eyebrows. Even a small amount of hair across the eye or brow region prevents the system from reading key facial markers. Digitally editing hair away from the face is prohibited. Reshoot if either eye is obstructed, either eyebrow is fully or partially covered, or hair overlaps the upper lash line.
Pixelation or excessive noise. Low-resolution images and phone screenshots cannot be upscaled without introducing further pixelation. Attempting to smooth or denoise digitally produces manipulation flags. Reshoot when skin appears blocky, edges are jagged, or the image was captured in insufficient light.
Non-white background textures or objects. Backgrounds with patterns, gradients, curtains, or textured walls cannot be converted to true uniform white without constituting over-editing. Reshoot if there is any yellow or gray tint in the background, objects are visible behind the subject, or the wall shows texture, shadow, or color variation.
Incorrect head ratio. If the head occupies less than 50% or more than 69% of the image height and there is insufficient space in the original frame to correct it by cropping alone, reshoot. Scaling the face up or down digitally warps proportions and produces biometric integrity failures.
Run an Online Compliance Check Before Submitting Your Photo
 Working through the fix checklist manually reduces the risk of a failed submission, but a dedicated compliance checker catches issues that are easy to overlook — incorrect head-to-frame ratios, subtle sRGB profile mismatches, mild background gradients, and hidden metadata flags. A good checker mirrors the same validation categories the federal pipeline applies: pixel dimensions and aspect ratio, head height relative to image height, color profile and file format, background uniformity, exposure balance, and image sharpness.
Running one before uploading is particularly useful for catching errors that are technically correct in isolation but collectively push the file outside the accepted range — for example, a file that is properly sized but slightly over-compressed, or a background that is visually white but reads as off-white at the pixel level. PhotoGov is one tool built specifically for U.S. passport photo validation that covers all of these checks and provides a pre-submission preview of compliance status.
Frequently Asked Questions
Why Was my U.S. Passport Photo Rejected?
Most rejections result from one or more of the following: pixel dimensions outside the 600×600 px to 1200×1200 px range, color profile other than sRGB, background that is not pure white, head size or alignment outside the required range, or shadows, blur, and facial obstruction. The system checks each automatically, and any file that does not conform to the federal template is rejected at that step.
What Does "Face Not Centered" Mean?
"Face not centered" indicates that the face is not properly aligned within the biometric window. Common causes include a head positioned too close to one edge, an incorrect 1:1 crop, and unbalanced spacing above or below the head. The U.S. validator requires horizontal and vertical centering to ensure consistent landmark mapping across all submissions.
Does DPI Matter for U.S. Digital Passport Photos?
No. DPI is irrelevant for digital submissions. The system evaluates pixel dimensions (e.g., 600×600 px), aspect ratio (1:1), and image quality and clarity. DPI affects printed photos only and has no bearing on digital upload validation.
What File Format is Required Not to Get Rejected?
Only JPEG files in the sRGB color profile are accepted. PNG, HEIC, AdobeRGB, Display P3, and TIFF files are rejected automatically before biometric analysis begins.
Why is My Lighting Causing My Digital Photo to be Rejected?
Lighting affects both background segmentation and facial analysis. The system flags harsh shadows, hotspots on the skin, dark gradients in the background, and overexposed or underexposed images. Correct lighting allows the face and the solid white background to meet U.S. visibility and uniformity requirements simultaneously.
Can I Edit my Non-White Background to White?
Minimal correction is permitted — softening patchy areas and removing slight tinting to reach #FFFFFF. Painting over, erasing, or reconstructing the background digitally constitutes manipulation and will result in disqualification.
Can I Resubmit the Same Photo?
Yes, but only if the defect is correctable without altering the face. Fixable issues include an incorrect 1:1 crop, a wrong color profile (convert to sRGB), a file that is too large, and mild background unevenness. The same photo cannot be reused if it has facial occlusion, blur, extreme shadows, or a head size error that cannot be corrected by cropping alone.
Why is My Square (1:1) Image Still Being Rejected?
A 1:1 aspect ratio is a necessary condition but not the only one. The system also checks whether the head occupies 50–69% of the image height, whether the face is correctly aligned within the frame, and whether the crop cuts off space above the head. An incorrectly composed square image will still fail biometric validation.
How do I Measure Head Size for U.S. Requirements?
Head size is measured as the distance from the chin to the top of the head, expressed as a percentage of the total image height. That measurement must fall between 50% and 69%. Use a compliance checker such as PhotoGov, or measure manually: calculate the chin-to-crown distance, divide by total image height, and confirm the result is within the required range.
Should I Use Exactly 600×600 pxfo?
No. The U.S. system accepts any square image from 600×600 px to 1200×1200 px. The 600×600 px figure is the minimum, not a recommended target. A slightly larger size — such as 900×900 px — generally produces sharper output and improves the reliability of landmark detection.
Was this helpful?
33 found this helpful
Authored by:
Nathaniel K. Rowden (Compliance consultant)Top expert
Verified by the Photogov compliance team
ICAO 9309-compliant
Based on official government sources
Helpful votes: 33
Was this helpful?
33 found this helpful
We value your Privacy
We use cookies to enhance your browsing experience, serve personalized ads or content. By clicking “Accept All”, you consent to our use of cookies.