My Digital Passport Photo Was Rejected: 29 Common Reasons & How to Fix Them
Table of contents:
- Why Can My Digital Passport Photo Be Rejected in the First Place?
- 29 Key Digital Passport Photo Rejection Reasons — and Fixes for Each One of Them
- Category 1: Digital Editing and AI — the Most Rejected Category in 2026
- Category 2: Background Errors
- Category 3: Head Size and Position
- Category 4: Lighting Issues
- Category 5: Glasses, Headwear, and Improper Attire
- Category 6: Image Quality and File Technical Issues
- Category 7: Photo Older Than 6 Months
- How to Take a Compliant Digital Passport Photo at Home
- What to Do If Your Photo Was Rejected: 3 Scenarios
- Avoid Rejection: a Complete Digital Passport Photo Checklist
- Frequently Asked Questions
- Official Government Sources
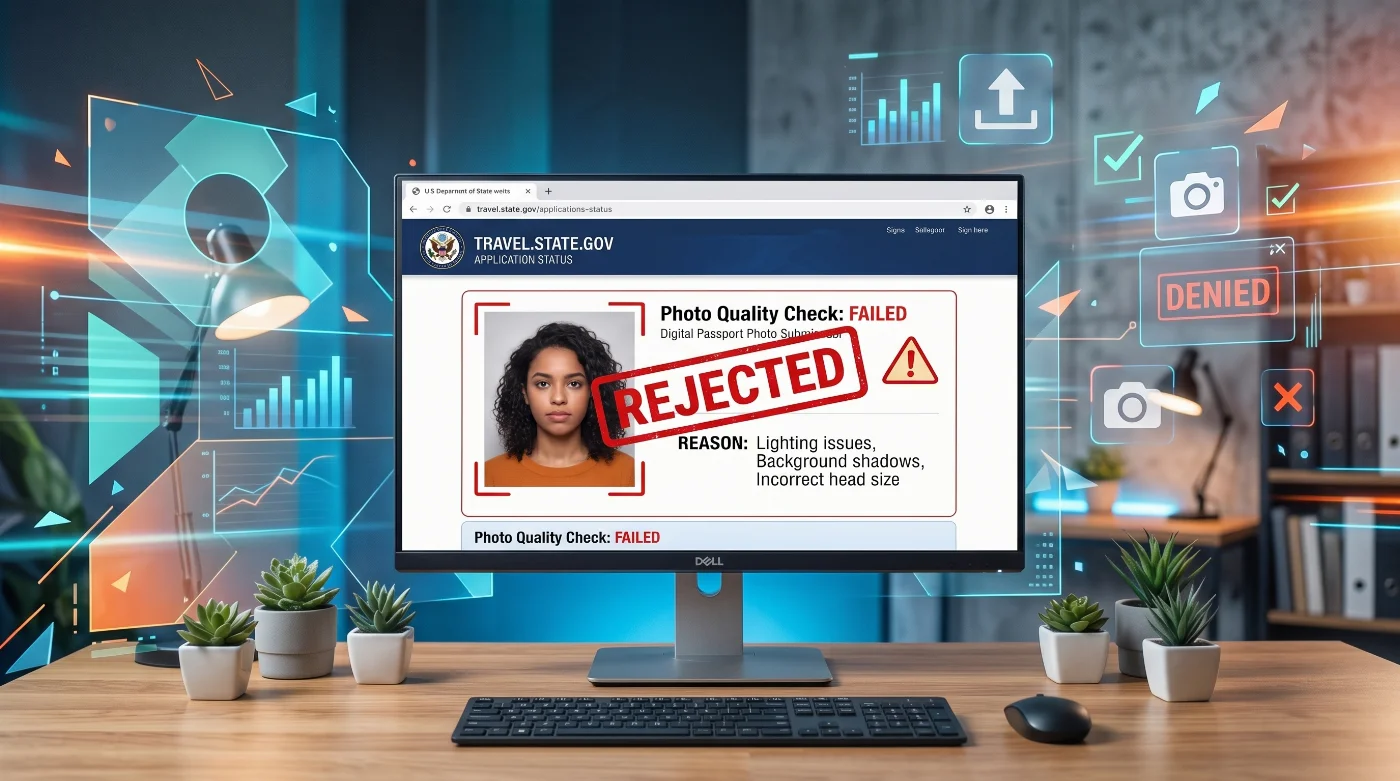
You have uploaded a passport photo to the U.S. Department of State’s official website. It looked perfectly fine on screen — but an automated system has sent a rejection notice. Digital passport photo rejections are one of the most common reasons US passport applications stall, and the cause is rarely what applicants expect.
This guide covers 29 official documented reasons for digital passport photo rejection by the US Department of State — from AI editing to background errors, from incorrect file format to wearing glasses. Each cause has an actionable fix suggestion to help your photo be accepted. All requirements are sourced directly from official travel.state.gov guidelines, including the December 2025 update and the 2026 AI editing ban.
The most common reasons US digital passport photos get rejected online are (1) AI editing or phone filters applied, (2) wrong background color or shadow on the background, (3) head size outside the 1–1⅜ inch range, (4) glasses not removed, and (5) file format or size mismatch. Each is addressed with a specific fix below.
Why Can My Digital Passport Photo Be Rejected in the First Place?
The U.S. Department of State's online passport renewal portal runs a two-stage review of every uploaded photo. The first stage is automated: the portal's photo tool checks basic technical requirements immediately on upload and will tell you what needs to change if the photo fails. You can try again with a different photo before submitting your application.
The second stage is a human review: after you submit your application, a U.S. Department of State employee reviews your photo again. If there is an issue at this stage, the Department will send you a letter or email asking you to submit a new photo. This second-stage rejection adds significant time to your passport processing — in some cases, several weeks — because your application goes on hold while you resubmit.
For in-person applications and mail-in renewals, the photo is reviewed by acceptance facility staff or passport agency employees, and a poor photo can similarly delay or halt processing. The requirements are the same regardless of whether you submit digitally or on paper.
A rejection at the human review stage (after you have already submitted your application) adds weeks to the processing time. Getting the photo right before submitting is far less time-consuming than correcting it afterward.
29 Key Digital Passport Photo Rejection Reasons — and Fixes for Each One of Them
The US digital passport photo rejection reasons can be divided into seven categories: digital editing, background errors, head size and position, lighting, attire, file quality, and photo age. The sections below break down all 29 failure reasons across these categories, with actionable solutions by the PhotoGov team.
Category 1: Digital Editing and AI — the Most Rejected Category in 2026

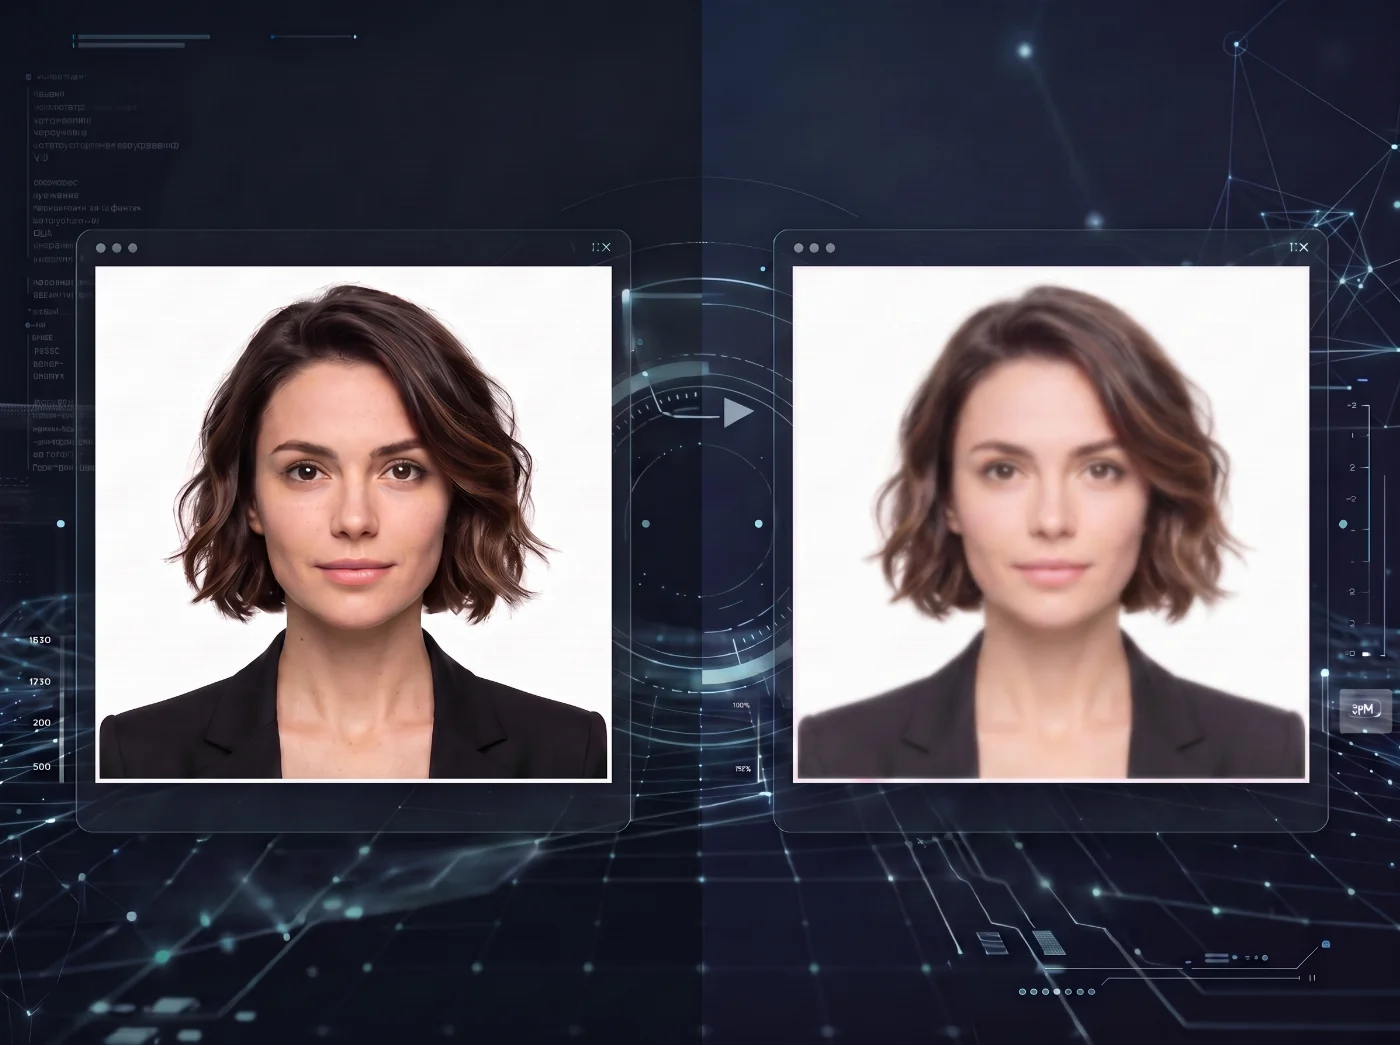
The U.S. Department of State explicitly prohibits changing your photo using 'computer software, phone apps, or filters, or artificial intelligence.' As of 2026, this prohibition has been significantly expanded to address AI-generated images and AI-enhanced photographs.
1. AI-generated photo
You submitted a photo created by an AI image generator (such as Midjourney, DALL-E, Stable Diffusion, or similar tools) or used an AI photo service that produces a synthetic portrait from your selfie. The U.S. Department of State's review process detects AI-generated imagery through pixel-level artifact analysis and metadata examination.
Submit a genuine photograph of yourself taken with a real camera. Delete the AI-generated image and photograph yourself according to the setup guidelines below. No AI photo service output is acceptable, regardless of how realistic it appears.
2. AI enhancements
Many modern smartphones apply automatic AI face enhancement, skin smoothing, or "beauty mode" to every photo taken with the front or rear camera. iPhone models from iPhone 12 onwards use Photonic Engine processing; Samsung Galaxy models — AI Remaster by default; Google Pixel applies Real Tone and Magic Eraser features. Even if you did not touch any filter, your phone may have altered your photo without any visible indication.
Before taking your passport photo, open your camera app settings and disable all AI enhancements, beauty modes, skin smoothing, scene optimizations, and any similar features. On iPhone: Settings → Camera → turn off Smart HDR if available, and do not use Portrait mode. On Samsung: Camera settings → turn off Scene Optimizer and Shooting Methods → turn off Shot Suggestions. On Google Pixel: Camera settings → turn off Top Shot and Real Tone processing. After disabling, close and reopen the camera app, then take new photos. Don’t apply any AI enhancements once the photo is done.
3. Filter applied — Instagram, Snapchat, VSCO, or any other app
Any filter manually applied after shooting — color-correcting filters, vintage effects, brightness adjustments, AI portrait retouching, or any other visual modification made in a photo editing or social media app — constitutes a prohibited digital change. The US Department of State rejects photos with unnatural color balancing, contrast adjustments, or any visual effect that was not present in the original camera capture.
Submit the original, unedited file exactly as it came from your camera. Do not open the photo in any editing app, even to crop. The US Department of State's online portal allows you to crop and adjust positioning during upload — use those tools, not third-party apps.
4. Red-eye correction applied
If your photo has red-eye caused by the flash, digitally correcting it is explicitly prohibited. The U.S. Department of State instructions are exact and strict: “If the photo has a red-eye effect on your eyes, do not edit it. Take a new photo with natural lighting.”
Reshoot the photo using natural window light instead of flash. Position yourself facing a large window. Natural light eliminates the possibility of a red-eye effect, and you won’t need any post-processing.
5. Photo sent via text message before upload
Sending a photo via SMS or iMessage before uploading it to the passport portal significantly degrades image quality. Standard text messaging compresses images to very small file sizes — often below the 54 KB minimum required for digital upload, and always with visible quality loss. The U.S. Department of State explicitly warns against this.
Transfer your photo file directly from your phone to your computer using a USB cable, AirDrop, email to yourself (not text), or iCloud/Google Photos sync. Upload the original full-quality file, not a compressed copy. Use a reliable online passport photo maker that produces a digital passport photo in the U.S. Department of State standards.
Category 2: Background Errors
6. Background not white or off-white
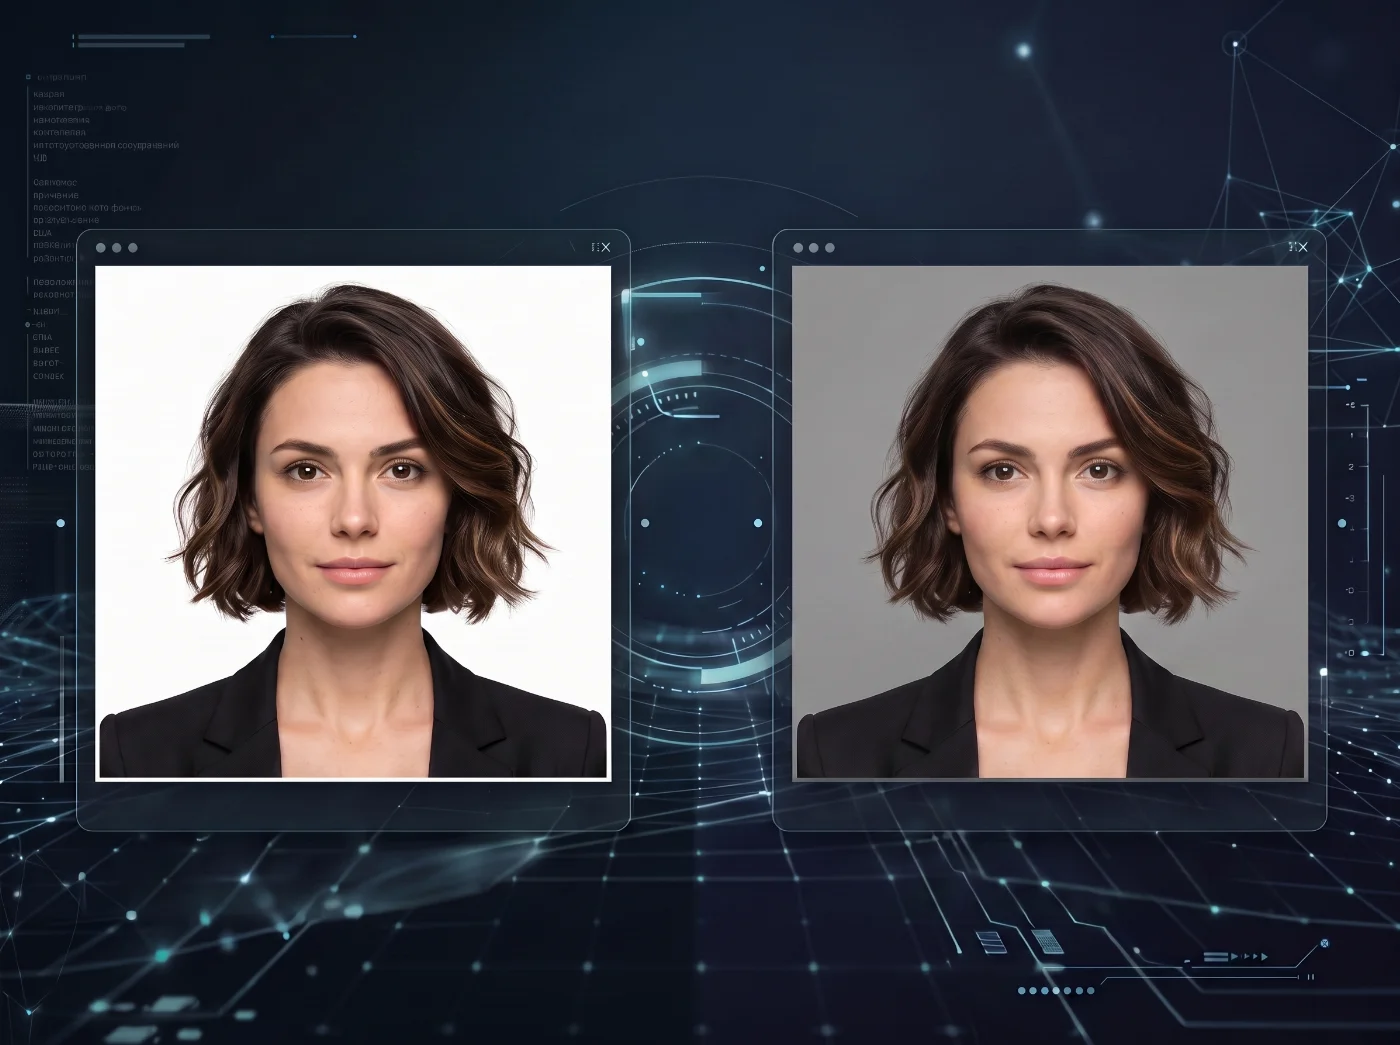
The background on your digital passport photo must be white or off-white. A light gray wall, a beige wall, a cream-colored surface, an outdoor setting, any patterned surface, or any other color — including pastels — is grounds for rejection. The U.S. Department of State's automated tool checks background color and luminance, rejecting all photos with non-white or off-white backgrounds.
Use a white backdrop: a plain white wall, a white foam board, or a sheet of paper taped flat against any surface. The background must appear uniformly white in the photo. Do not confuse “light-colored” with “white” — photos with light gray and cream backgrounds are specifically rejected.
7. Shadow on the background
Standing too close to the background wall causes your body to cast a shadow visible behind you. Shadow in the background is one of the top five most common rejection reasons according to the U.S. Department of State's documentation. The shadow does not need to be large — even a faint gradient behind your head or shoulders is detectable.
Stand at least 3–4 feet (approximately 1 meter) from the background. At this distance, your body doesn’t cast a shadow on the surface behind you. Use two light sources or a large window facing you to eliminate directional shadows.
8. Textures, patterns, or objects visible in the background
Wall outlets, light switches, picture frames, furniture edges, wallpaper patterns, tile grout lines, or any other object or pattern visible behind you causes a background rejection. Even a faint wall texture can be flagged.
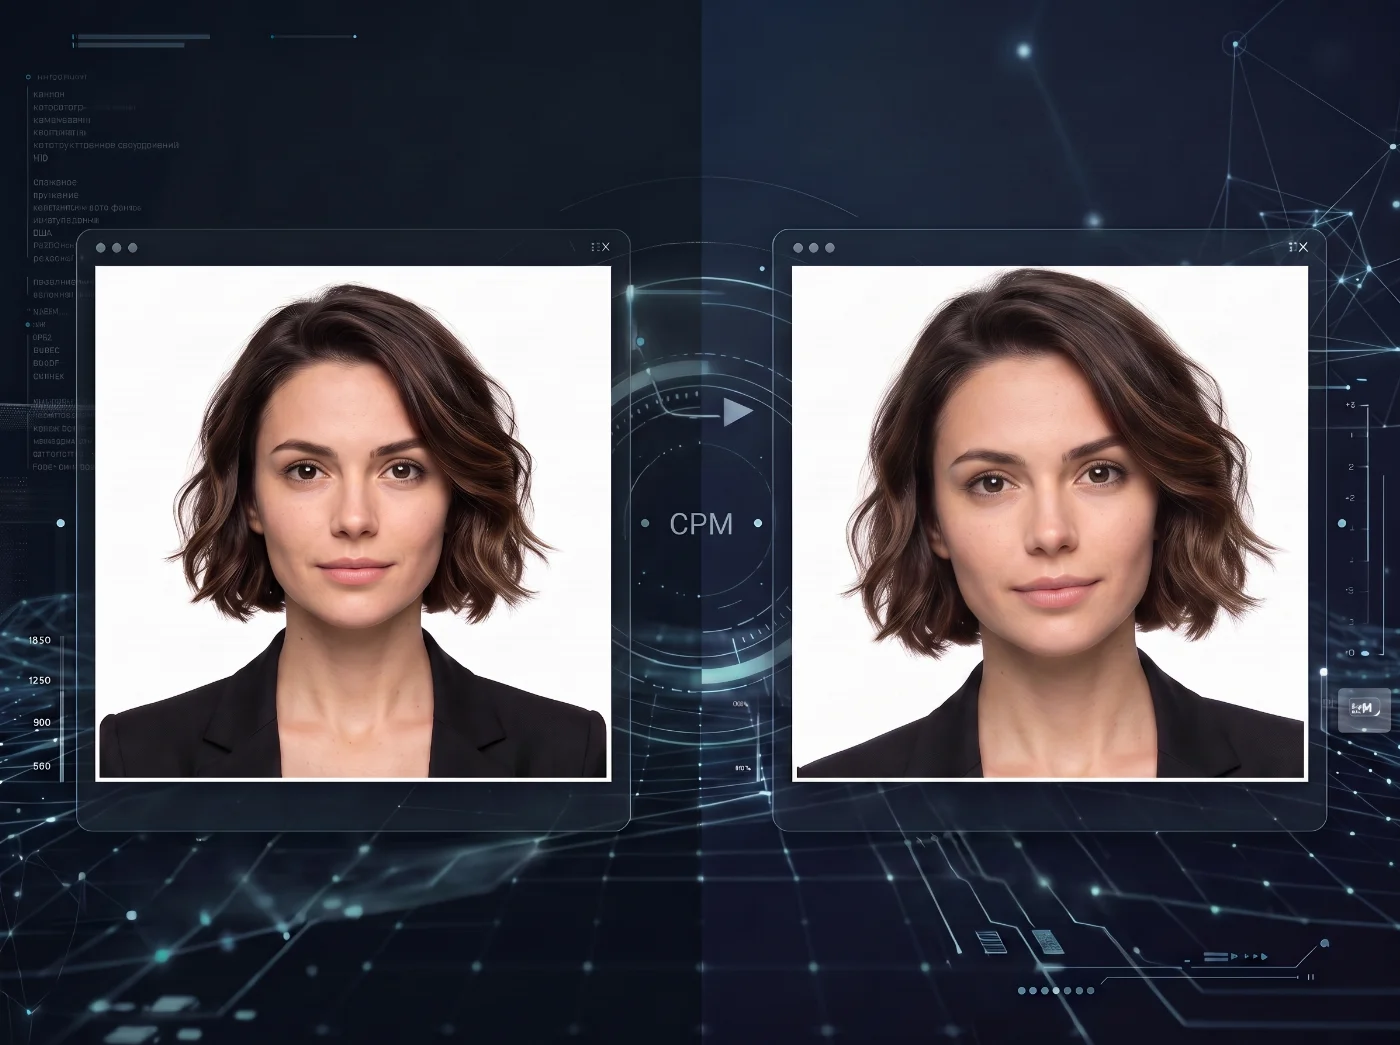
Choose the smoothest, most featureless wall surface available. If you don’t have a suitable surface in your house, tape a clean flat sheet of white foam board or white poster board directly to the wall and ensure it is large enough that no wall is visible around the edges of your shot. Alternatively, use the online passport photo maker that corrects the background on your original photo, following all U.S. Department of State rules and doesn’t alter your facial features
Category 3: Head Size and Position
9. Head too small — zoomed out too far
The U.S. Department of State specifies that your head must measure between 1 and 1⅜ inches (25–35 mm) from the bottom of the chin to the top of the head in the final 2×2-inch print. If the person photographing you is standing too far away, your head will be too small. The online portal's automated tool flags this. The U.S. Department of State guidance notes: “If you are zoomed out too far, this can cause background errors. Zoom in so your face is centered.”
The bottom frame of the photo should be at the edge of your shoulders, where they connect to your arms — not at your waist, not at your chest. Move the camera closer or zoom in to ensure your face fills the frame correctly. When you upload, the portal allows cropping — use this to fine-tune positioning after upload rather than before.
10. Head too large — zoomed in too close
If the camera is too close, your head height in the print exceeds 1⅜ inches (35 mm), which is the maximum. This clips out the top of your head or makes the portrait look unnaturally close.
Leave a small gap above the top of your head — your head should not touch or come close to the top edge of the frame. The bottom frame should be at shoulder level, not cropped above the shoulders.
11. Head tilted or not facing the camera directly
The requirements state: “Face the camera directly with full face in view” and “Directly face the camera without tilting your head.” Any tilt, rotation, or profile angle is grounds for rejection. Both ears should be visible and at the same height.
Check a mirror or take a sample photo to ensure your head is perfectly level. Both ears should be at the same height. Your face must be square in the shot — not a three-quarter angle, not a profile view.
12. Eyes obstructed by hair
The U.S. Department of State specifies: “Make sure that your eyes are not obstructed or covered by your hair.” Hair crossing the eye area — even partially — triggers a rejection because the eyes are the primary biometric reference point.
Pull, pin, or push back any hair that falls across your eyes, eyebrows, or forehead before taking the photo. Both eyes must be fully visible.
Category 4: Lighting Issues
13. Shadow on the face
Shadows across the nose, chin, forehead, or one side of the face occur when lighting is directional — a single lamp on one side, overhead lighting only, or a window behind you rather than in front. Facial shadows are one of the U.S. Department of State's explicitly listed rejection categories.
Use two light sources positioned at 45 degrees on either side of your camera, or stand facing a large window (the window should be in front of you, not behind you). This creates even illumination across both sides of your face with no shadows. Check the preview before shooting — both sides of your face should appear equally bright.
14. Photo overexposed — too bright or washed out
Lighting that is too bright or positioned directly in front of you at close range washes out facial features and skin tone detail. Overexposed photos lose the texture and definition that the biometric review system uses.
Move away from the light source, use diffused natural window light, or reduce the brightness of any artificial lights. Do not shoot in direct sunlight or directly under a bright overhead fixture.
15. Photo underexposed — too dark
Taking the photo in a dim room or in insufficient light results in a flat, low-detail image, with facial features, skin tone, and facial contours lacking the definition required for biometric review. Both the automated portal and human examiners flag underexposed photos, as low-light conditions also cause cameras to raise ISO, introducing visible grain and digital noise across the image.
Take the photo in a well-lit room during daylight hours using natural light from a window. If using artificial light, use two household lamps at 45 degrees on either side. The face must be clearly and evenly lit.
Category 5: Glasses, Headwear, and Improper Attire
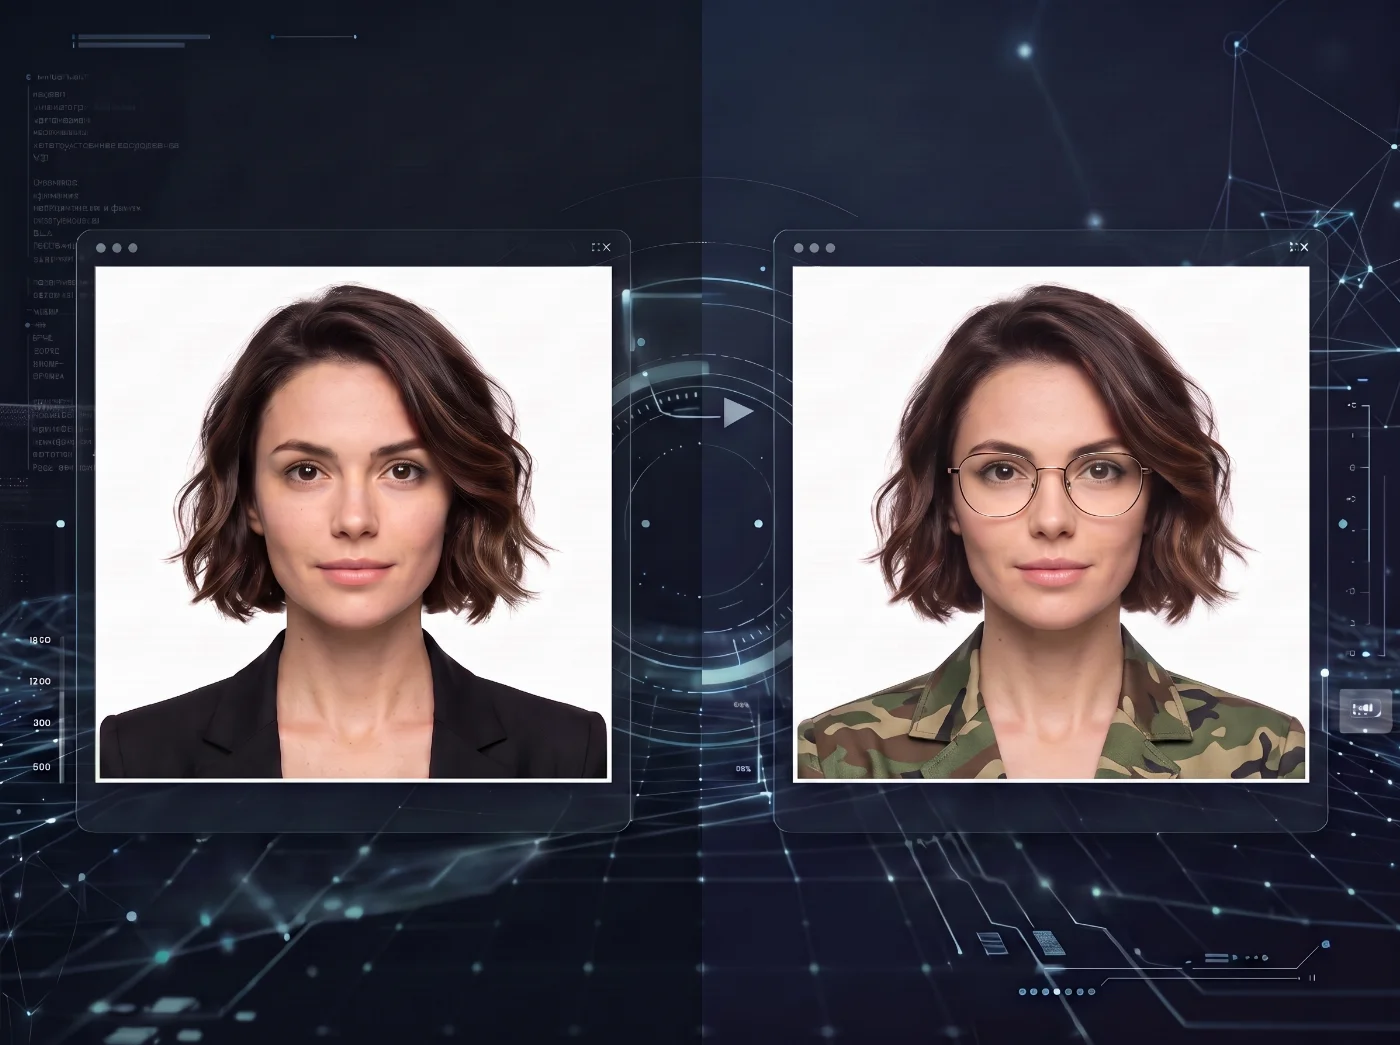
16. Wearing glasses
The U.S. Department of State requirement is explicit: “Take off your eyeglasses for your photo.”This applies to prescription glasses, reading glasses, and all other corrective eyewear. The only exception is a medical condition that prevents removal, documented by a signed doctor's note submitted with the application.
Remove your glasses before the photo. If you have a medical condition requiring glasses, obtain a signed statement from your physician explaining why the glasses cannot be removed and submit it with your application. A standard optician's prescription does not qualify.
Sunglasses and tinted lenses are rejected even if your prescription glasses with tinted lenses would otherwise qualify for the medical exception. No tinted lenses of any kind are permitted.
Remove all sunglasses and tinted eyewear. If your prescription lenses have a tint (including slight tinting or photochromic lenses that darken in bright light), remove the glasses entirely.
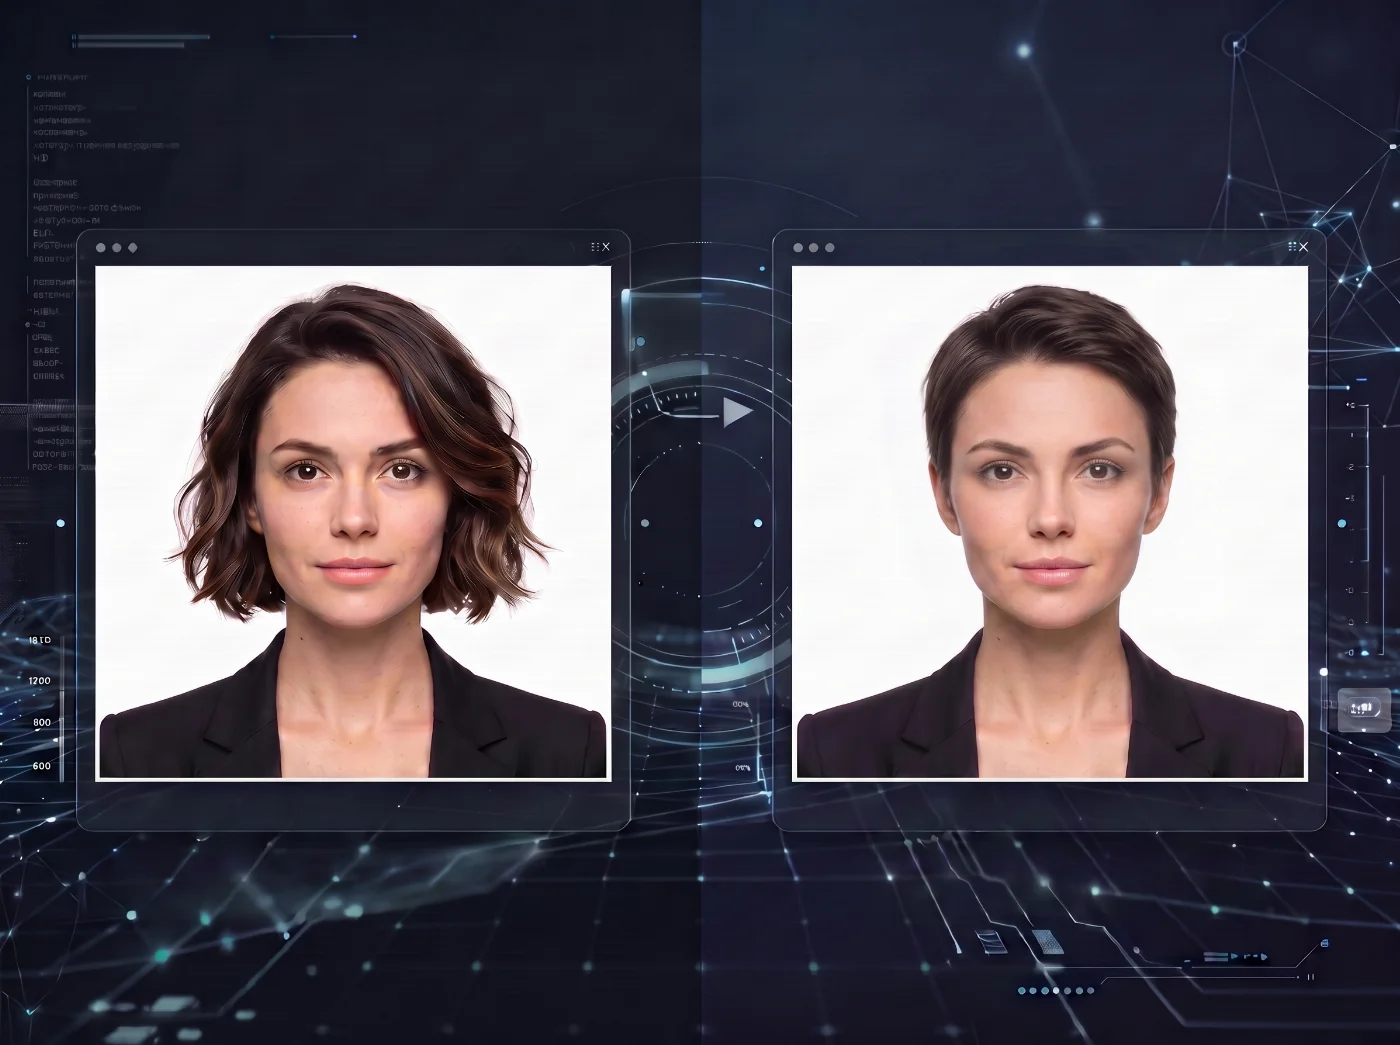
17. Hat or head covering without religious or medical documentation
All hats and head coverings must be removed for the photo unless worn daily as part of an established religious practice or for a documented medical reason. A baseball cap, beanie, winter hat, bandana, or fashion accessory is not acceptable under any circumstances.
Remove the head covering. If you wear a religious head covering as part of your daily practice, you must submit a signed statement with your application confirming that it is religious attire worn in public daily. If worn for medical reasons, submit a signed doctor's statement. Even with documentation, your full face must be visible from the hairline to the chin, the covering must be a solid color, and the material must be solid-colored and free of patterns or small holes.
18. Wearing a uniform or camouflage
Clothing that resembles a uniform — military, police, medical scrubs, or any similar attire — and any camouflage pattern are explicitly prohibited. The rule applies to clothing that 'looks like a uniform,' not only actual official uniforms.
Wear everyday civilian clothing. Solid colors in navy, gray, or any non-white, non-patterned fabric work well. Avoid scrubs, flight suits, or any clothing that could be mistaken for an official uniform.
19. Wearing headphones or wireless hands-free devices
Earbuds, over-ear headphones, Bluetooth devices, and any wireless hands-free equipment are specifically prohibited by the U.S. Department of State. They partially obscure the ear area and are flagged on visual review.
Remove all earbuds, earphones, and wireless devices before the photo is taken.
20. Face covering or a medical mask
No face covering, surgical mask, N95, or any other mask may be present in the photo. “Your full face must be visible, and the face covering or mask does not block portions of your face.”
Remove all face coverings before taking the photo.
Category 6: Image Quality and File Technical Issues
21. Photo blurry, grainy, or pixelated
Low-resolution photos, photos taken in insufficient light (which can cause digital noise/grain), and out-of-focus photos are all rejected. This is especially common when using a front-facing phone camera (typically 12 MP) rather than the rear camera (typically 36–48 MP), or when shooting in a dark room where the camera compensates by raising ISO and introducing grain.
Use your phone's rear camera, not the front-facing camera. Shoot in a well-lit environment. Do not use digital zoom — zoom creates pixelation. Use a tripod or self-timer to prevent blur from camera movement. Select the highest quality/resolution setting in your camera app before shooting.
22. Scanned printed photo submitted
Scanning a printed passport photo (the kind produced at a drugstore) creates a digital file that shows visible printer dots, compression artifacts, and generally insufficient quality. The U.S. Department of State explicitly states: 'Avoid scanning or taking a picture of a printed photo since this may lower the photo quality.'
For digital submissions (online renewal), you need a digital photograph — not a scan. Take a new photo with your phone or camera, then upload the original digital file directly.
23. Photo is a photocopy or duplicate of another photo
Photographing a photo on a screen — taking a picture of your phone screen, a monitor, or a printed photo with another camera — creates a secondary image with significant degradation in quality, moiré patterns, and color distortion.
Upload the original camera (smartphone) file. Never submit a picture of your photo.
24. Damaged photo: holes, creases, or smudges (for print/mail submissions)
Physical damage to a printed photo — including fingerprints on the image surface, creases from folding, ink or pen marks from writing on the back, and punched holes — causes rejection. The U.S. Department of State specifies: “Do not submit a damaged photo with holes, creases, or smudges.”
Handle printed photos by their edges. Do not write on the back with a ballpoint pen (the pressure creates marks on the image side). Store photos in a protective envelope. If a photo is damaged, print a replacement.
25. Wrong file format (digital upload)
The U.S. Department of State's online renewal portal accepts only JPG, JPEG, PNG, and HEIF file formats. PDF, TIFF, BMP, and other formats are rejected by the upload system. Some photo editing apps save files as PNG by default.
Before uploading, verify the file extension: it should be .jpg, .jpeg, .png, or .heif. On an iPhone, photos from the camera are typically saved as HEIC (a variant of HEIF) and are accepted. If your file is TIFF, for example, save/export as JPEG before uploading.
26. File too small — under 54 KB (digital upload)
The minimum file size for online renewal upload is 54 KB. A photo that has been compressed too aggressively — for example, one that was exported at a very low JPEG quality setting, sent via text message and redownloaded, or resized to a very small pixel count — will fall below this threshold.
Export your photo at high or maximum JPEG quality. A head-and-shoulders photo at 600×600 pixels exported at JPEG quality 85+ will typically produce a file well above 54 KB. If the file is still too small, export at a higher pixel count.
27. File too large — over 10 MB (digital upload)
The maximum file size for online renewal upload is 10 MB. A full-resolution, uncompressed photo from a modern smartphone camera is typically 8–25 MB. If your photo exceeds 10 MB, the upload will fail.
Export your photo as JPEG at standard quality. Most JPEG exports of a head-and-shoulders crop at 1,200×1,200 pixels or smaller will produce files well under 10 MB. If your file is still over 10 MB, reduce the export quality slightly (to 85–90%) or crop to a tighter head-and-shoulders frame.
28. File metadata is missing or incomplete
Every digital photo contains embedded technical information called metadata. This includes the image resolution (DPI), color profile, file format details, and information about the camera or device used to take the photo. Government systems read this data automatically to verify that the image meets technical standards before it is processed.
If any of this information is missing, corrupted, or inconsistent with the required specifications, the photo will be rejected — even if it looks correct visually.
Use PhotoGov to process your photo for a U.S. passport or any other document; it automatically adds and corrects metadata, so you don’t have to worry about submitting an incomplete file.
Category 7: Photo Older Than 6 Months
29. Photo not taken within the last 6 months
The U.S. Department of State requires the photo to “reflect your current appearance.” A photo older than 6 months may be rejected, especially if your appearance has changed. Photos with EXIF metadata showing a date more than 6 months before the application submission date may be flagged during review.
Take a new photo. EXIF metadata — the timestamp embedded in digital photos by your camera app — is readable by the U.S. Department of State's system. If you retake the photo, the EXIF timestamp updates automatically.
How to Take a Compliant Digital Passport Photo at Home
The following checklist covers every step required before, during, and after taking a digital passport photo that will pass both the automated portal check and the human review at the U.S. Department of State.
Prepare the Setup
Find a smooth white or off-white wall, or tape a clean white foam board flat against any wall.
Stand 3–4 feet from the background — far enough that no shadow falls on the wall behind you.
Set up lighting: face a large window (window in front of you, not behind), or use two lamps at 45-degree angles on either side of your camera position.
Use your phone's rear camera — not the front-facing camera.
Open the camera settings: turn off Portrait mode, Beauty mode, AI enhancement, Scene Optimizer, Smart HDR, and any skin-smoothing or face-retouching options.
Remove glasses, hats, headphones, earbuds, and face coverings.
Arrange your hair so both eyes are fully visible.
Wear solid-colored everyday clothing. Avoid white (blends with the background). Avoid camouflage or uniform-style clothing.
Take the Photo
Have a friend or family member take the photo — do not take a selfie. Selfies involve the front camera and often cause compositional problems.
Position the bottom frame at your shoulder level, where your shoulders meet your arms.
Face the camera squarely. Both ears at the same height. No tilt or rotation.
Natural expression or natural smile. Eyes fully open. Mouth closed.
Take at least 10–15 shots. Review each at full zoom for sharpness, evenness of lighting, and no shadows.
Submit the Photo
Transfer the original camera file directly — by cable, AirDrop, or cloud sync. Do not send via text message.
Do not open the file in any editing app. Do not apply any adjustment.
Verify the file format is JPG/JPEG/HEIF and the size is between 54 KB and 10 MB.
Upload the photo to the U.S. Department of State portal. Use the portal's built-in crop tool if needed — this is the only adjustment permitted.
If the portal's automated tool rejects your photo, read the specific reason it provides, address that issue exactly, and try again.
What to Do If Your Photo Was Rejected: 3 Scenarios
Let’s explore the three most common rejection scenarios and find the solutions to fix them.
1. Rejection at the Upload Portal (Before Submitting Application)
The portal identifies the reason for the rejection and displays it on screen. Address the specific issue stated, take a new photo, and upload again. Your application is not submitted until the photo passes and you complete checkout — no application has been filed, no fees have been spent, no processing time has been lost.
2. Rejection After Application Submission (Human Review Stage)
You will receive a letter or email from the U.S. Department of State at the address you provided in your application. The letter explains what was wrong with the photo and provides instructions for submitting a replacement. Your application processing clock is paused while you respond. Respond as quickly as possible to minimize total processing delay. Follow the specific instructions in the letter — do not simply resubmit the same photo.
3. Rejection at an Acceptance Facility (In-Person Application)
Acceptance facility staff review photos before accepting your application. If your photo is rejected, you have two options: have a new photo taken at the facility (most acceptance facilities offer photo services) or return on a different day with a corrected photo. The application is not filed until an acceptable photo is presented.
Avoid Rejection: a Complete Digital Passport Photo Checklist
All requirements on this page come directly from travel.state.gov (last updated December 15, 2025). There is no other authoritative source for US passport photo requirements.
Requirement | Official Specification |
|---|---|
Digital size | 600 x 600 to 1,200 x 1,200 pixels |
Head size | 50-69% of the shot — 1 to 1⅜ inches (25–35 mm) from the bottom of the chin to the top of the head |
Color | Full color — no black-and-white |
Recency | Taken within the last 6 months |
Background | White or off-white — no shadows, texture, lines, or objects |
Expression | Neutral facial expression or natural smile. Eyes open. Mouth closed. |
Pose | Face the camera directly. Full face in view. No tilting. |
Digital changes | None permitted. No software, phone apps, filters, or AI of any kind. |
Glasses | Not allowed. |
Head coverings | Must be removed. Religious exception: signed statement. Medical: signed doctor's note. |
Uniforms | Not permitted. No camouflage clothing. |
Headphones / devices | Not permitted — remove all wireless hands-free devices. |
Face coverings / masks | Not permitted — full face must be visible. |
Digital upload format | JPG (JPEG), HEIF (HEIC), or PNG for online passport renewal / JPG (JPEG) only for visas and DV Lottery entries |
Digital upload file size | 54 KB to 10 MB (for online renewal) / 240 KB max for visas and DV Lottery entries |
Red-eye | Do NOT correct digitally — reshoot with natural lighting if red-eye appears |
Frequently Asked Questions
Does The U.S. Department of State Automatically Detect Ai-Edited Photos?
Yes. The U.S. Department of State's photo review system uses pixel-level forensic analysis to detect post-processing signatures, including AI enhancement artifacts that are invisible to the human eye. The system was significantly updated in 2024–2026 specifically to address the proliferation of AI photo tools. Even subtle phone-level AI smoothing is detectable. The only safe approach is to upload an original, unprocessed camera file.
Can I Smile in My Digital Passport Photo?
Yes — but carefully. The official U.S. Department of State guidance states: 'Use a neutral facial expression or a natural smile.' However, it also specifies: 'Avoid showing teeth.' A natural closed-mouth smile is acceptable. An open-mouthed grin or a toothy smile is not. The eyes must be open. When in doubt, a neutral, relaxed expression is the safest choice and produces the most consistent biometric results.
My Digital Passport Photo Has Red-Eye. Can I Fix It?
No. The U.S. Department of State explicitly prohibits red-eye correction: 'If the photo has a red-eye effect on your eyes, do not edit it. Take a new photo with natural lighting.' Red-eye is caused by flash photography reflecting off the retina. Prevent it by shooting with natural window light, which eliminates red-eye without any post-processing.
Can I Use a Photo From My Phone's Front Camera?
Technically, yes, but it is not recommended. Front-facing cameras on most smartphones capture at 12 megapixels — significantly lower than the 36–48 MP rear cameras — and they apply automatic AI beauty processing and skin smoothing by default. Using the front camera increases the risk of both quality rejection and AI-editing rejection. Use the rear camera with all AI processing disabled.
My Background Wall is Off-White. Will the Photo be Rejected?
Off-white is explicitly listed as acceptable by the U.S. Department of State. However, if your backdrop is unevenly lit, has even minor shadows, or has color variations, the photo will be rejected by an automated system. The background is one of the essential biometric checkpoints, as it helps define the facial outline and contrast required for accurate face matching.
If you are uncertain about the color of your background, upload your photo to the PhotoGov digital passport photo editor — the tool will automatically adjust it to meet all official U.S. Department of State requirements, including correcting your background to the correct white/off-white color.
I Submitted My Application, and the Photo Was Rejected. What Happens to My Fees?
Your application fees are not refunded due to a photo rejection. The U.S. Department of State will hold your application while you submit a replacement photo. Processing does not restart — it resumes from where it was paused once your replacement photo is accepted. Respond to the U.S. Department of State's letter or email promptly and follow the exact instructions provided.
Can I Use the Same Photo for a US passport and a US visa?
No. Though the biometric specifications are effectively the same for both U.S. visa and passport photos (2×2 inches, white or off-white background, same pose and expression), digital visa and passport submissions require different file types. For example, an online passport renewal requires 54 KB–10 MB files at 600 x 600 to 1,200 x 1,200 pixels in JPEG, HEIF, HEIC, or PNG; non-immigrant visa applications and DV Lottery entries require JPEG only under 240 KB. Always check the specific portal's requirements before submitting your photo.
How Long is a Passport Photo Valid?
The photo must have been taken within the last 6 months of the date you submit your application. There is no fixed expiration date on the photo itself — the 6-month window is measured from the submission date, not from when the photo was taken.
Official Government Sources
US Passport Photo Requirements: US Department of State — Passport Photos
Online Passport Renewal Photo Guide: US Department of State — Uploading a Digital Photo
US Visa Digital Image Requirements: US Department of State — Digital Image Requirements for Visas
ICAO Biometric Standards: Document 9303, Part 3 — Specifications for Machine Readable Travel Documents
Authored by:
Nathaniel K. RowdenApproved by Association of Visa center
On this page:
- Why Can My Digital Passport Photo Be Rejected in the First Place?
- 29 Key Digital Passport Photo Rejection Reasons — and Fixes for Each One of Them
- Category 1: Digital Editing and AI — the Most Rejected Category in 2026
- Category 2: Background Errors
- Category 3: Head Size and Position
- Category 4: Lighting Issues
- Category 5: Glasses, Headwear, and Improper Attire
- Category 6: Image Quality and File Technical Issues
- Category 7: Photo Older Than 6 Months
- How to Take a Compliant Digital Passport Photo at Home
- What to Do If Your Photo Was Rejected: 3 Scenarios
- Avoid Rejection: a Complete Digital Passport Photo Checklist
- Frequently Asked Questions
- Official Government Sources
We value your Privacy
We use cookies to enhance your browsing experience, serve personalized ads or content. By clicking “Accept All”, you consent to our use of cookies.