Learn the 2026 US Visa Photo Requirements: Expert-Checked & Verified
Learn the 2026 US Visa Photo Requirements: Expert-Checked & Verified
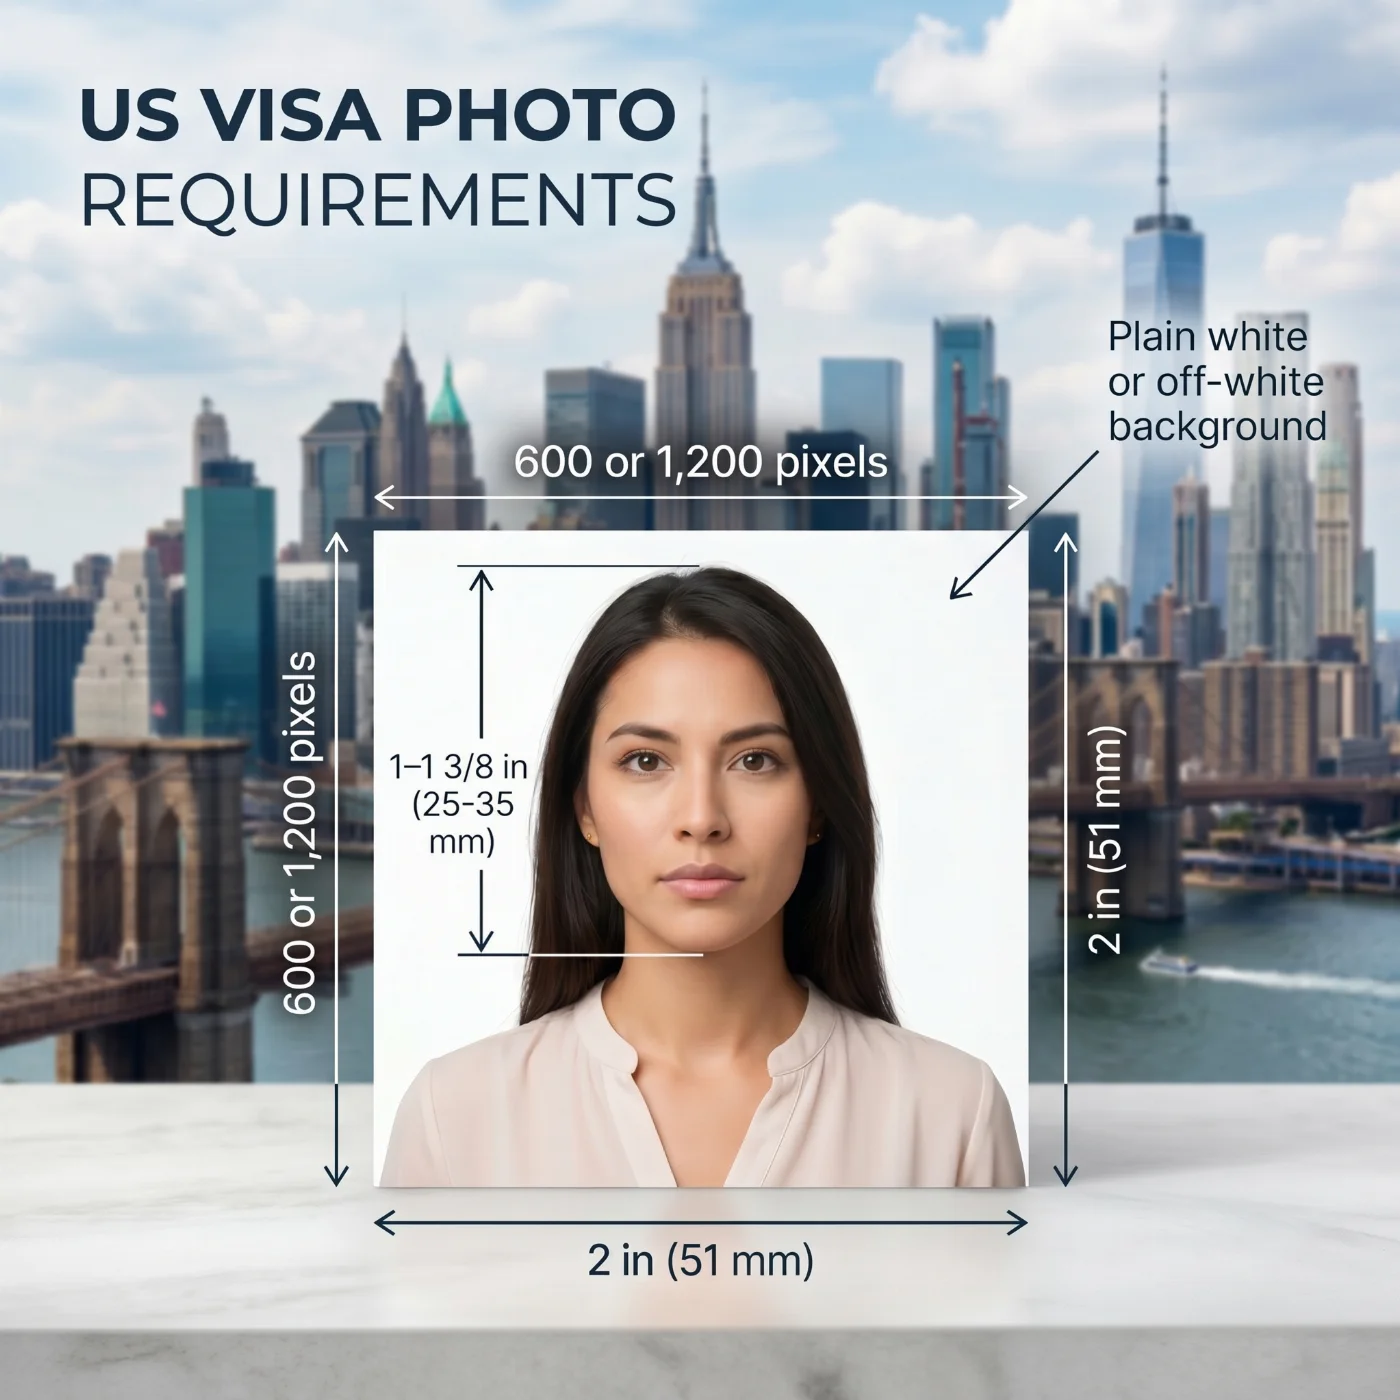
The U.S. has some of the strictest visa photo requirements in the world: even a small deviation from the rules can lead to an instant rejection. To avoid delays, your picture must follow every specification — a square aspect ratio, printed size of 2 x 2 inches with the head measuring 1 to 1 3/8 inches, a digital file between 600 x 600 and 1,200 x 1,200 pixels, a plain white or off‑white background, no glasses, taken within the last six months, and be compliant with all other technical parameters.
This Complete 2026 Guide covers all U.S. visa photo requirements you need to keep in mind to prepare a compliant image that is accepted on the first try. Follow them, and enjoy your trip to the U.S.!
 Source: U.S. Department of State
12 Essential US Visa Photo Requirements
The U.S. Department of State sets detailed requirements for its immigrant and non-immigrant visa photos, covering every aspect from the size and background to the number of images, their recency, and submission channels. In addition to key national rules, U.S. visa photos must follow the official biometric standards of the International Civil Aviation Organization (ICAO) Document 9303. To save you time and effort, we gathered all official requirements in this guide — with every single one manually checked and verified by our U.S. ID photo compliance team.
Parameter | Requirement |
|---|---|
1. Number of photos | One digital photo is required for applicants submitting the DS‑160 or DS‑1648 online forms or applying for a Diversity visa. Two printed photos are required for the green card interview, Form DS‑260. |
2. Recency | The visa photo must be taken within the last 6 months and clearly show the applicant's current appearance and normal aging process. Individuals who have undergone a significant change in appearance, like weight loss, must provide a new photo that reflects this change. |
3. US visa photo size | Square aspect ratio — for printed photos, 2×2 inches (51×51 mm). The head centered, and the face measured between 1–1 3/8 inches (25–35 mm); for digital photos, 600 x 600 to 1,200 x 1,200 pixels with the head covering 50–69% of the image height. |
4. Background | A plain white or off‑white background without patterns or textures. |
5. Lighting | Even lighting. The image must be clear and show the applicant's natural skin tone, with no shadows or reflections on the face or background. |
6. Facial expression and positioning | The applicant is facing the camera directly, with a neutral facial expression, eyes open, and mouth closed. |
7. Clothing | Everyday clothes in colors that contrast with a white background. No camouflage attire or uniforms are permitted. Religious clothing worn daily is allowed, but the full face must be visible. |
8. Head covering and accessories / Hearing devices | An applicant cannot wear a hat or a head covering that obscures facial features or the hairline, unless it's worn daily for religious or medical reasons. Headphones and wireless hands‑free devices are not permitted. If a US visa applicant normally wears a hearing aid or similar device, they may keep it in the ID photos. |
9. Eyeglasses | Glasses are not allowed, except for rare medical reasons such as recent eye surgery. In these cases, a signed doctor's statement is required. If accepted, the frames must not cover the eyes, and the image must be free of glare, shadows, or lens refraction. |
10. Facial surgery | When an applicant has undergone a facial surgery that has significantly changed their appearance, a signed doctor's statement verifying the identity is required. |
11. Print quality | The photo must be printed in color on high-quality matte or glossy photo paper at 600 DPI, a square aspect ratio exactly 2 x 2 inches, without visible borders, frames, or other artefacts. It has to be sharp, well‑focused, free from pixels, dots, or compression artefacts. |
12. Digital quality | Digital file must be 600 × 600 to 1,200 x 1,200 pixels, saved as a JPEG, 24-bit color (sRGB), 240 KB max. |
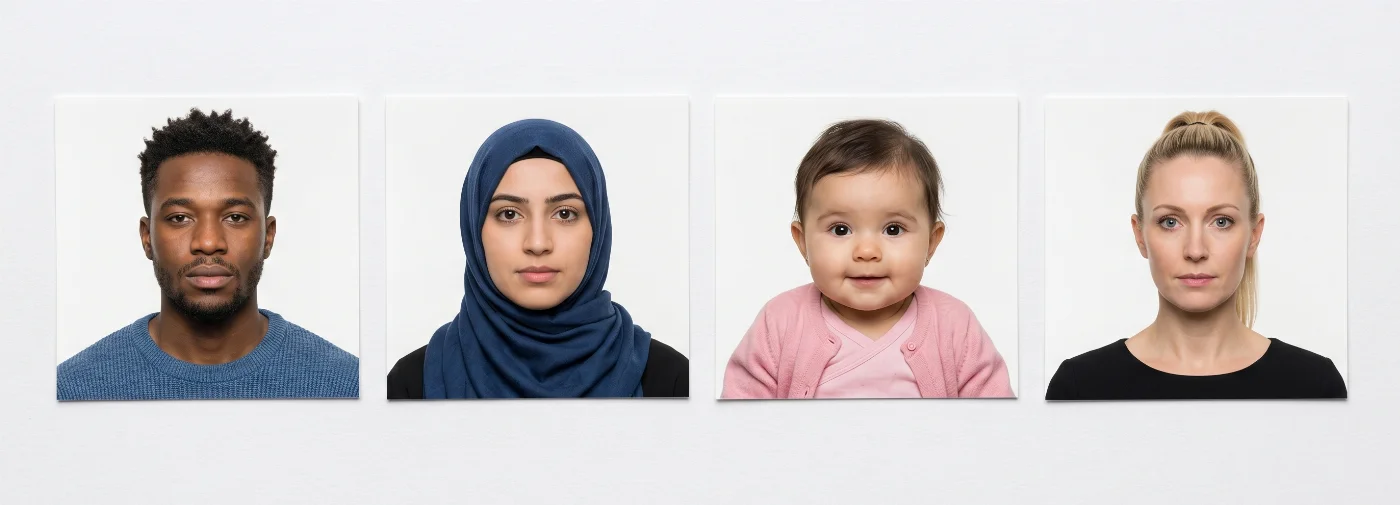
Acceptable US Visa Photos
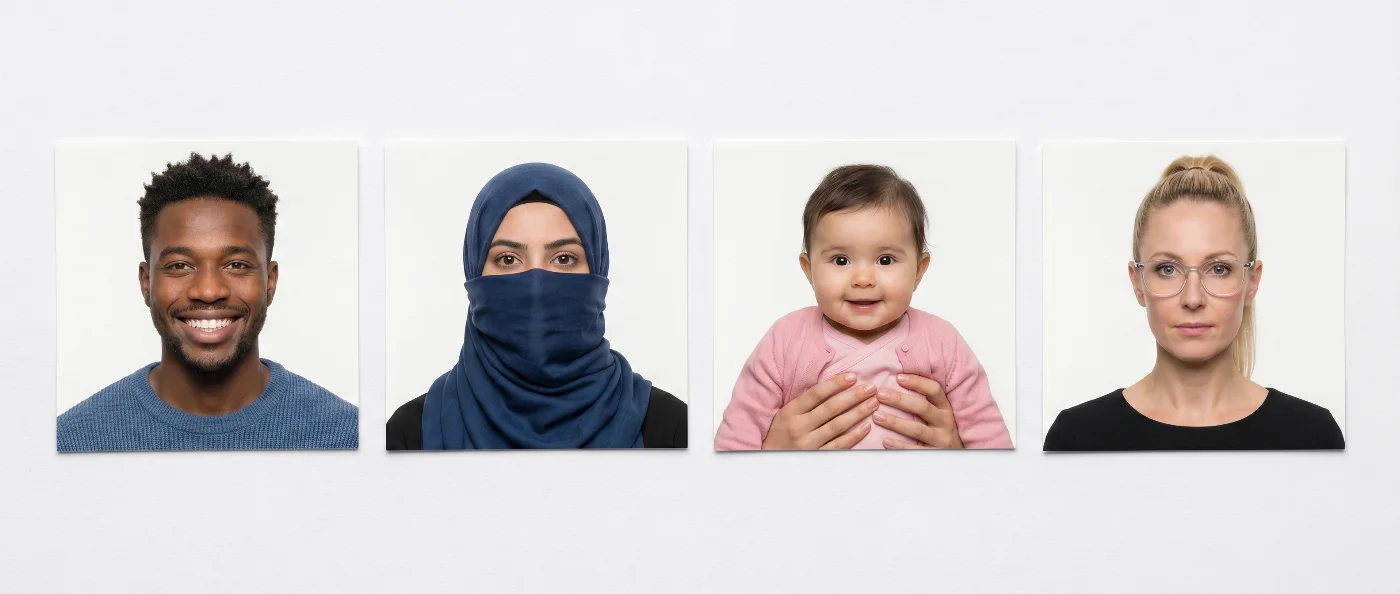
Unacceptable US Visa Photos
US Visa Photos for Special Cases — from Religious Clothing to Appearance Change
Below are detailed explanations for different “appearance cases” — and what to do when taking a US visa photo if you have one of them.
Hijab, headscarf, kippah, turban. Religious head coverings worn daily are permitted, provided the full face is visible from the bottom of the chin to the top of the forehead, and from edge to edge of the face. The covering must not cast shadows on the face. A signed statement attesting to daily religious wear is not formally required, but some consulates request one — keep one prepared if you regularly wear religious attire.
Niqab and full-face veils. Permitted only when the veil is parted or removed enough to fully expose the face. The photo cannot show only the eyes.
Hearing aids. Hearing aids, cochlear implants, and similar medical devices may be worn in the photo. Wireless or Bluetooth hearing devices that look like consumer earbuds aren’t allowed.
Prosthetic eyes / Eye patches. Permitted, but the photo should clearly show your normal everyday appearance. If you wear a patch only some of the time, use the version that matches your travel documents. A medical statement is required.
Wheelchair users and applicants who cannot sit upright. The US Department of State allows photos taken in any position the applicant is able to maintain, provided the head is straight and facing the camera. A plain white backdrop behind the applicant must be used— a white sheet held up by a helper works well.
Elderly applicants and applicants with health conditions. Eyes that are partially open due to medical conditions (Bell's palsy, ptosis, recent surgery) are evaluated on a case-by-case basis. A signed letter from a treating physician explaining the condition will reduce the chance of rejection.
Applicants with significant facial surgery or scarring. A signed doctor's statement verifying identity is required. The photo must reflect current appearance — do not submit a pre-surgery photo.
Digital vs Printed US Visa Photo Explained
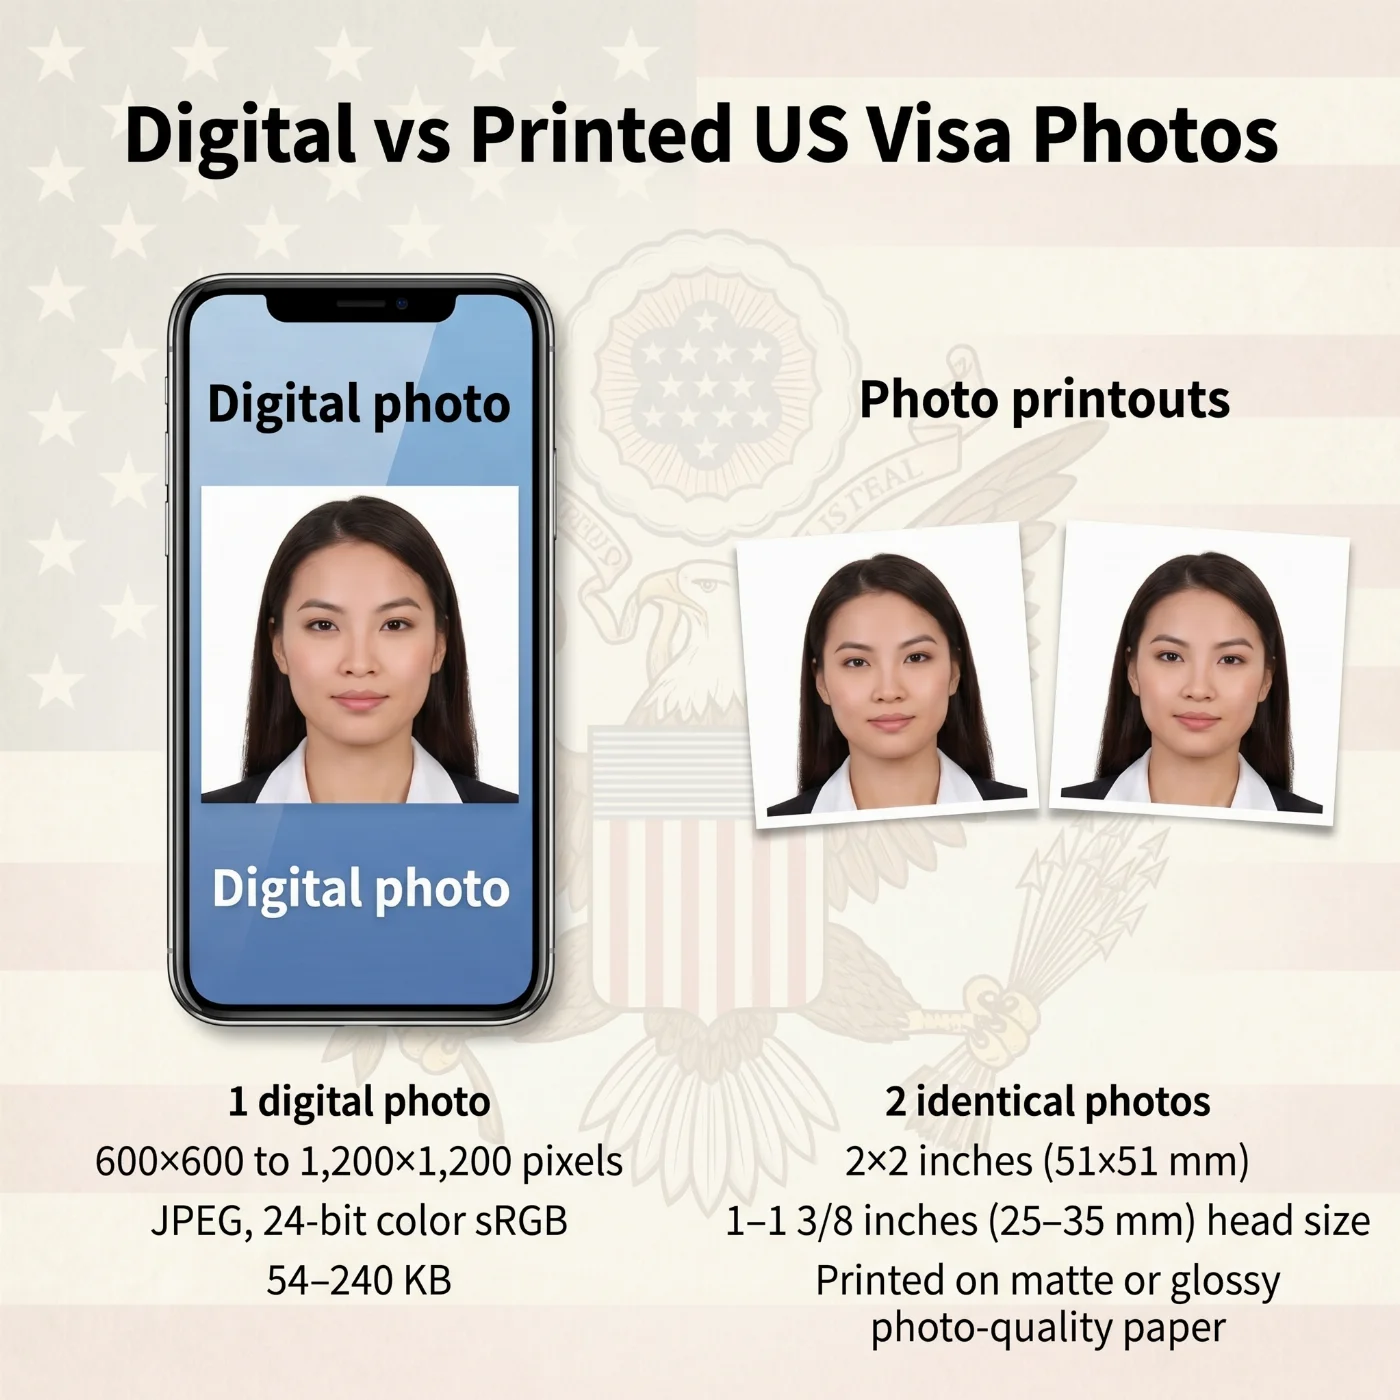
For U.S. visas, the official application accepts both printed and digital photos, but each type is used for different categories. Digital files are uploaded to online forms (DS-160, DS-1648, and the Diversity Visa Lottery). Printed photos are required for immigrant visa interviews (Form DS-260) and brought to the embassy on the day of the appointment.
Specification | Printed | Digital |
|---|---|---|
Purpose | Submit at the immigrant visa interview at a U.S. embassy or consulate (Form DS-260) | Upload to the online DS-160, DS-1648, or Diversity Visa (DV Lottery) application |
Quantity | 2 identical prints | 1 file |
Dimensions | 2 × 2 inches (51 × 51 mm); head 1–1 3/8 inches (25–35 mm) from chin to crown, covering 50–69% of image height | Square aspect ratio (1:1); minimum 600 × 600 pixels, maximum 1,200 × 1,200 pixels |
Format | Color, on high-quality matte or glossy photo paper at 600 DPI | JPEG (.jpg), 24-bit color (sRGB), file size 240 KB max |
Submission | Bring in person to the embassy/consulate interview | Upload directly to the online application portal; can also be used to order compliant prints from a photo shop |
US Visa Photo Requirements by Visa Type
All non-immigrant U.S. visa categories — B1/B2, F-1, M-1, J-1, H-1B, L-1, L-2, O-1, O-2, K-1, and others — use the same DS-160 photo standards described in the requirements table above: square 2 × 2 inches, white or off-white background, taken within the last 6 months, no glasses, neutral expression. Below are the category-specific nuances applicants should be aware of.
F-1 / M-1 Student Visa Photo
Take the photo close to your SEVIS appointment date — not before — so it reflects your most recent appearance for the school's I-20 records and the consular interview.
J-1 Exchange Visitor Visa Photo
Some J-1 program sponsors (au pair, intern, summer-work-travel) require a separate ID photo in their internal portal. These sponsor photos are usually less strict than DS-160 standards, but using a compliant DS-160 photo for both is the safest choice.
K-1 Fiancé(e) Visa Photo
In addition to the DS-160 photo, the U.S. citizen petitioner files Form I-129F, which requires two passport-style printed photos of both the petitioner and the beneficiary, taken within the last 30 days. These I-129F photos must meet USCIS passport-photo standards (essentially identical to the State Department visa standards).
L-1 Intracompany Transferee Visa Photo
L-2 dependents (spouse and children) each need their own individual photo — one photo per applicant, regardless of age. Family group shots are never accepted.
O-1 / O-2 Extraordinary Ability Visa Photo
O-1 applicants frequently submit professional headshots from media kits — almost always non-compliant. Backgrounds, lighting, and stylized expressions used in promotional photography violate U.S. visa standards. Take a dedicated visa photo, not a marketing portrait.
Diversity Visa (DV Lottery) Photo
The DV Lottery has the strictest photo verification of any U.S. visa program. Reusing a previous DV Lottery photo — even a fully compliant one — results in automatic disqualification, since the State Department uses facial-recognition software to detect duplicate entries across years. See our DV Lottery photo tool for a step-by-step compliance check.
Immigrant Visa Photo (IR, CR, EB, F-Categories)
Immigrant visa applicants file Form DS-260 online and must bring two printed 2 × 2-inch photos to the consular interview. Both prints must be identical, on glossy or matte photo paper, in color, and taken within the last 6 months. Some embassies request additional photos for the medical examination — check your appointment instructions.
US Green Card Photo: Forms I-485, I-130, I-765, I-131, N-400
Green card applicants frequently confuse U.S. visa photo rules (set by the Department of State, used at consulates abroad) with U.S. immigration photo rules (set by USCIS, used inside the United States). The standards are nearly identical — but a few key differences matter.
Form | Purpose | Photos Required | Submitted How |
|---|---|---|---|
I-485 | Adjustment of Status (green card from inside the U.S.) | 2 identical color prints, 2 × 2 inches | Mailed with application; biometrics taken later at ASC |
I-130 | Petition for Alien Relative | 2 identical color prints of beneficiary, 2 × 2 inches | Mailed with the petition |
I-765 | Employment Authorization (EAD) | 2 identical color prints, 2 × 2 inches | Mailed with the application |
I-131 | Travel Document / Advance Parole | 2 identical color prints, 2 × 2 inches | Mailed with the application |
N-400 | Naturalization (citizenship) | 2 identical color prints, 2 × 2 inches (only for applicants residing abroad) | Mailed with the application |
USCIS specifies that photos should be taken within the last 30 days (stricter than the State Department's 6-month rule), printed on thin paper, with the applicant's name and A-number written lightly in pencil on the back. Always write your name on both prints — USCIS officers process millions of forms a year, and unidentified photos can be lost from your file.
For a green card interview, you must provide two identical color prints measuring exactly 2 × 2 inches (51 × 51 mm) on high-quality matte or glossy photo paper, with the head sized 1–1 3/8 inches (25–35 mm) from chin to crown — covering 50–69% of the image height. The prints must be taken within the last 6 months, sharp and in focus, on a plain white or off-white background, with a neutral expression, mouth closed, and eyes open and clearly visible. Digital retouching, beauty filters, and uniforms are not permitted.
ESTA Photo Requirements
The Electronic System for Travel Authorization (ESTA) is the online pre-clearance system for citizens of Visa Waiver Program countries. ESTA itself does not require you to upload a photo at the application stage — applicants enter only passport, biographical, and travel data. However, the photo embedded in your machine-readable passport (the "biometric chip" photo) is the one U.S. Customs and Border Protection officers compare to your face when you arrive.
For this reason, your passport photo must already meet ICAO Document 9303 biometric standards: square or rectangular, plain light background, neutral expression, no glasses, taken within the last 6 months of your passport application. If your passport is more than 5 years old, or if you've had a facial surgery that has significantly changed your looks, weight changes, or aging since your last passport photo, U.S. CBP may pull you aside for secondary inspection. Renewing your passport with a fresh, compliant photo is the safest approach.
How to Apply for a Nonimmigrant US Visa?
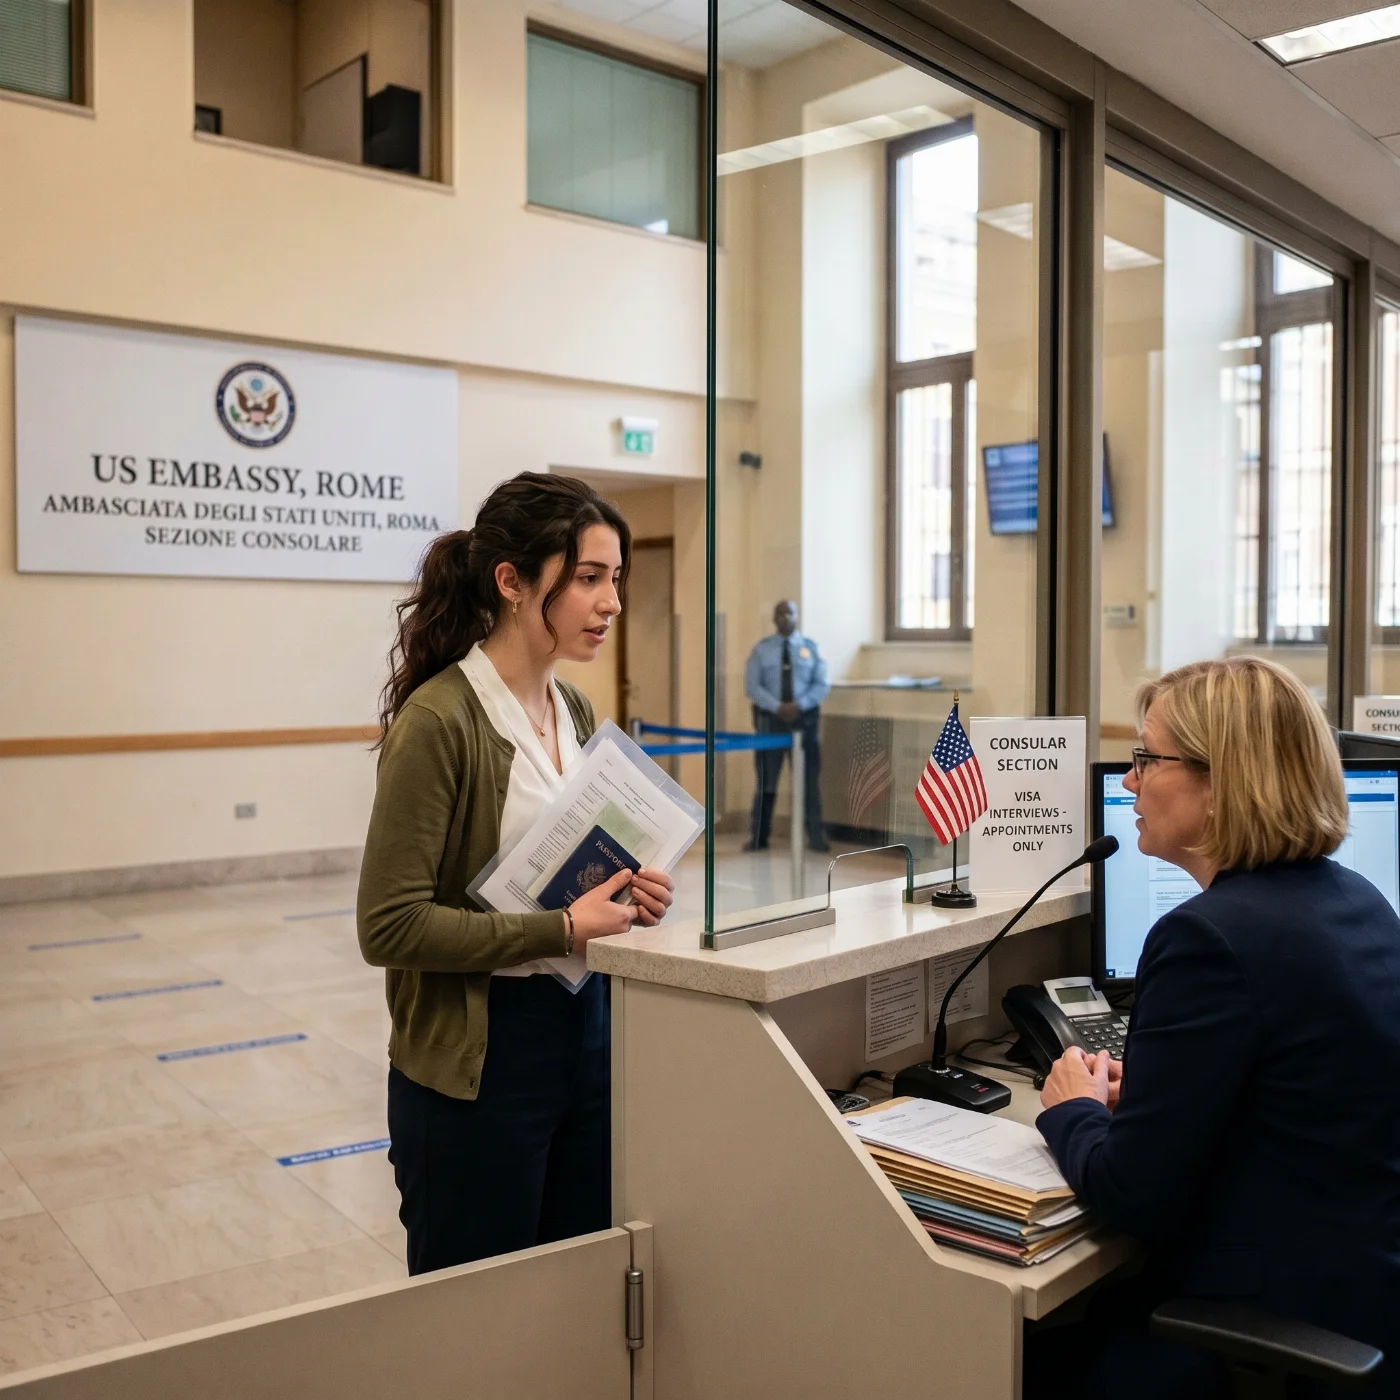
To apply for a US visa, you must complete the DS-160 form online and prepare official documents — your valid passport, confirmation page, and fee receipt. A suitable photo that meets the US visa photo requirements must be uploaded during the application. When reviewing your case, a Department of State employee will check that your photo meets the standards and that all paperwork is correct. The next step is to schedule an interview at the US embassy or consulate where you apply, depending on your location. Different visa categories (for example, B1/B2 visitor visas, student visas, or work visas) may require additional supporting documents.
Step-by-Step: How to Upload Your Photo to DS-160
The CEAC online application (Consular Electronic Application Center) is where you upload your photo for the DS-160 form. The interface is notoriously strict — even compliant photos are sometimes rejected by the automated check. Here's how to navigate it.
Step 1. Prepare your photo file. Make sure it is JPEG (.jpg), square, between 600 × 600 and 1200 × 1200 pixels, and between 54 KB and 240 KB. PhotoGov produces a file ready for direct upload — no resizing needed.
Step 2. Log in to the CEACwith your DS-160 application ID.
Step 3. Navigate to the "Upload Photo" page. You will see two options: "Upload Photo" and "I will provide a photo at the time of the interview."
Step 4. Click "Upload Photo" and select your file. The system will run an automated check. If accepted, you'll see a green checkmark. If rejected, you'll see one of the following error codes:
Head not centered / head out of frame: Recrop with the head centered and the face occupying 50–69% of image height.
Background not uniform: Retake with a plain white wall, no shadows, no objects.
Pixel dimensions out of range: Resize to 600 × 600 to 1200 × 1200 pixels.
File size too large / too small: Re-export the JPEG between 54 KB and 240 KB.
Color depth incorrect: Re-save as 24-bit color JPEG (not grayscale, not 8-bit).
Glasses detected: Retake without eyeglasses.
Face not detected: Retake with proper lighting and the head facing forward.
Multiple faces detected: Make sure only the applicant is in frame.
Step 5. If the upload fails three times, choose the second option ("I will provide a photo at the time of interview") and bring two printed 2 × 2 photos to your interview.
Step 6. After a successful upload, save your DS-160 confirmation page. The barcode and photo thumbnail must be visible — print this page and bring it to your interview.
Why US Visa Photos Get Rejected — and What to Do About It
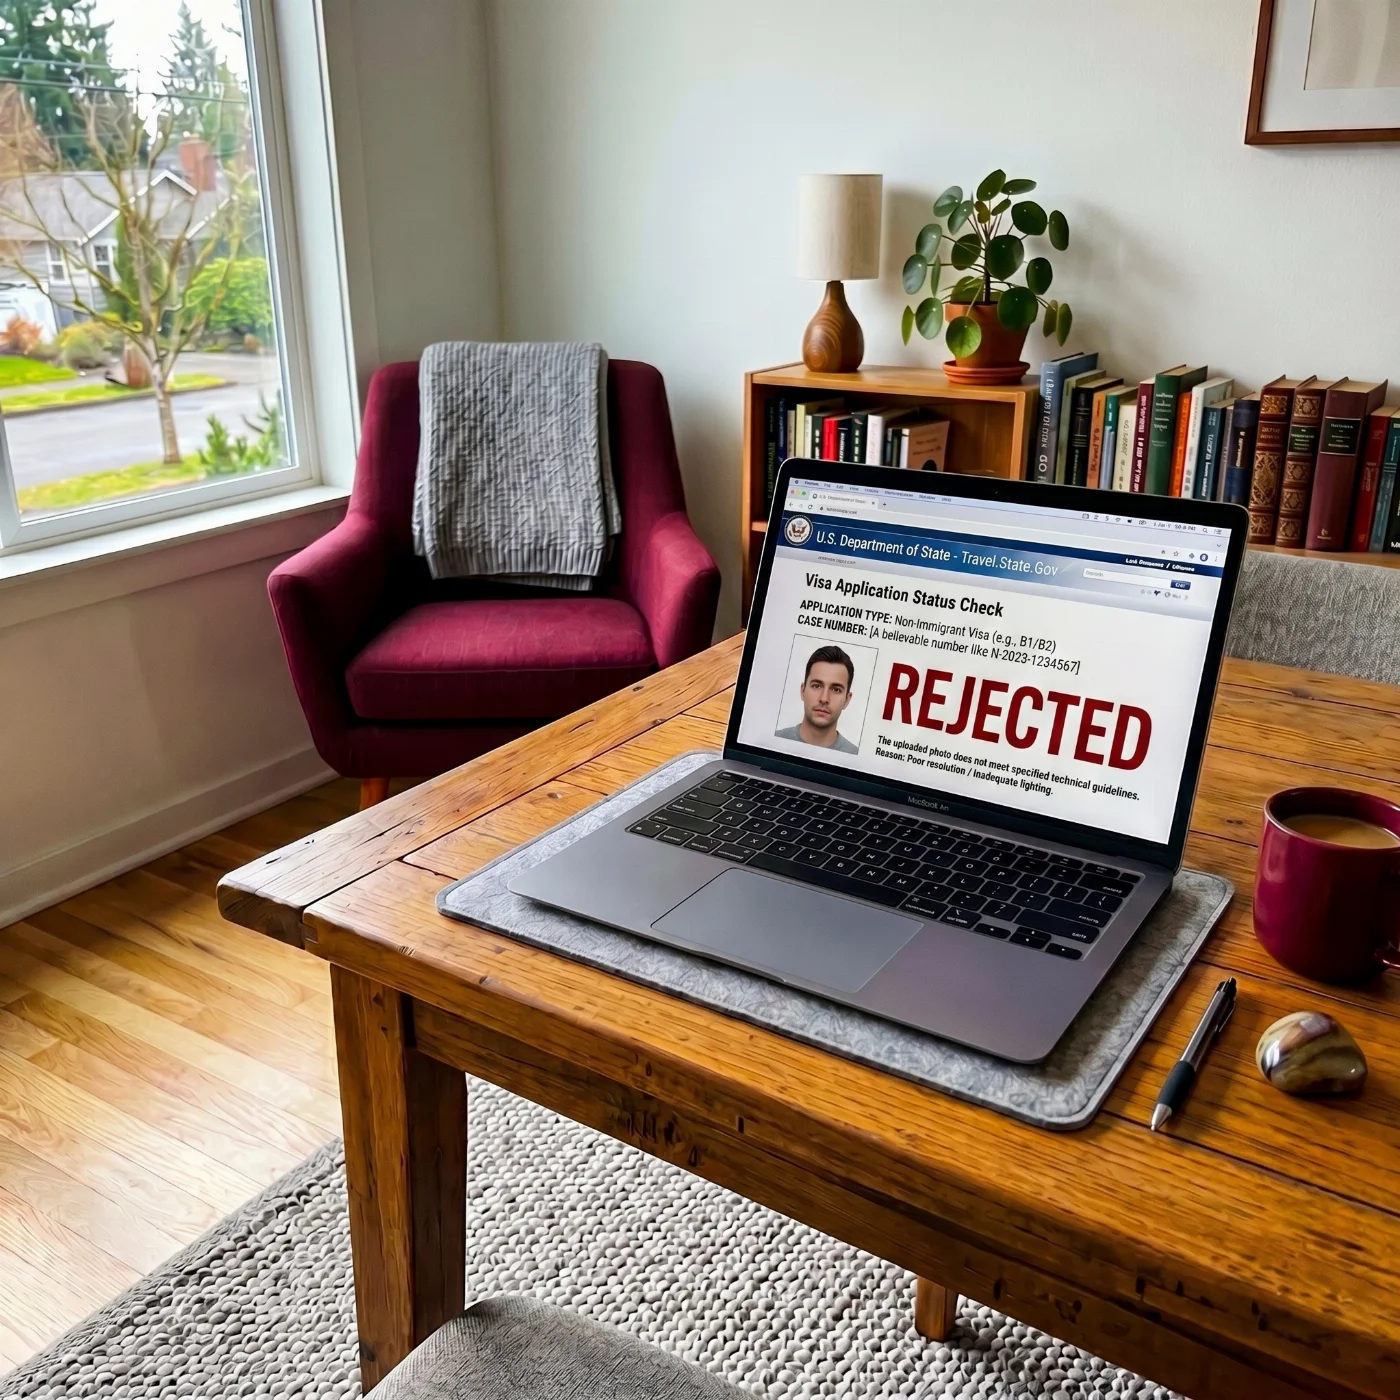
According to data published by the U.S. Department of State and consular post reports, roughly one in four visa photos uploaded to the DS-160 application is flagged as non-compliant. Photos rejected at the embassy interview itself can delay your case by weeks. Understanding why photos are rejected — and how to recover — is the single fastest way to make sure your application is approved on the first try.
The 12 Most Common Rejection Reasons
The background is not white or off-white. Cream, beige, light gray, light blue, and patterned walls are the number-one reason photos are rejected. The background must be uniform, plain, and clearly white or off-white — without textures, shadows, gradients, or visible objects.
Shadows on the face or background. Side lighting, overhead lighting, and direct sunlight all create shadows that the State Department's facial recognition system reads as facial deformities. Use indirect, even, front-facing daylight from a window.
The head is the wrong size. The head from chin to crown must measure 1 to 1 3/8 inches (25–35 mm), or 50–69% of the image height. Heads that are too small or too large are an instant rejection.
Glasses. Eyeglasses have not been allowed in U.S. visa photos since November 1, 2016. Even if you wear them every day, you must remove them. The only exception is a documented medical reason (e.g., recent eye surgery) accompanied by a signed statement from a medical professional.
Smiling or showing teeth. Your expression must be neutral, with your mouth closed. A natural, slight upward curve at the corners of the mouth is acceptable; anything more — including a closed-lip smile that lifts the cheeks — risks rejection.
Eyes closed, partially closed, or looking off-camera. Both eyes must be fully open and looking directly into the lens. This is the single most common reason baby visa photos are rejected.
The photo is older than 6 months, or the appearance has changed significantly. Even if you haven't aged a day, a photo more than 6 months old will be rejected. The same applies if your appearance has changed (weight, beard, hair color, tattoos visible on the face).
Hair covering the face. Hair must not fall over the eyes, and both edges of the face should be visible. Ears do not have to be visible, but the face cannot be obscured.
Filters, beauty modes, or AI retouching. iPhone Portrait Mode, Snapchat-style filters, skin-smoothing apps, and any kind of background blur are all grounds for rejection. AI-generated and AI-edited images are detected and rejected since 2024 — the photo must be unedited.
Wrong file format or pixel size. Files must be JPEG, square (1:1), between 600×600 and 1200×1200 pixels, and 54 KB–240 KB. Files outside this range are rejected by the CEAC upload tool before you even submit.
Uniforms, camouflage, or clothing that blends with the background. Military, police, hospital, and airline uniforms are not allowed. White shirts that merge with the white backdrop are also a frequent cause of rejection.
Headphones, AirPods, or visible Bluetooth devices. Bluetooth earpieces and consumer audio devices are not allowed. Medical hearing aids are permitted.
What to Do If Your US Visa Photo is Rejected
A photo rejection is almost never a final decision. Here's how to recover.
Step 1. Identify the exact rejection reason. If your photo was rejected at the CEAC upload stage (DS-160), you'll see a specific error code on screen — see the full error-code list in the DS-160 upload step-by-step section below. If your photo was rejected at the embassy interview, the consular officer will tell you verbally.
Step 2. Map the error to one of the 12 requirements above and identify the specific rule you violated.
Step 3. Retake the photo from scratch. Don't try to edit or "fix" the rejected photo — Photoshopped visa photos are detectable by the State Department's verification systems and can lead to a permanent ban for misrepresentation. Take a new photo from scratch, following the corrected requirement.
Step 4. Re-upload (DS-160) or re-print (DS-260). For DS-160, return to your CEAC application and re-upload the new file. For DS-260 / immigrant visa interviews, bring two new prints to the rescheduled interview.
Step 5. If rejected at the embassy interview, request the rescheduling instructions. Most consulates will allow you to return with a compliant photo within a few days, sometimes the same day. Some embassies even have on-site photo services, though their quality varies.
Step 6. If your application is delayed because of repeated photo rejections, contact the embassy directly. Each U.S. embassy and consulate has its own contact channel — you can find yours on usembassy.gov.
To minimize rejection risk, run your photo through an automated compliance checker before uploading. Tools like PhotoGov verify all 12 requirements (background, head size, shadows, expression, etc.) in under 30 seconds and flag issues before you submit.
Where to Take a US Visa Photo (and How Much it Costs)
A compliant photo is a vital part of your visa application — getting it right the first time saves money and weeks of delay. Below are the four main options, with realistic 2026 pricing and rejection risk.
Online visa photo editor. Upload a photo from your iPhone or digital camera; the service automatically crops it to U.S. visa standards and returns a digital file or printable PDF in under 30 seconds. The fastest, cheapest, and most reliable approach when you have a decent original shot.
Pharmacies, shipping centers, and post offices (CVS, Walgreens, FedEx Office, UPS Store, USPS). Convenient locations and trained staff, but quality varies by store, and the wait depends on staff availability. Searching "US visa photo near me" usually returns these first.
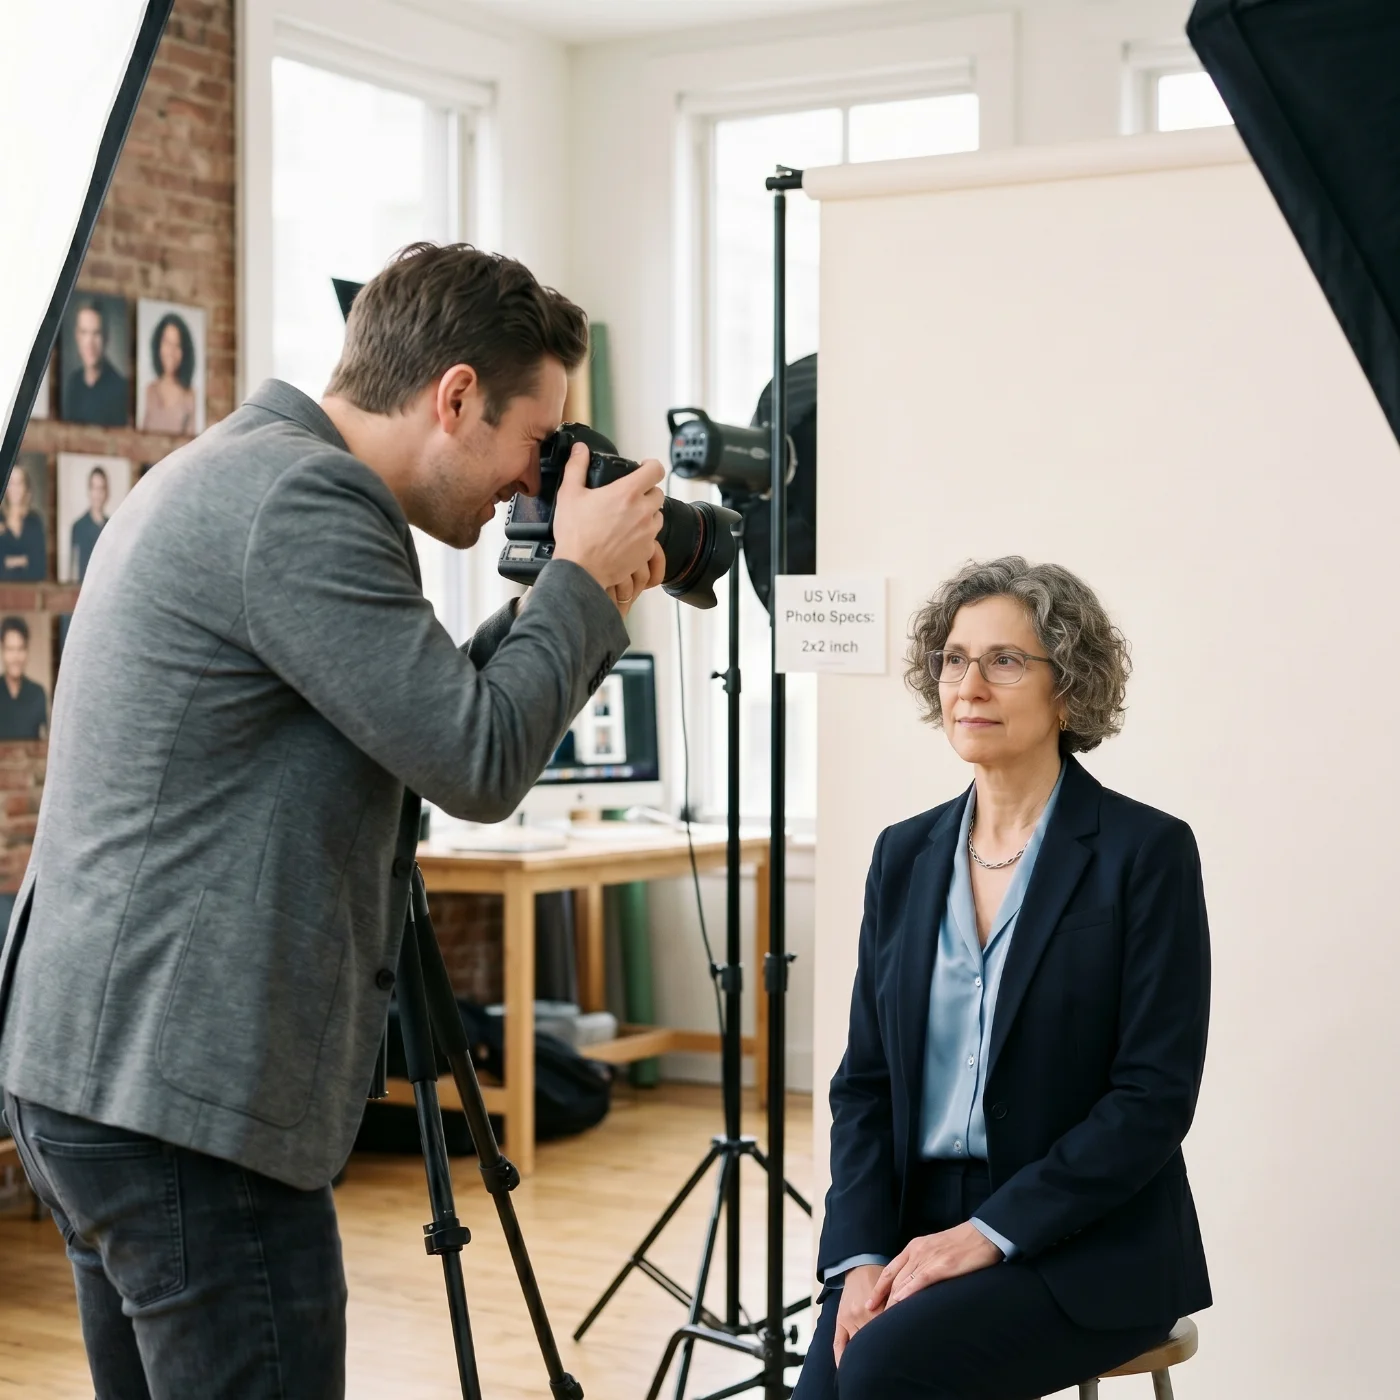
Professional photographer or studio. The most reliable in-person option. A photographer handles lighting and composition, and a high-quality printer is on-site. Most expensive and requires an appointment.
Photo booth. The cheapest option, but the least reliable. Vending-machine booths often produce photos with glare, shadows, or wrong backgrounds — frequently rejected at U.S. embassies.
Where to Take a US Visa Photo: Service Comparison
Service | Time | Pricing (USD) | Chance of Approval |
|---|---|---|---|
PhotoGov Online Visa Photo Tool | Under 30 seconds | Free first digital photo, then from $5.90 | Very High |
Professional photographer / studio | 1 hour to 1–2 days (incl. travel + appointment) | $20–100 | High to Very High |
Walgreens/CVS (pharmacy photo) | 10–30 minutes | $16.99-$17.99 (+$3.99 in CVS for digital) | High |
FedEx Office | 10–30 minutes | $14.95 (incl. digital file) | High |
UPS Store | 10–30 minutes | $11.99–14.99 | High |
USPS Post Office | 10–30 minutes | $15.00 | High |
Walmart Photo Center | 10–30 minutes | $9.96 | Moderate to High |
Costco Photo (members only) | 10–30 minutes | $4.99 | High |
Staples Print & Copy | 10–30 minutes | $14.99 | Moderate to High |
AAA (members) | 10–30 minutes | $10–15 | High |
Self-service photo booth | 5–15 minutes | $5–15 | Low (often rejected) |
Where to Find a US Visa Photo Service Near Me
A search for "US visa photo near me" returns the nearest providers in your country. Common options by region:
Popular Visa Photo Services in the United States
CVS
Walgreens
Walmart
FedEx Office
UPS Store
USPS Post Office
Costco / AAA (members)
Local photo studios offering professional services
Where to Take a US Visa Photo in Canada
Shoppers Drug Mart
London Drugs
Walmart
Staples Print & Copy
Post offices
US Visa Photo Services in the United Kingdom
Snappy Snaps
Timpson
Max Spielmann
Jessops
Post Office branches
Popular Spots for Taking a US Visa Photo in Australia
Officeworks
Australia Post
Harvey Norman
Camera House
Local pharmacies and photography labs
Where to Take a US Visa Photo in India
Kodak Express
Fujifilm Photo Service
Local camera stores and ID photo shops in major malls
US Visa Photo Service in Thailand
Photo Express (Bangkok, Phuket, Chiang Mai)
Kodak Express
Local "photo for visa" shops near embassies
US Visa Photo Service in the Philippines
Picture City
Kodak Express
FujiFilm Digital Imaging
Local malls and camera stores
US Visa Photo Service in Malaysia
Foto Express
Kodak Express
Harvey Norman
Where to Take a US Visa Photo in Singapore
FotoHub
Kim Tian Colour Centre
Kodak Express
US Visa Photo Service in Indonesia
Digital FujiFilm
Kodak Express
If you want to save money and time, an online tool like PhotoGov is available 24/7 with no registration or app download needed.
How to Take a US Visa Photo at Home
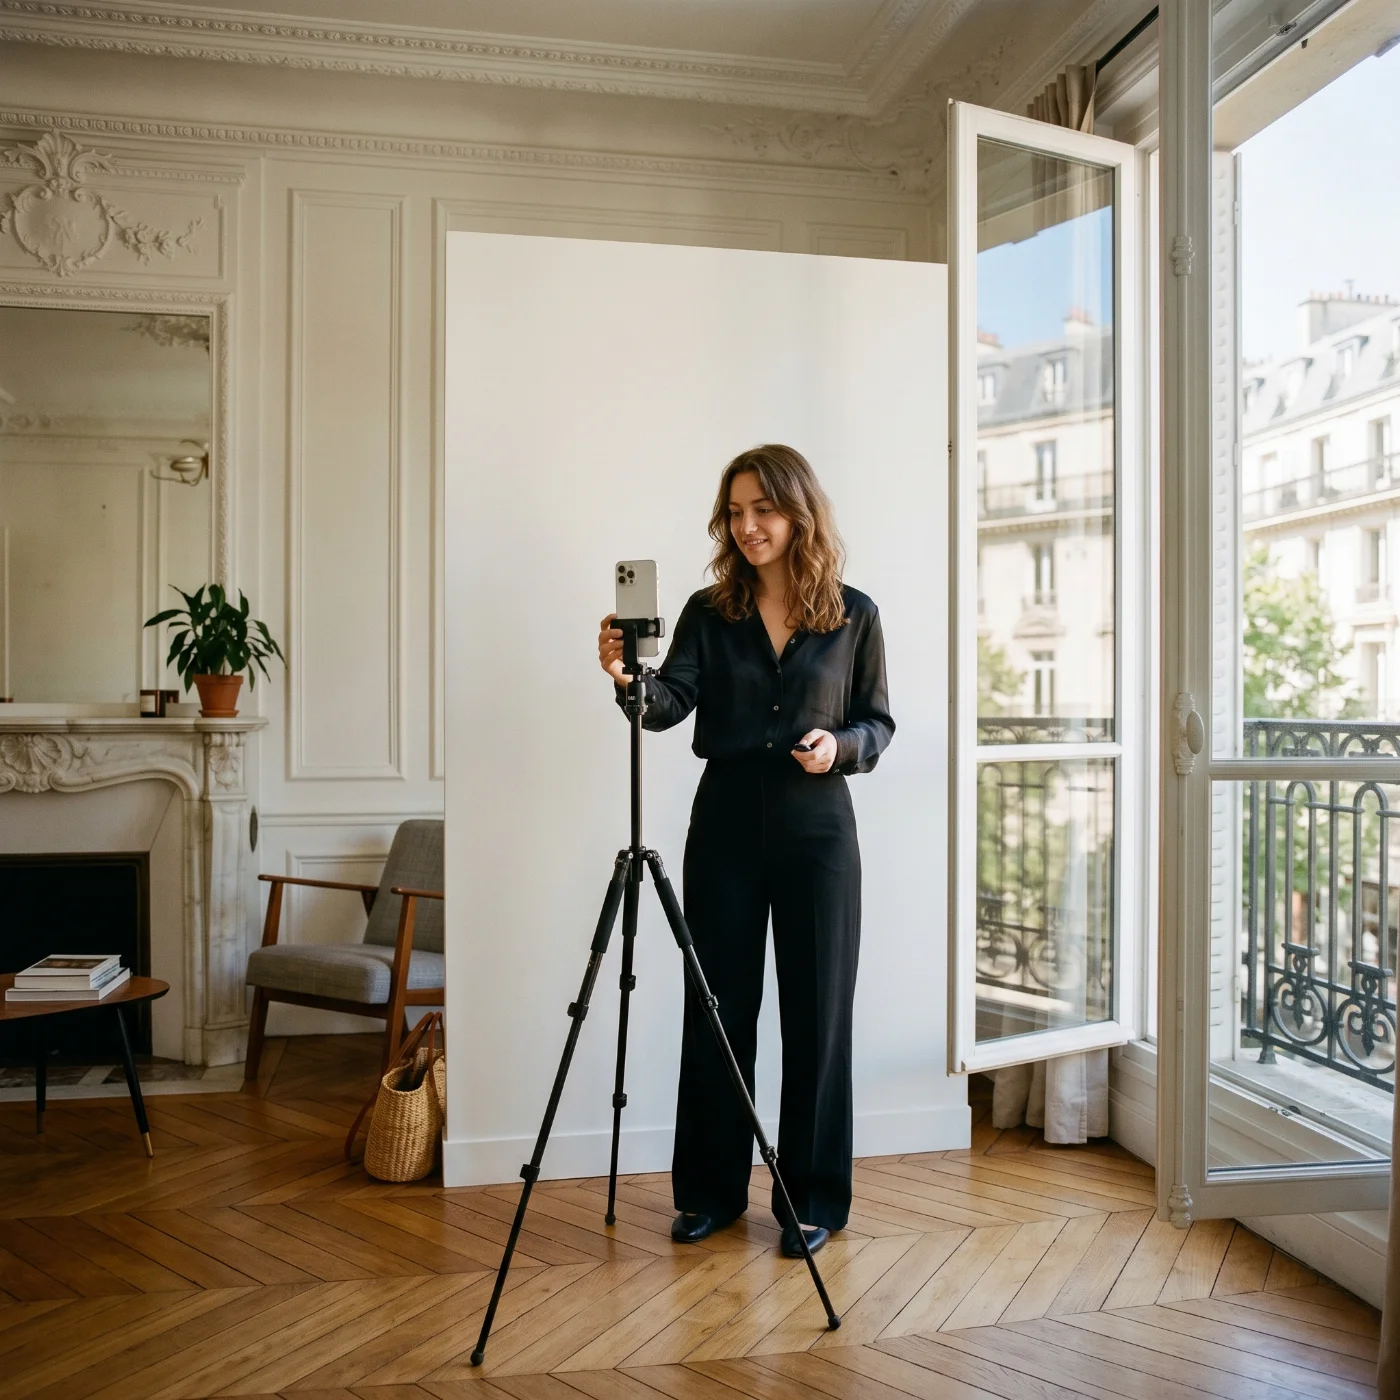
Your phone, laptop, or camera is more than capable of producing a photo that meets all U.S. Department of State requirements — you just need to set the scene correctly and follow a few simple rules. Use these expert tips to take a perfect visa picture from home.
The following principles apply no matter which device you use.
Wear everyday clothing that doesn't blend with the background. Choose solid, neutral colors that contrast clearly with a white or off-white wall — navy, dark gray, burgundy, forest green, or black work well. Avoid white shirts (they merge with the backdrop), camouflage prints, busy patterns, and anything resembling a uniform. Skip hats, headbands, and sunglasses; prescription glasses are no longer accepted for U.S. visa photos and must be removed. Keep jewelry minimal so it doesn't distract from your face.
Choose a spot with even, natural lighting. The ideal setup is indirect daylight — stand facing a large window during the day, with the light hitting your face evenly from the front. Avoid direct sunlight, which creates harsh contrast and squinting, and avoid overhead lights, which cast shadows under the eyes, nose, and chin. If one side of your face looks darker than the other, turn slightly until the light is balanced. Never use built-in flash — it produces red-eye, glare on glasses, and an unnaturally flat, washed-out look that the State Department's facial recognition system often rejects.
Position the camera at eye level, about 16 inches (40 cm) away. The lens should be exactly level with your eyes — not above (which makes you look down and shrinks your forehead) and not below (which distorts your jaw and nostrils). The easiest way to get this right is to ask someone else to take the photo, or prop the device on a stack of books or a tripod and use the self-timer. Keep your shoulders square to the camera, your head straight (not tilted), and your expression neutral with your mouth closed. Both eyes must be open and clearly visible, looking directly into the lens.
Below are the device-specific tips you'll want to follow on top of the general rules above.
How to Take a US Visa Photo With an iPhone
Use the rear (main) camera rather than the front-facing selfie camera — the rear lens has higher resolution and produces less distortion. Turn off Portrait Mode, beauty filters, and any background-blur effects — visa photos must be sharp from edge to edge. Disable HDR if your iPhone tends to over-process skin tones. Shoot in good resolution (the default JPEG setting is fine) and make sure the final image is at least 600 × 600 pixels after cropping. Once you've taken the photo, upload it to an online tool that automatically resizes and verifies it against U.S. visa standards — this is the safest way to avoid rejection at the embassy.
How to Take a US Visa Photo With Android (Samsung, Google Pixel, OnePlus, Xiaomi)
Use the rear (main) camera, not the front-facing selfie camera. Turn off Beauty Mode, AI Photo, Single Take, Live Focus, and any "Pro Mode" filters. On Samsung, set the aspect ratio to 4:3 or 1:1. On Google Pixel, turn off Top Shot. On Xiaomi MIUI, disable HDR, AI scene detection, and the camera watermark. Save in standard JPEG, not HEIC.
How to Take a US Visa Photo With a Webcam
Most laptop webcams are only 1 MP (1280 × 720), producing files barely above the 600 × 600 minimum after cropping. Use an external HD webcam (1080p or 4K) for the best results. Sit 16 inches from the screen with the camera at eye level — most laptops sit too low and need a stack of books or a laptop stand. Use room daylight, not the screen's glow (it casts a blue tint).
How to Take a US Visa Photo With a Digital Camera (DSLR or Mirrorless)
The highest-quality at-home option. Use a 50 mm or 85 mm lens for natural facial proportions (wider lenses distort the face). Set ISO 100–400 for a clean image, aperture f/5.6–f/8 for sharpness, and white balance to "Daylight." Disable any in-camera beauty effects. Shoot in JPEG (not RAW, unless you'll convert) at the camera's largest size, and crop to 1:1 in post-processing.
How to Take a US Visa Photo With a Tablet (iPad or Android Tablet)
The same rules as smartphones apply, but tablets are awkward to hold steady — use a tablet stand, not your hands. Use the rear camera if available; many tablets have only a front camera, which is acceptable but lower quality.
Visual Do's and Don'ts
Below is a side-by-side reference of the most common mistakes versus their correct equivalents.
Do | Don't |
|---|---|
Plain white wall as a backdrop | Beige, gray, or patterned wall |
Even, indirect daylight from the front | Side light, overhead light, direct sunlight, or flash |
Both eyes open, looking at the lens | Closed, blinking, or looking away |
Mouth closed, neutral expression | Smiling with teeth, open mouth, or frowning |
Head straight, shoulders square | Head tilted, leaning, or turned to one side |
Hair pulled back from the face | Hair across the eyes or covering the eyebrows |
Camera at eye level, ~16 inches away | Selfie angle from below or above; phone too close |
Solid-color top in dark/medium tones | White shirt that blends with the background |
Glasses removed | Eyeglasses or sunglasses |
Hearing aids and medical devices are visible if worn daily | AirPods, Bluetooth earbuds, or large jewelry |
Recent photo taken within 6 months | Old photo from a previous application |
Original, unedited image | Beauty filter, Portrait Mode, Photoshop, AI retouching |
How to Take a US Baby Visa Photo at Home
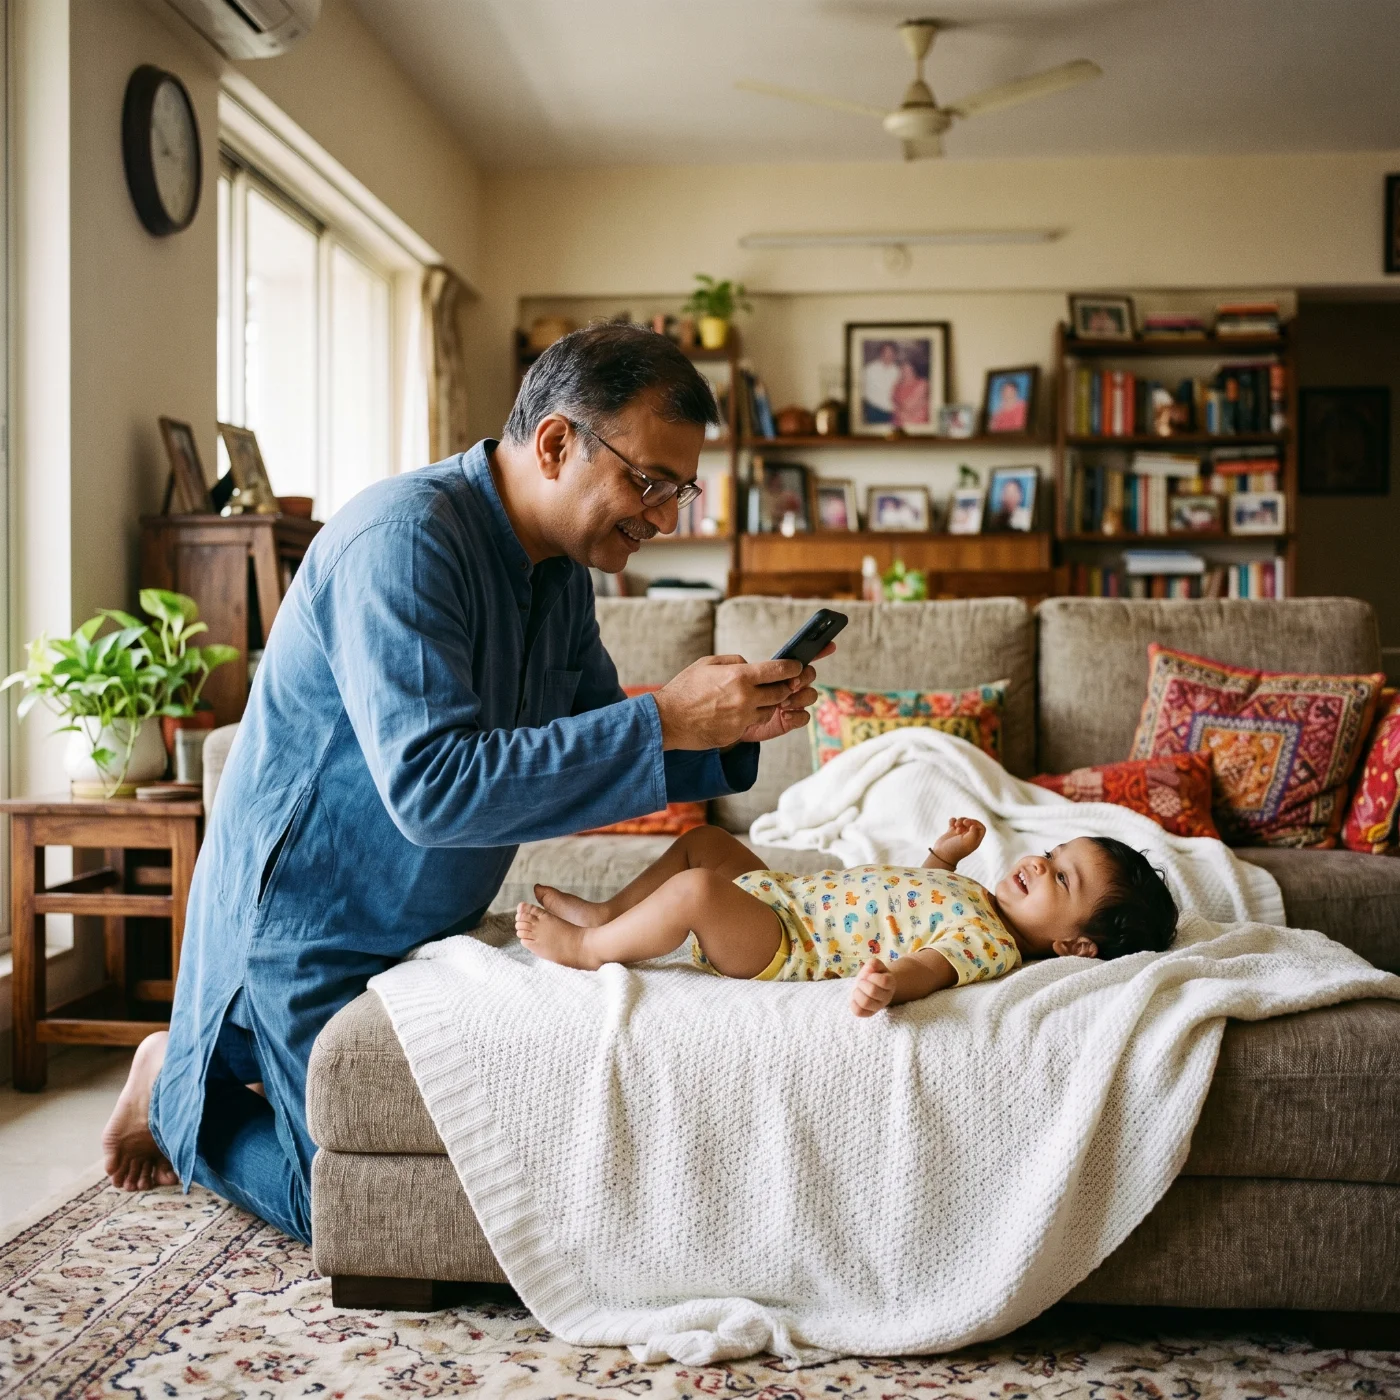
Taking photos of children follows the same rules as for adults, with the slight adjustments mentioned below. Babies and small children can't pose on command, so the goal is to create a calm, controlled setup and capture the right moment. Once you have a suitable photo, upload it to our online tool — it will automatically adjust it to the correct size for a U.S. visa.
Setting. Use soft, natural light from a window and a plain white backdrop. A white sheet, a smooth blanket, or a freshly painted wall all work well. Make sure the surface has no creases, patterns, or shadows behind the child's head. Keep the room warm and comfortable so the baby stays relaxed — a fussy or cold child will not hold still. Do not use flash; it startles infants and creates harsh reflections in their eyes.
Position. A newborn or very young baby may lie flat on their back on a smooth white blanket, with the iPhone held directly above. Make sure the head is straight, not tilted to one side, and that the blanket is pulled tight to remove wrinkles. Older babies who can sit unsupported should be placed in a car seat or chair covered with a white sheet — the cover hides the seat itself and provides head support without showing in the frame. Toddlers and older children can sit or stand, just like adults, with the camera at their eye level (you'll likely need to crouch).
Expression. The baby's eyes must be open and looking toward the camera, with a neutral expression — no crying, no big smiles, no laughing. Closed eyes, half-open eyes, or eyes looking off to the side are the most common reasons baby visa photos get rejected. Try shaking a quiet toy near the lens to catch the baby's attention for a split second, or have a parent stand directly behind the photographer, making gentle sounds. Take many shots in burst mode and choose the best one afterward — patience is essential.
Frame. The baby's face must be centered and fill roughly the same proportion of the frame as an adult's would (the head should occupy about 50% of the photo's height once cropped). Nothing else can appear in the picture — no toys, no pacifiers, no bottles, no parents' hands, fingers, arms, or shadows, and no other people. If you need to support the baby's head, slip a hand under the white blanket from below so it stays out of view. The mouth should be closed, the head straight, and both ears roughly visible. Make sure no hair falls across the eyes.
One last note for parents. U.S. visa photos for children have no minimum age — even a one-week-old needs their own photo, and they cannot share a photo with a parent. If your first attempts don't turn out, take a break, feed and calm the baby, and try again later. It's far easier to retake the photo at home than to be turned away at a visa appointment.
How to Print a US Visa Photo at Home
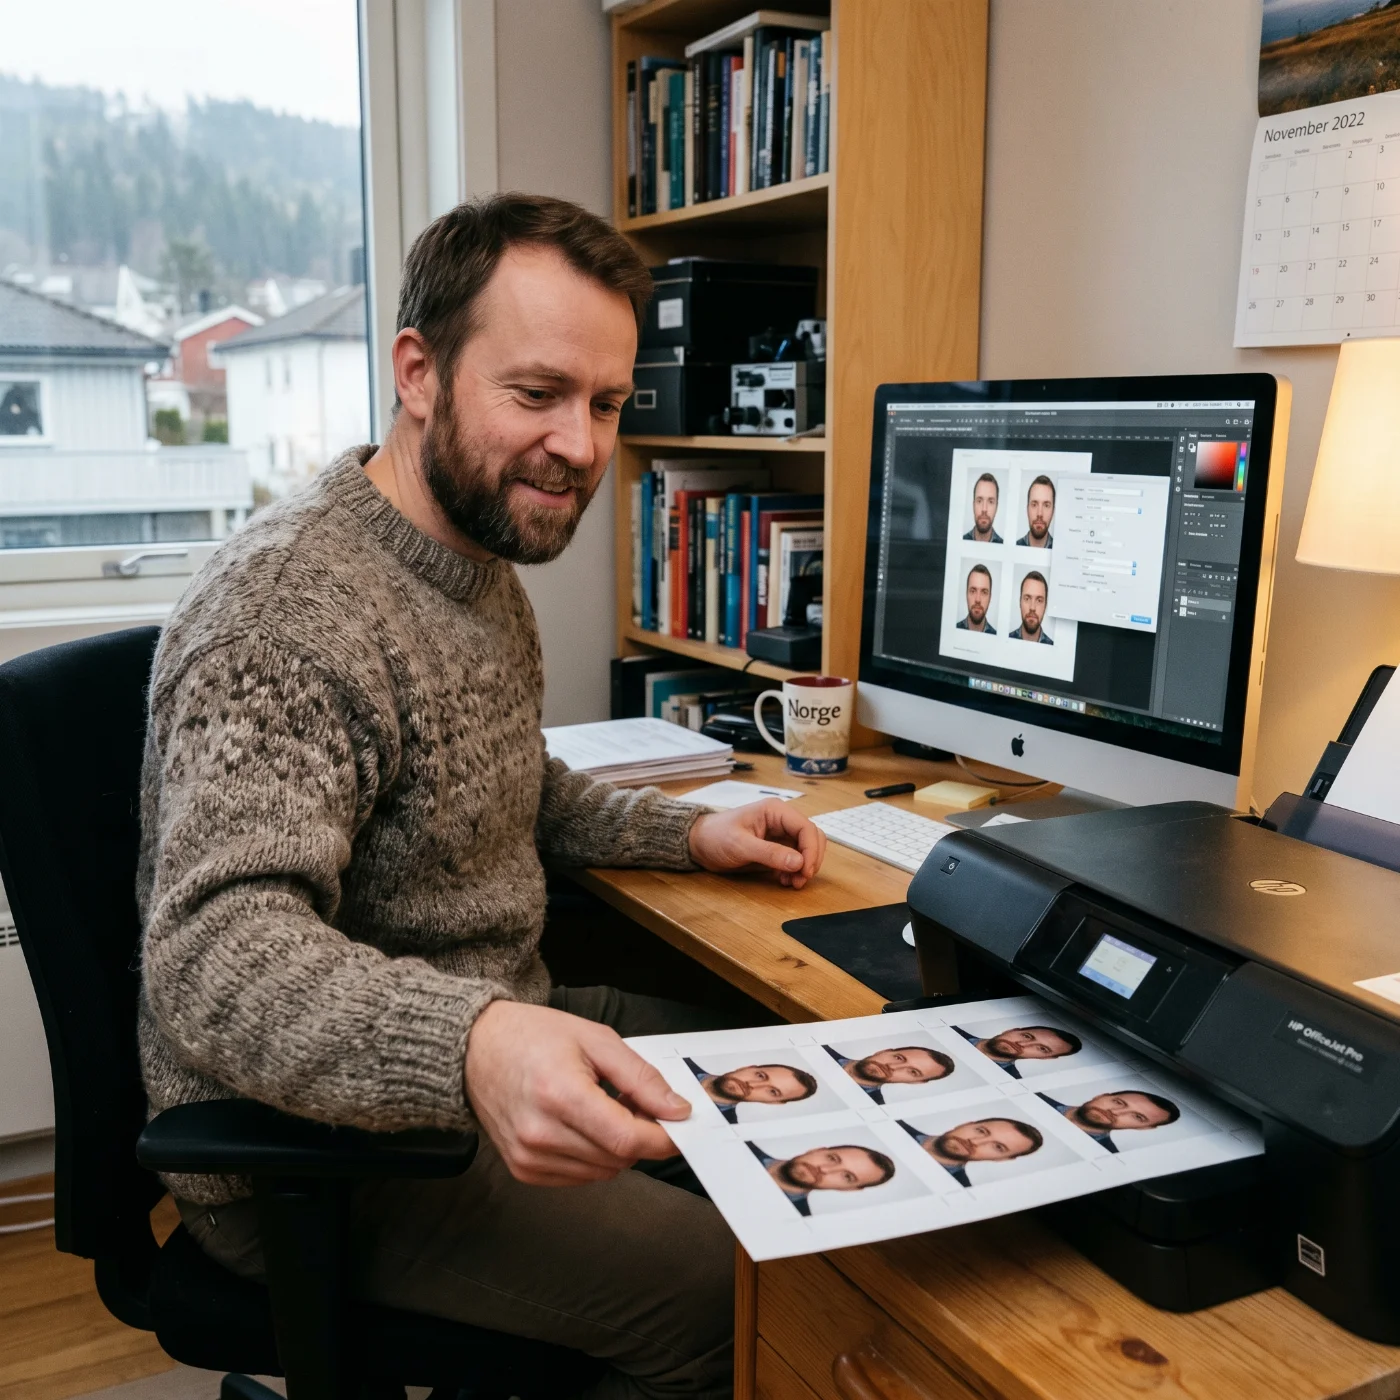
Printing your own U.S. visa photo at home saves money and time, but only works if you have the right equipment. Here's exactly how.
What you need:
A photo printer or any inkjet printer that supports glossy/matte photo paper
Glossy or matte photo paper, 4 × 6 inches, 200+ gsm
Image-editing software (Photoshop, Affinity Photo, GIMP, or any free online crop tool)
A digital photo that already meets all U.S. visa photo requirements
Step-by-step:
Crop your digital photo to a perfect square (1:1) at 600 × 600 to 1200 × 1200 pixels. Verify the head occupies 50–69% of the image height.
Open a new 4 × 6-inch document at 600 DPI (this gives you 2400 × 3600 pixels of printable area).
Place four copies of your visa photo on the 4 × 6 sheet — two on top, two on bottom — with a small gap between them so you can cut them apart.
Print on glossy or matte photo paper. Set the printer to "Best Quality" or "Photo." Do not use "Draft" mode — it produces visible dots that violate the no-pixel-artifacts rule.
Let the print dry for 10 minutes before cutting. Use a paper cutter or sharp scissors — uneven edges are sometimes flagged at the embassy.
The result: four 2 × 2-inch prints from one 4 × 6 sheet. You only need two for a DS-260 interview, but having extras is wise.
If you don't have a photo printer, use the PhotoGov digital file to order prints from a local pharmacy (CVS, Walgreens) or office store (Staples, FedEx) — most will print 4 × 6 sheets with multiple visa-sized photos for under $5.
How Long Is a US Visa Photo Valid?
The U.S. Department of State considers a visa photo valid only if it has been taken within the last 6 months. The 6-month rule applies regardless of how compliant the photo otherwise is — a perfectly compliant photo from 7 months ago will be rejected.
In addition to the 6-month rule, the State Department requires a fresh photo any time your appearance has changed significantly, even if the change happened in less than 6 months. Significant changes include:
Weight gain or loss of more than 10–15 pounds
New permanent facial scarring or visible facial surgery
Growing or removing a beard or mustache
Significant changes to hair color or hairstyle
Visible new tattoos or piercings on the face
Significant aging (relevant especially for children, whose appearance changes rapidly)
For DV Lottery applicants, the rules are strict: the photo must be taken specifically for the lottery entry, and reusing photos from prior years' entries is grounds for automatic disqualification. For visa renewals, you cannot reuse the photo from your previous visa, even if it was issued less than 6 months ago. Each new application requires a new photo.
US Visa Photo Requirements vs Visas in Other Countries
The U.S. visa photo specification is one of several global biometric photo standards. Here's how it compares to the other major destinations.
Country / Region | Size | Background | Head Size | Smile? | Glasses? | Recency |
|---|---|---|---|---|---|---|
United States | 2 × 2 in (51 × 51 mm) | White or off-white | 50–69% of height | No | No (medical only) | 6 months |
United Kingdom | 35 × 45 mm | Light gray or cream | 29–34 mm chin to crown | No | No | 1 month |
Canada | 35 × 45 mm | Plain white | 31–36 mm chin to crown | No | No (medical only) | 6 months |
Schengen / EU | 35 × 45 mm | Light gray | 32–36 mm chin to crown | No | No | 6 months |
Australia | 35–40 × 45–50 mm | Plain light | 32–36 mm chin to crown | No | No | 6 months |
China | 33 × 48 mm | White | 28–33 mm chin to crown | No | Allowed | 6 months |
India | 2 × 2 in (51 × 51 mm) | White | 25–35 mm chin to crown | No | No | 3 months |
Japan | 35 × 45 mm | Plain, no shadow | 32–36 mm chin to crown | No | Allowed if no glare | 6 months |
The U.S. requirement is unusual in three respects: the square aspect ratio (most countries use a 35 × 45 mm rectangular format), the very strict white-only background, and the complete ban on eyeglasses.
Changes to the US Visa Photo Rules: a 10-Year Recap
The U.S. Department of State has updated its photo requirements multiple times in the last decade. Here's a timeline of the most important changes.
November 1, 2016 — Eyeglasses banned. Before this date, applicants could wear glasses if there was no glare. After November 2016, glasses are not permitted in any U.S. visa photo, except in rare medical cases with a signed doctor's statement.
2018 — Religious head covering guidance clarified. The State Department issued explicit guidance that hijab, turban, kippah, and similar religious head coverings worn daily are permitted, provided the full face from chin to forehead and from edge to edge is clearly visible.
2019 — DV Lottery photo verification tightened. The Department of State began using automated facial-recognition systems to detect duplicate photos across DV Lottery entries. Reused photos now result in automatic disqualification.
2020 — CEAC online photo tool overhauled. The DS-160 photo upload now performs an instant automated check against all 12 requirements, returning specific error codes for non-compliant uploads.
2022 — Digital file size requirements clarified. JPEG files must be between 54 KB and 240 KB. Files outside this range are rejected by the upload tool.
2024 — AI photo detection added. The State Department began flagging photos that show signs of AI generation or heavy AI retouching. Submitting an AI-generated or AI-modified photo can result in a permanent visa denial under INA §212(a)(6)(C)(i) (misrepresentation).
2025 — Updated guidance for biometric photos in the renewal-by-mail program. Applicants renewing certain non-immigrant visas by mail (Interview Waiver) now have additional photo verification steps.
2026 — No major rule changes to date. The 12 core requirements remain identical to the 2024 specification.
Frequently Asked Questions
What is the Passport Photo Size for US Visa?
The official US visa passport photo size is 2x2 inches (51x51 mm). The head must cover 50–69% of the image's height, from chin to crown. Use our online photo-cropping tool for the automatic match with the required size.
What are the US Visa Photo Size Requirements for B1/B2 visas?
The size requirements for the B1/B2 are the same as for all non-immigrant categories — 2 x 2 inches, color, plain white background. Check more size requirement details at the official US Department of State website.
Can I Wear Makeup in a US Visa Photo?
Yes. Light, everyday makeup is permitted. Heavy contouring, dramatic eye makeup, and false eyelashes that significantly alter your appearance are not recommended. Lipstick should be a natural color.
Can I Wear Earrings, a Nose Ring, or Other Piercings in the US Visa Photo?
Yes, small everyday jewelry is allowed as long as it does not obscure your facial features. Large earrings that cast shadows or partially cover the face should be removed.
Can I Smile in a US Visa Photo?
No. A neutral expression is required for a US visa photo. A very subtle, closed-lip smile may pass automated checks, but it’s still risky, as it may lead to an automatic rejection.
Can I Use a Selfie for a US Visa Photo?
Technically yes, if you use a tripod or self-timer to position the camera at eye level, ~16 inches away, with the rear (main) camera. A handheld arms-length selfie is almost always rejected because of distortion and angle.
Does My Hair Have to Be Tied Back in a US Visa Photo?
No, but your face from chin to forehead must be fully visible. If your hair falls across your eyes, you will need to tie it back or pin it.
Can I Wear a Wig or Hair Extensions in a US Visa Photo?
Yes, if you wear them daily as part of your normal appearance. The wig must not obscure facial features.
Can I Have a Beard in a US Visa Photo?
Beards are permitted as part of your normal appearance. If you grew or shaved your beard within the last 6 months, take a new photo to reflect your current look.
Are Visible Tattoos Allowed in a US Visa Photo?
Yes. Facial tattoos and visible tattoos are part of your appearance and do not need to be covered.
Can I use the Same Photo for the DS-160 and the visa Interview?
Yes, as long as the photo is still within the 6-month recency window and your appearance has not significantly changed.
Can I Reuse my Old Visa Photo for a US Visa Renewal?
No. Each new application — including renewals and Interview Waiver renewals — requires a fresh photo, even if the old one is less than 6 months old.
My Baby Cannot Keep Their Eyes Open for the US Visa photo. What Do I Do?
Try shaking a quiet toy or making gentle sounds near the lens to catch their attention for a split second. Use burst mode and select the best frame. If your baby is under 6 months and physically cannot keep eyes fully open, the State Department evaluates these on a case-by-case basis — submit the best frame you can capture.
What Format does CEAC accept?
CEAS accepts a JPEG (.jpg), 24-bit color, square (1:1), 600 × 600 to 1200 × 1200 pixels, 54 KB to 240 KB. PNG, HEIC, GIF, and TIFF are not accepted.
Why Does CEAC Say My Photo is Unacceptable?
The system returns specific error codes — see the full list in the DS-160 upload section above. The most common are head size, background, lighting, and pixel dimensions.
Can I Take a US Visa Photo at Home?
Yes. Follow the iPhone, Android, or digital-camera guide in this article, and use a reliable passport photo maker to convert your selfie into an official US visa picture. Use a plain white wall, daylight from a window, and the rear camera at eye level.
Can I Use an AI-Generated Photo or an AI-Edited Photo for My US Visa?
No. As of 2024, the State Department actively detects AI-generated and heavily AI-edited photos. Submitting one can result in visa denial and a permanent finding of misrepresentation.
What if My Photo Background is Slightly Off-White Instead of Pure White?
Off-white is acceptable. Pure cream, beige, gray, or any other color is not.
Can I Wear Contact Lenses in a US Visa Photo?
Yes. Clear and prescription contacts are fine. Decorative or color-changing lenses that significantly alter your eye color are not recommended.
Can I Use My Passport Photo for a US visa?
Only if it meets the 2 × 2-inch U.S. requirement. Most national passport photos are 35 × 45 mm and need to be recropped or re-shot for U.S. visa use.
Was this helpful?
78 found this helpful
Authored by:
Nathaniel K. Rowden (Compliance consultant)Top expert
Verified by the Photogov compliance team
ICAO 9309-compliant
Based on official government sources
Helpful votes: 78
Was this helpful?
78 found this helpful
We value your Privacy
We use cookies to enhance your browsing experience, serve personalized ads or content. By clicking “Accept All”, you consent to our use of cookies.