How to Create a Digital Passport Photo
Making a digital passport photo is easy and fast with our service. Here are the steps to follow. Have a go at the process.
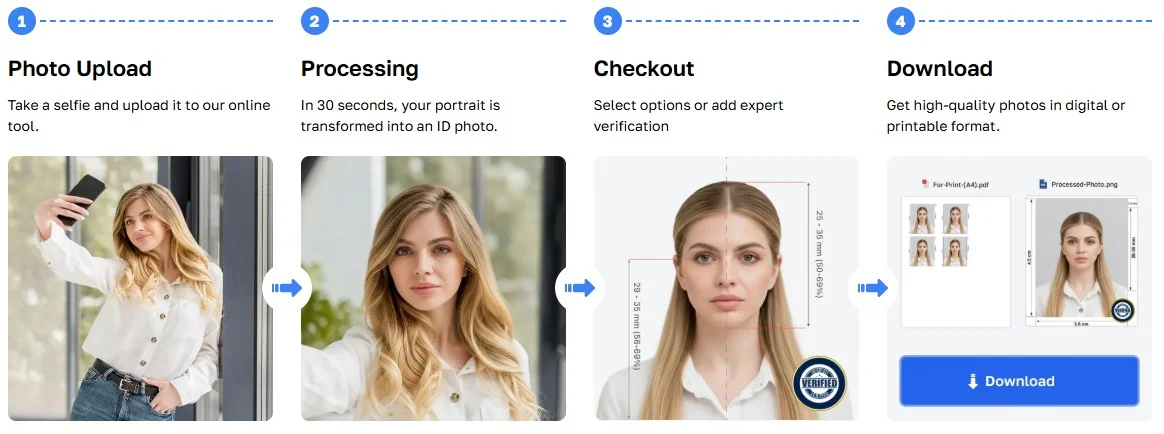
Step 1: Snap a Photo
For the best results, use your rear camera (the resolution is higher) or place your phone on a tripod. Stand about an arm’s length from a blank wall – that's roughly a meter. Position yourself in front of a window where you can benefit from soft daylight (the most flattering light source). Check out examples and common mistakes when creating photos.
Step 2: Upload Your Photo
After you have taken your photo, click on “Upload” to upload your photo. It’s really simple: tap once to open the gallery, then tap on the photo you want to choose. Our system will do all the work then.
Step 3: Automatic Enhancement Processing by PhotoGov
Once you upload the picture, PhotoGov starts processing the photo automatically to check that it fulfils all the digital passport photo criteria.
- Auto-cropping: The AI automatically crops the photo to the correct proportions.
- Resizing: The image is scaled according to the digital size requirements.
- Background adjustments: We modify the background to a clean solid white.
- sRGB & Compression checks: Our system validates the color profile, and the image is ready for submission online, with no loss of quality.
With PhotoGov these corrections are handled in the background while you continue working. What you get is a photo that meets all the requirements.
Step 4: Expert Verification (Optional)
For added certainty, you can choose professional validation. A human will review your photo to make sure it complies with the requirements needed for submission of a digital passport.
And once more, you don't have to do this if you don't want to! If you're satisfied with the automatic fixes, you can skip this and proceed to the next step.
Step 5: Download and Print Your Digital Passport Photo
After your photo has been processed and accepted, you will be able to download it in jpeg format. This file is now ready to be uploaded to your passport agency or any other government application website.
Or, if you want a hard copy, you can print it as a regular 4x6 print or get an instant print through services such as Instax. It’s fast and easy, all in just a couple of taps.
Step 6: Submit Your Photo
Once you have downloaded your digital passport photo, it is ready to be submitted. It can be uploaded directly to the required platform, or you can print it out for use in any in-person application. With PhotoGov, you won’t have to worry if your file is compatible or if it meets the technical requirements — we did the hard work for you.
Still have questions? You can visit our FAQ page, where we have answered our clients most frequently asked questions.
Authored by:
Nathaniel K. RowdenApproved by Association of Visa center
We value your Privacy
We use cookies to enhance your browsing experience, serve personalized ads or content. By clicking “Accept All”, you consent to our use of cookies.